
Vending Machine Type A (Vending A)
Vending Machine Type A (VendingA)
1) Vending machines that have up to 2 normally open pulse based coin acceptors, up to 6 item slots and a built-in normally open pulse based bill acceptor.
-
You will require the Vending A wire harness that has 9 wires on it.
-
Open up the vending machine and controller box.
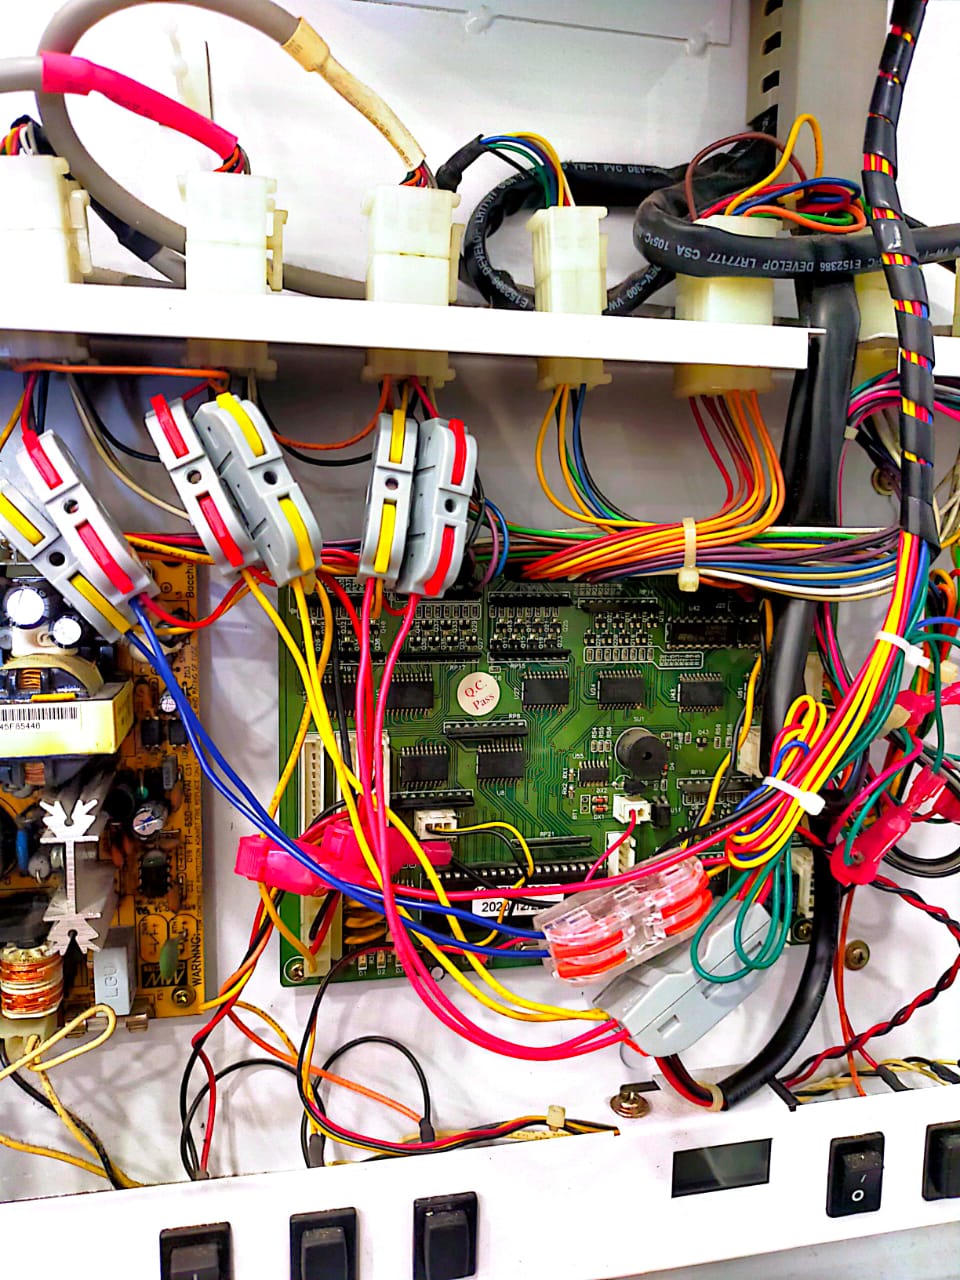 Example: Vending A Mother board
2) You will see the motherboard connections; connect the CA1 and CA2 terminals.
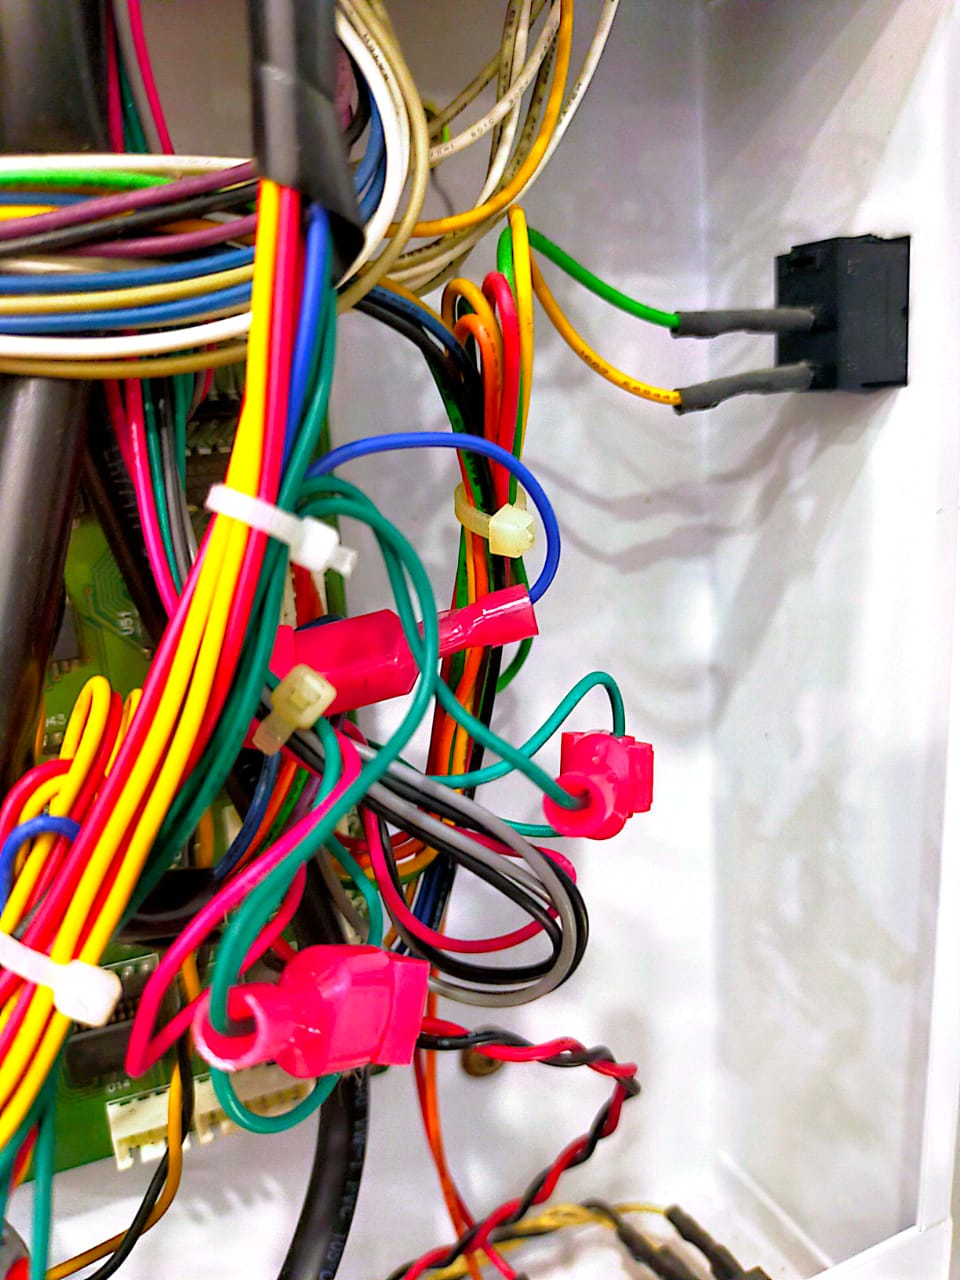
3) Attach 2 G-splice connectors to the green wires coming from the coin acceptors and connect them to CA1 and CA2 of the Alpha-3 wire harness.
4) Attach 1 G-splice connector to the blue wire coming from the bill acceptor and connect them to BA of the Alpha-3 wire harness.
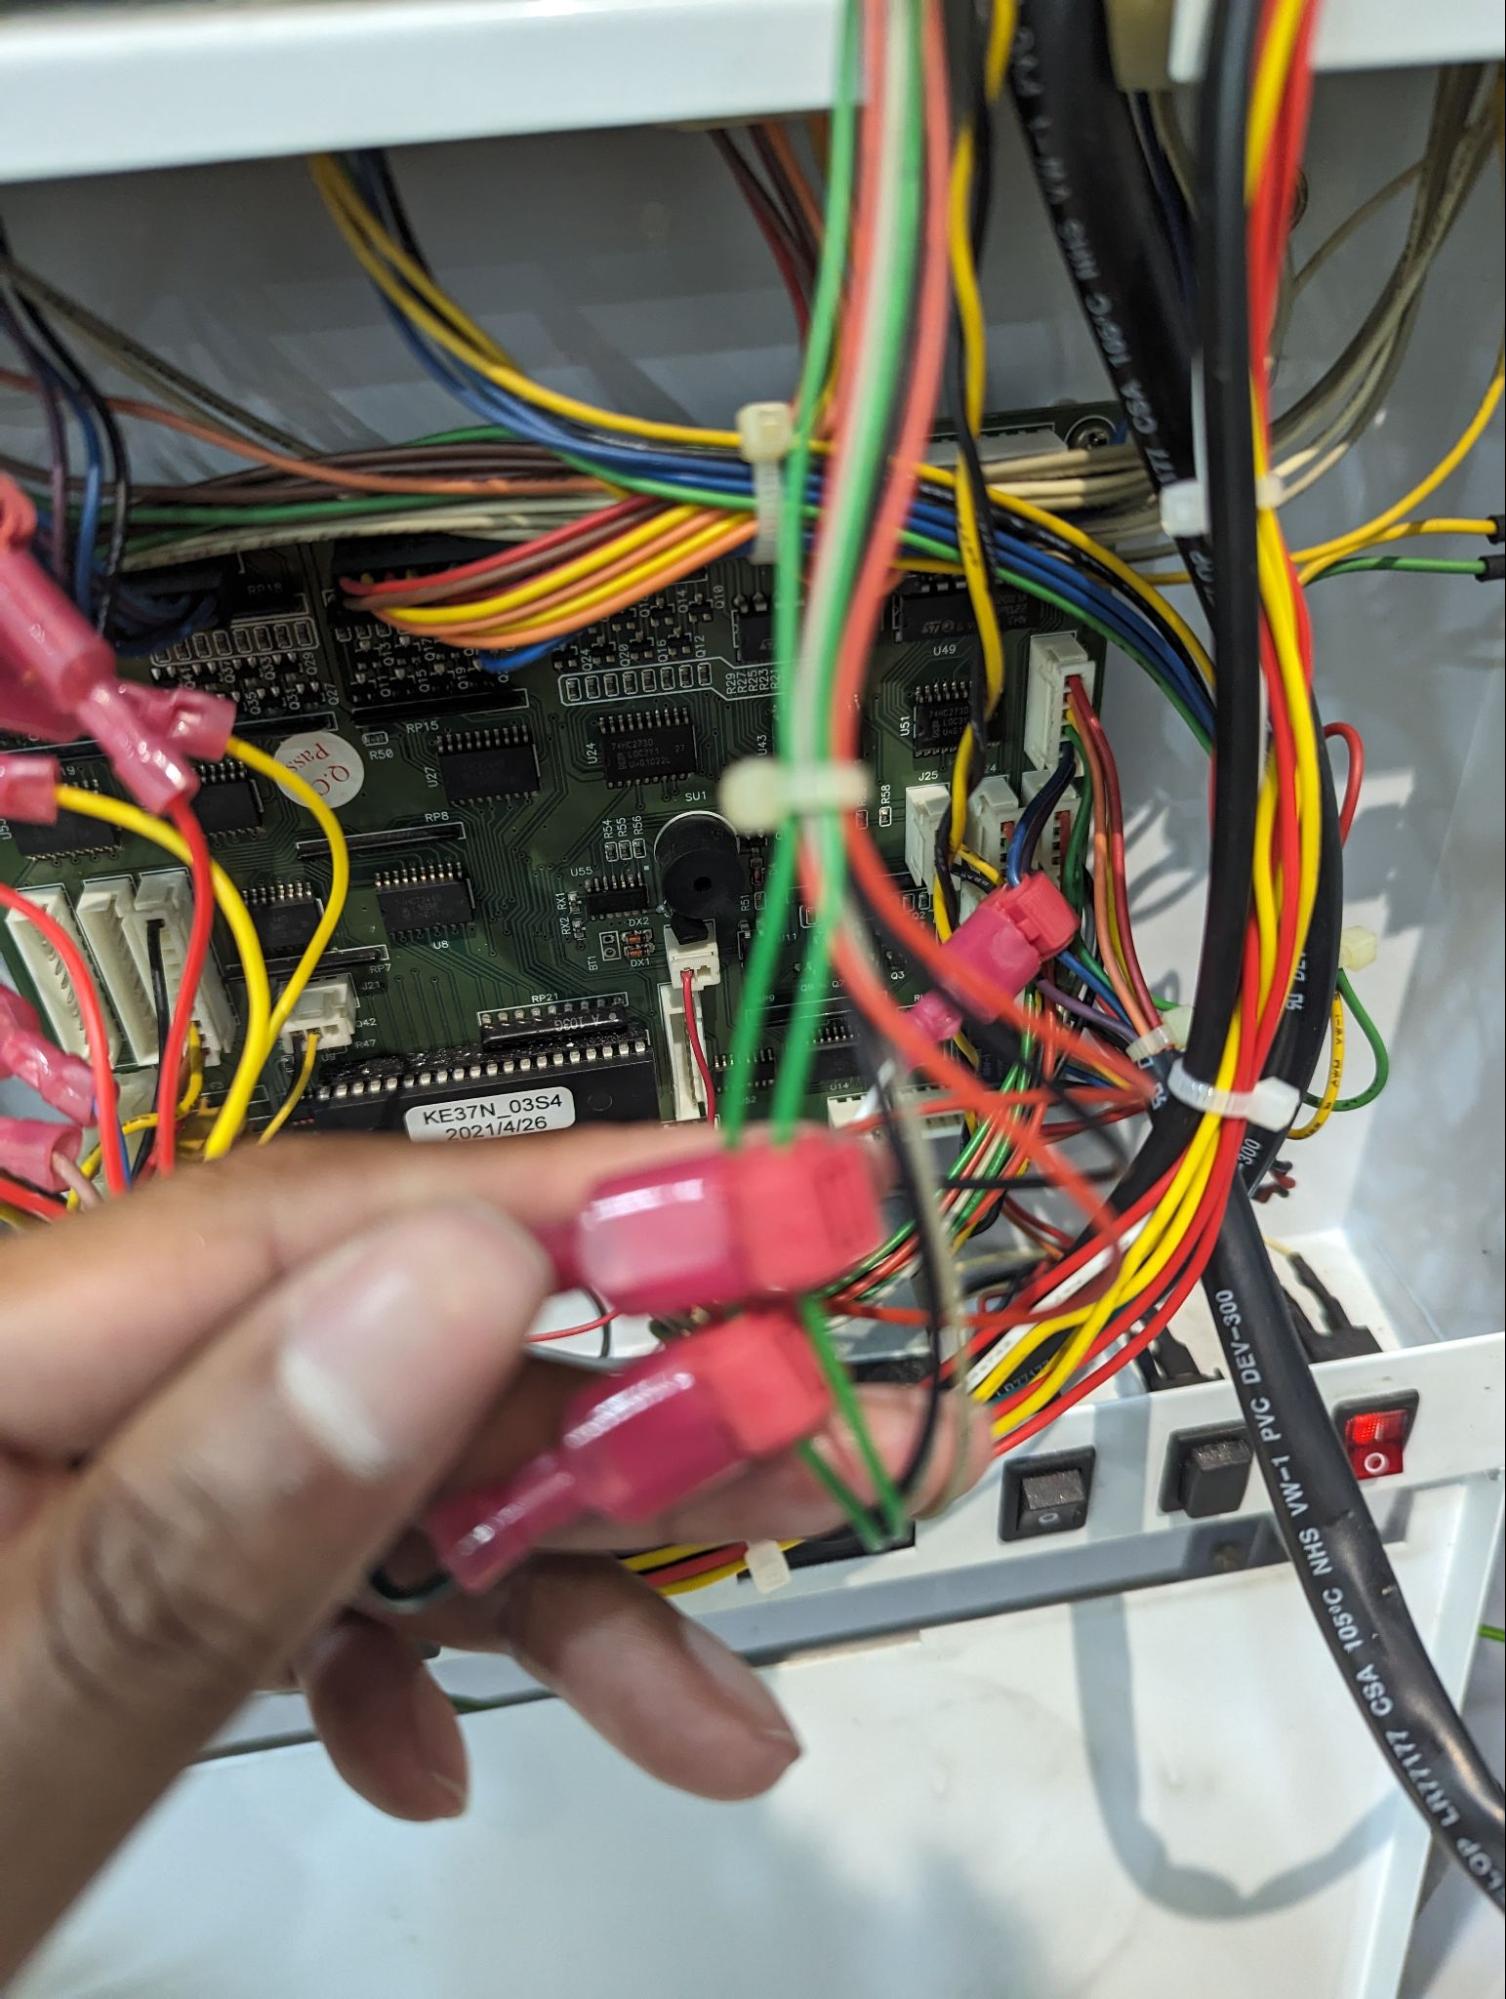
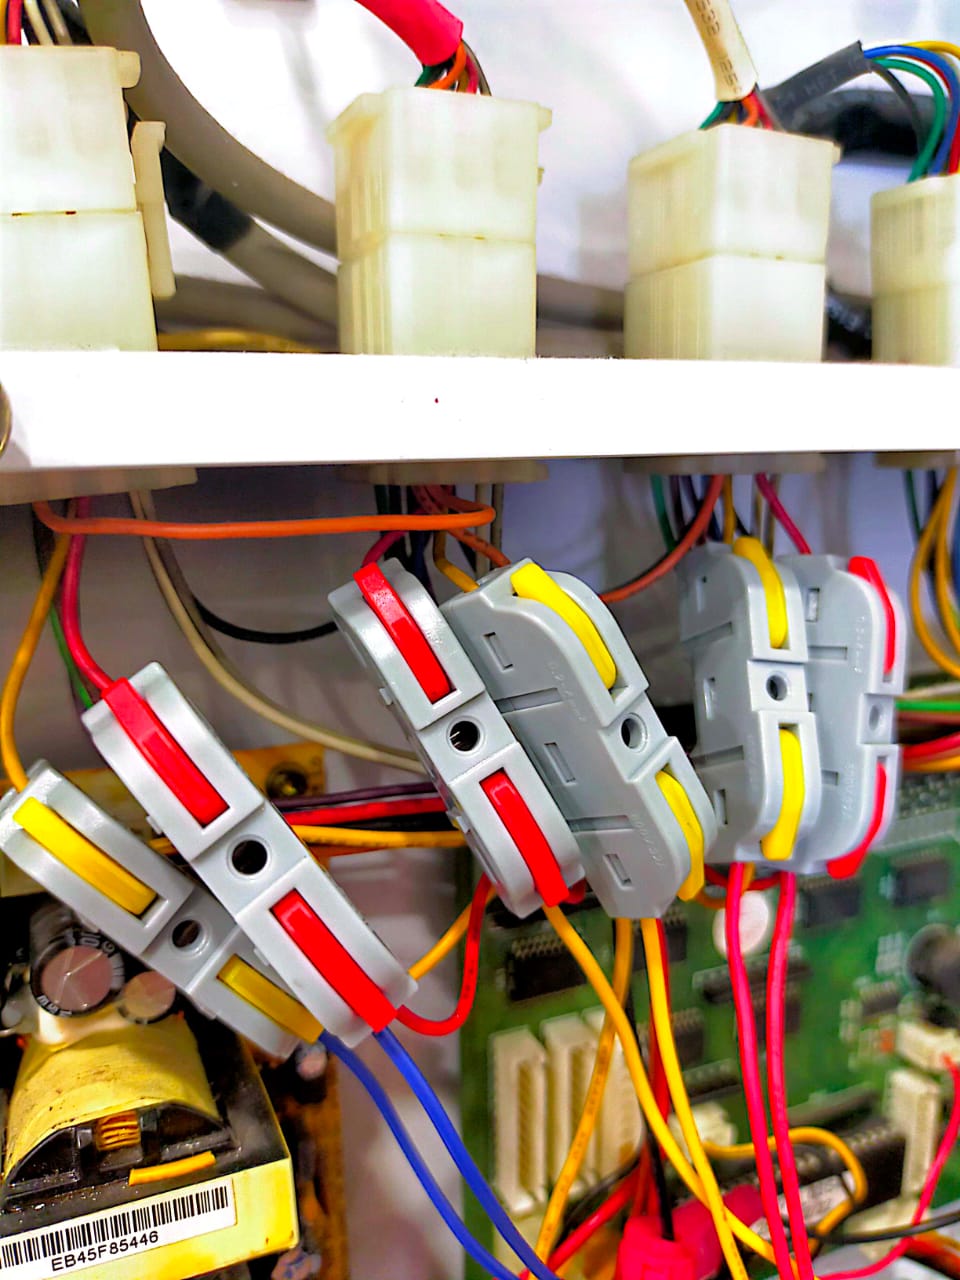 Example IN.1 to IN.6 (RED/YELLOW) connection
5) Attach 6 G-splice connectors to the red and yellow wires going to the dispenser motors. (Top 3 connectors on the left)
6) Starting from the right most, connect the following to the Alpha-3 wire harness
-
-
IN1 - Red wire of the right most connector.
-
IN2 - Yellow wire of the right most connector.
-
IN3 - Red wire of the next connector on the left.
-
IN4 - Yellow wire of the next connector on the left.
-
IN5 - Red wire of the next connector on the left.
-
IN6 - Yellow wire of the next connector on the left.
-
 ⚠️ Attention: Can follow the colour on the in numbers shows
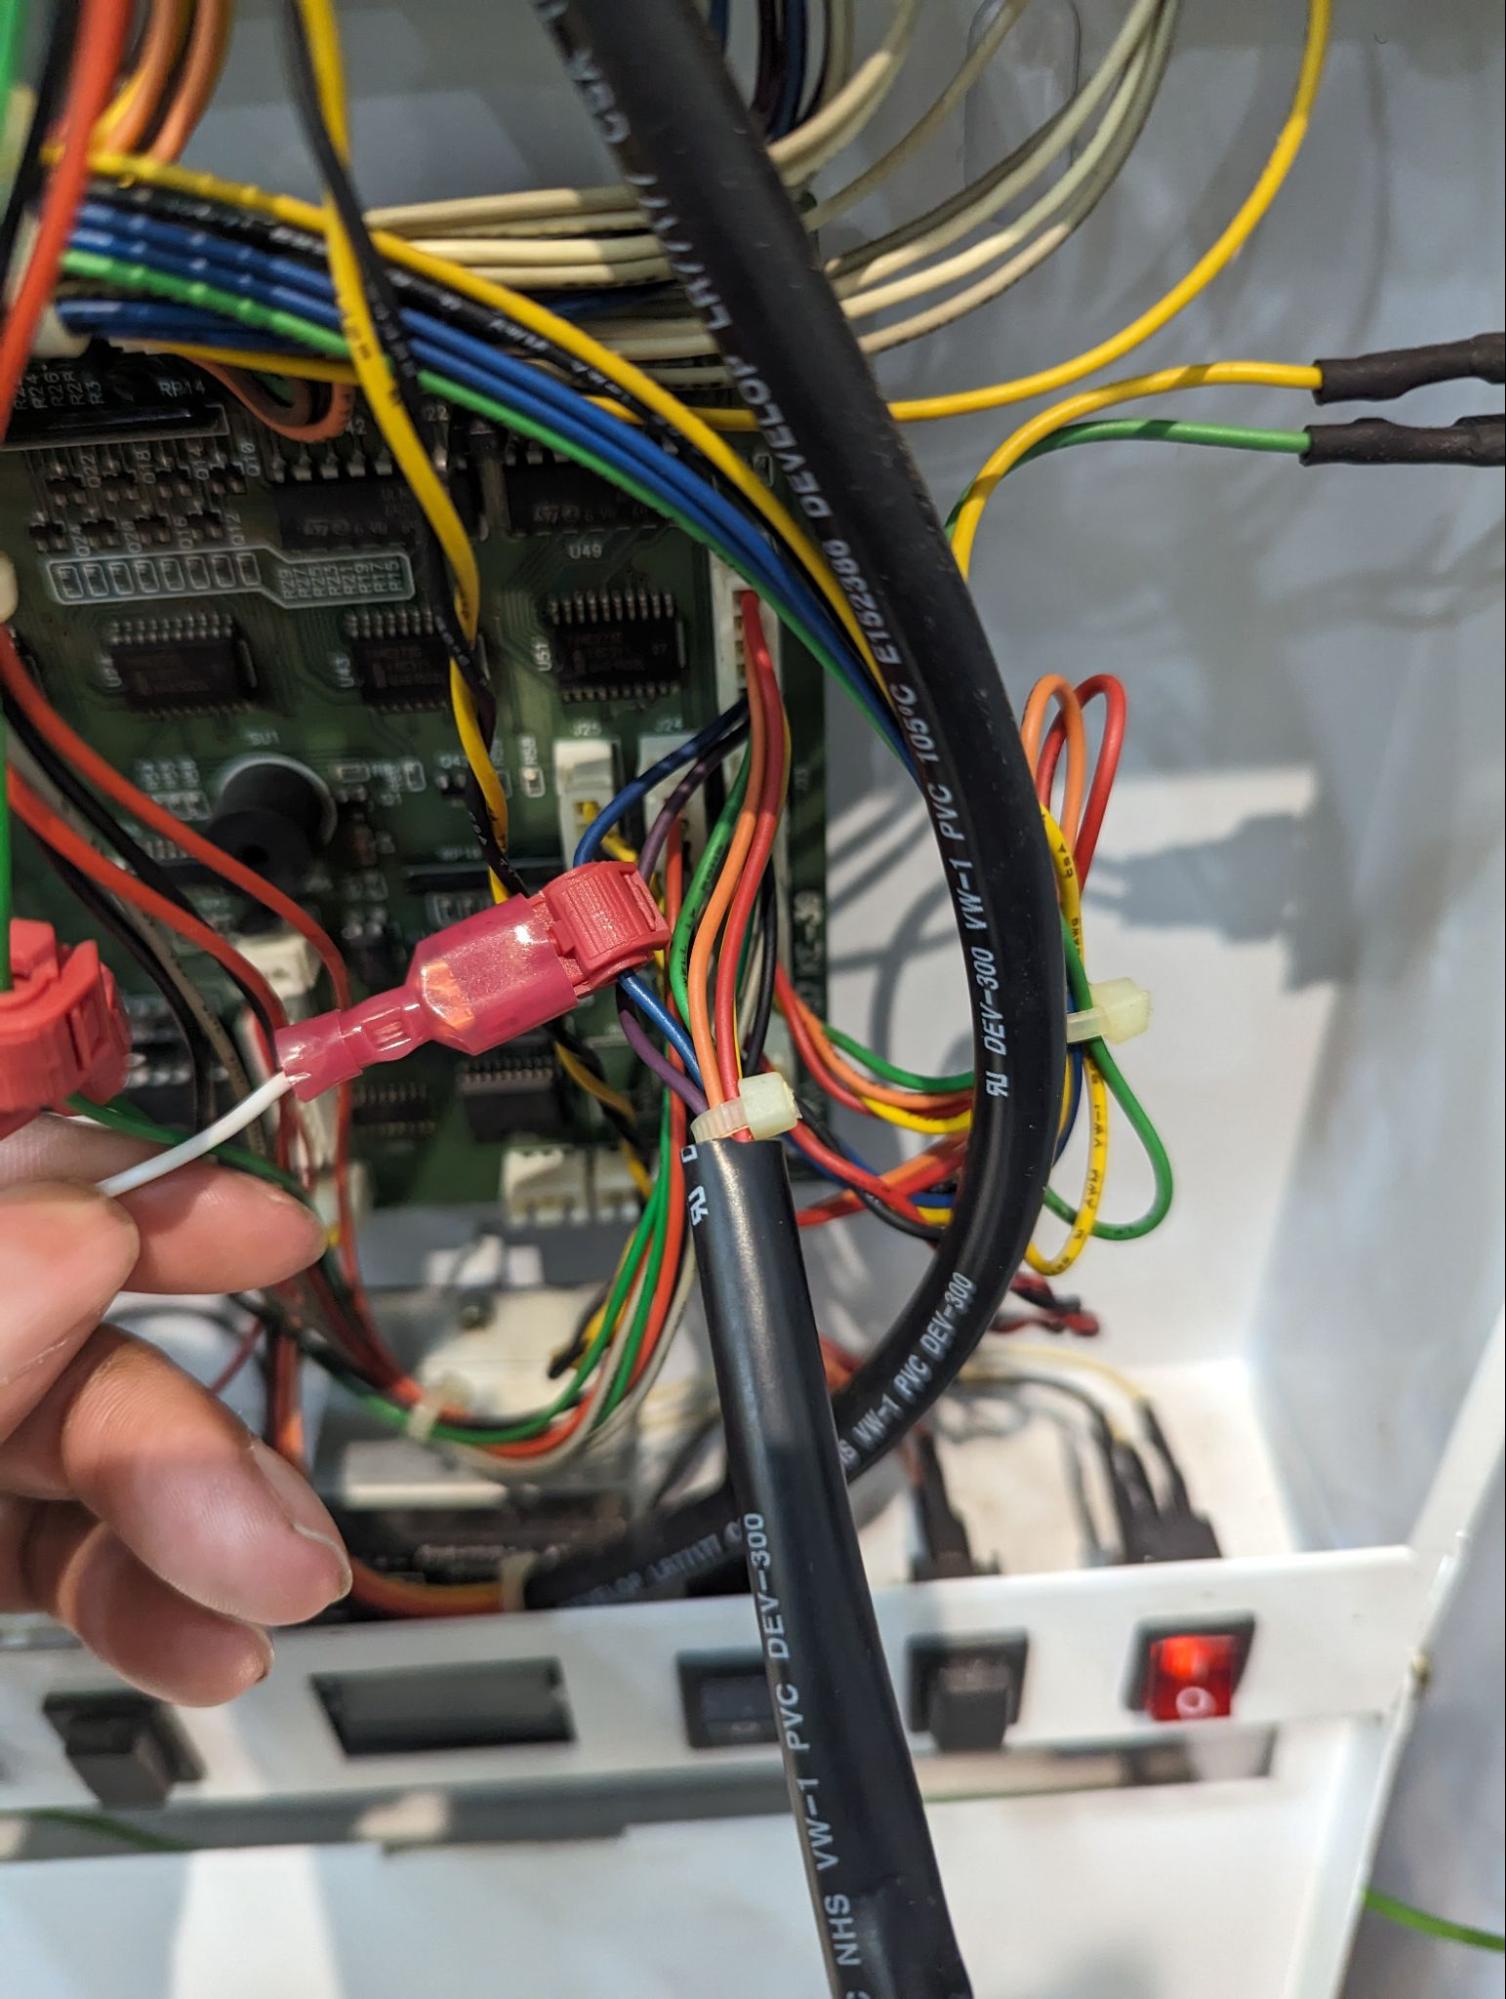
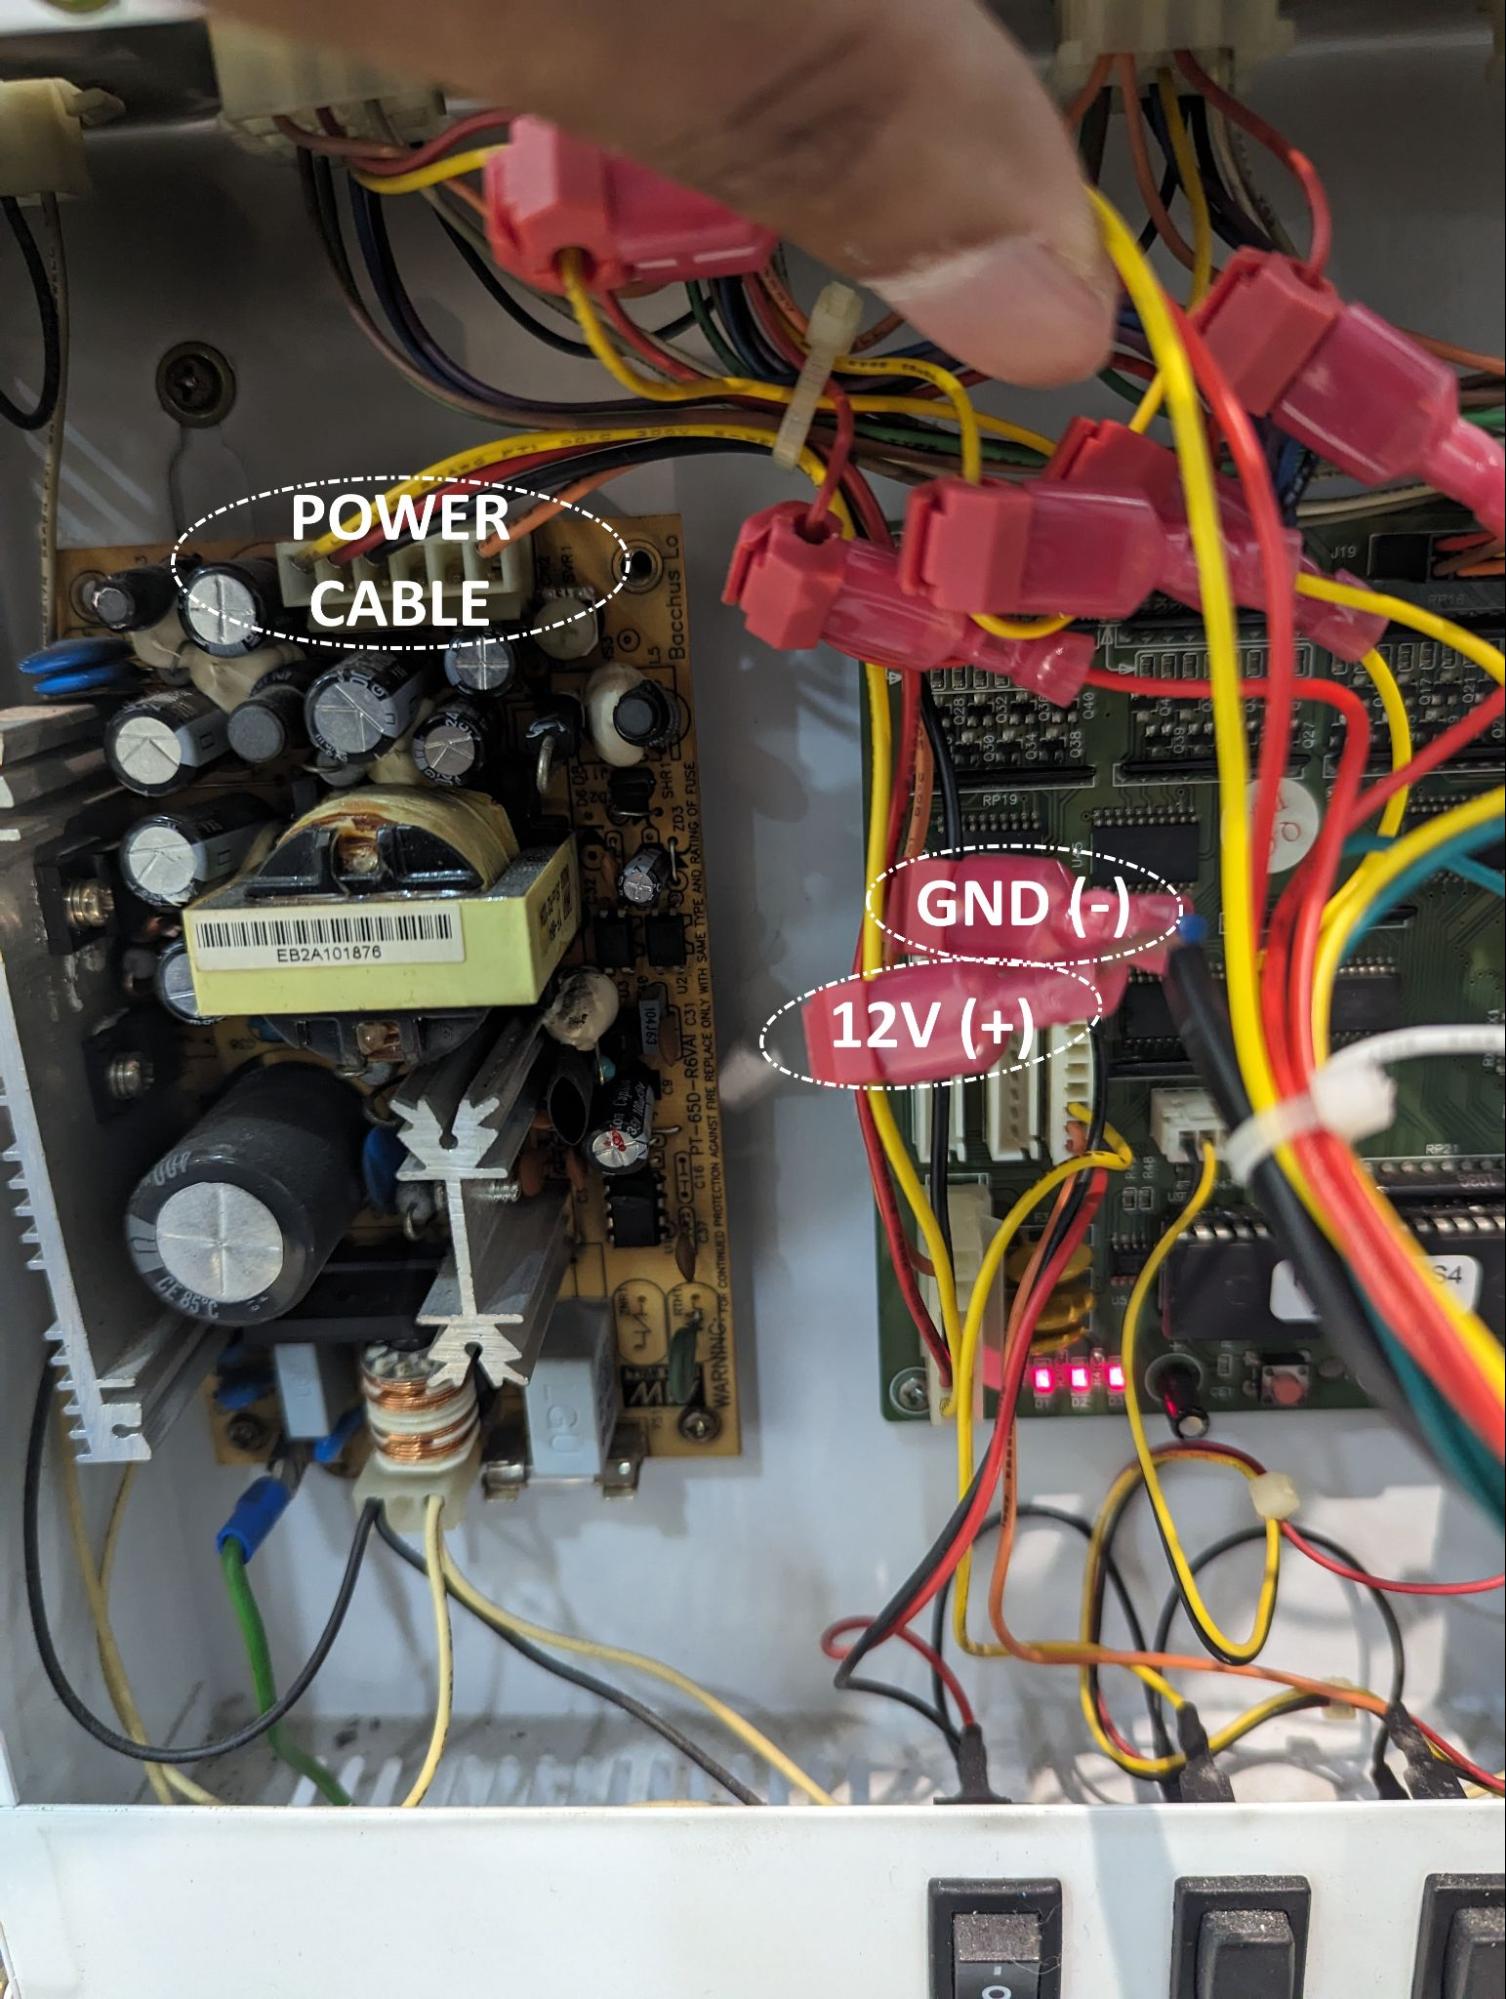
7) Attach 2 G-splice connectors on the yellow and black wire of the power cable for 12V and GND respectively. Connect these wires to the power input of the Alpha-3.
 Example: Device connection from board
8) Cable ties the wires neatly, and attach the Alpha-3 device above the controller box.
⚠️ Attention: If any of the tests are not detected, check the connections and ensure they are tapped properly. For best results, connect the related connections together for better conductivity.