
Fiuu Setup Guide
Login
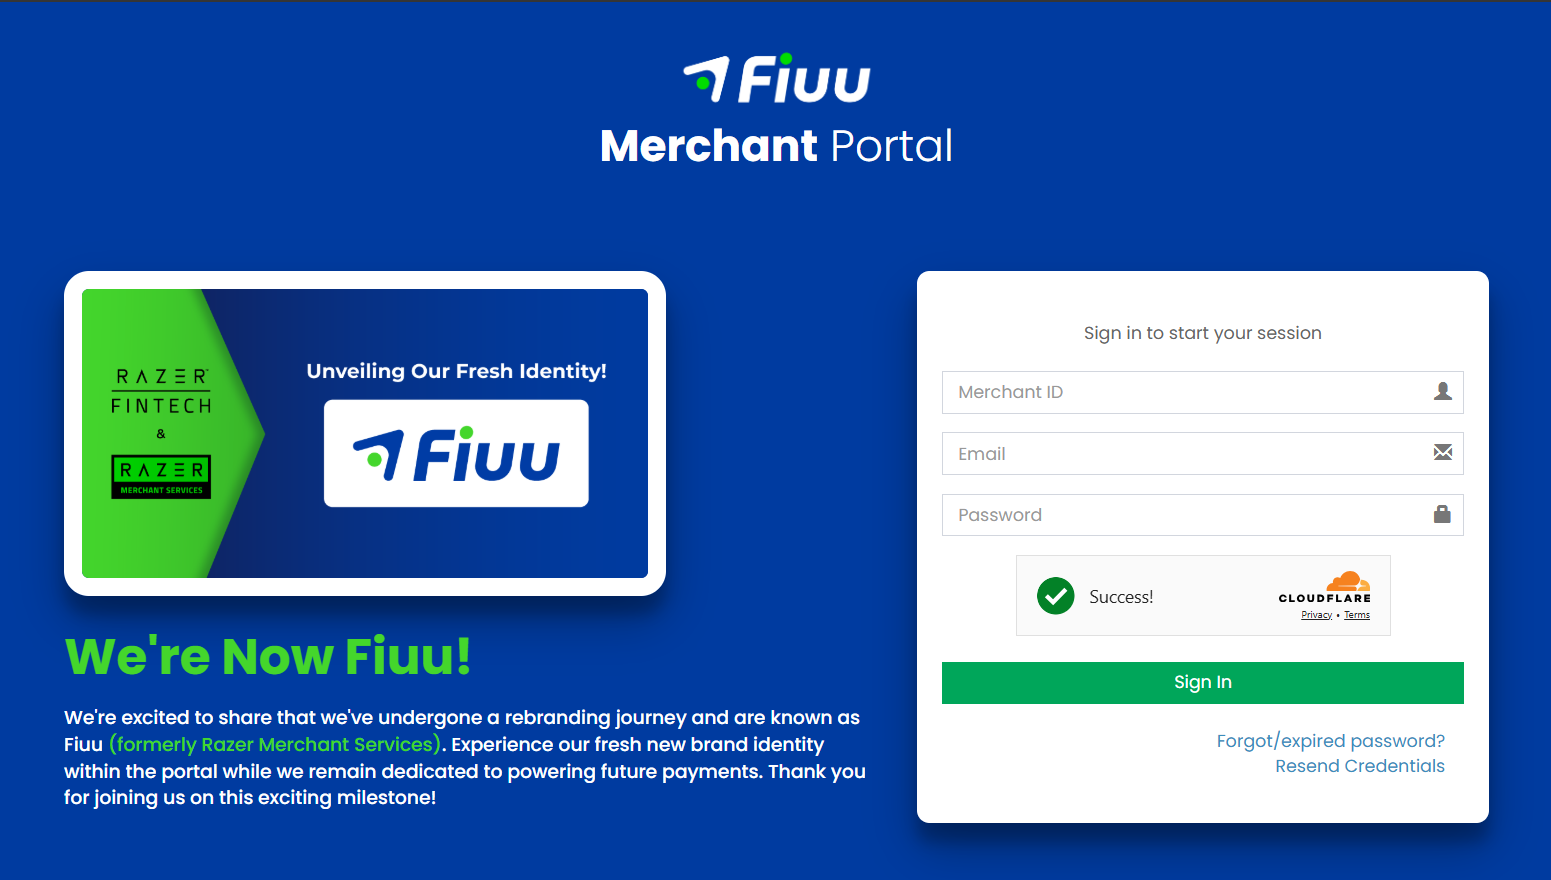
1) Open Fiuu Portal URL: https://portal.fiuu.com/index.php?mod=authentication&opt=login . Enter Merchant ID, email and password to Login
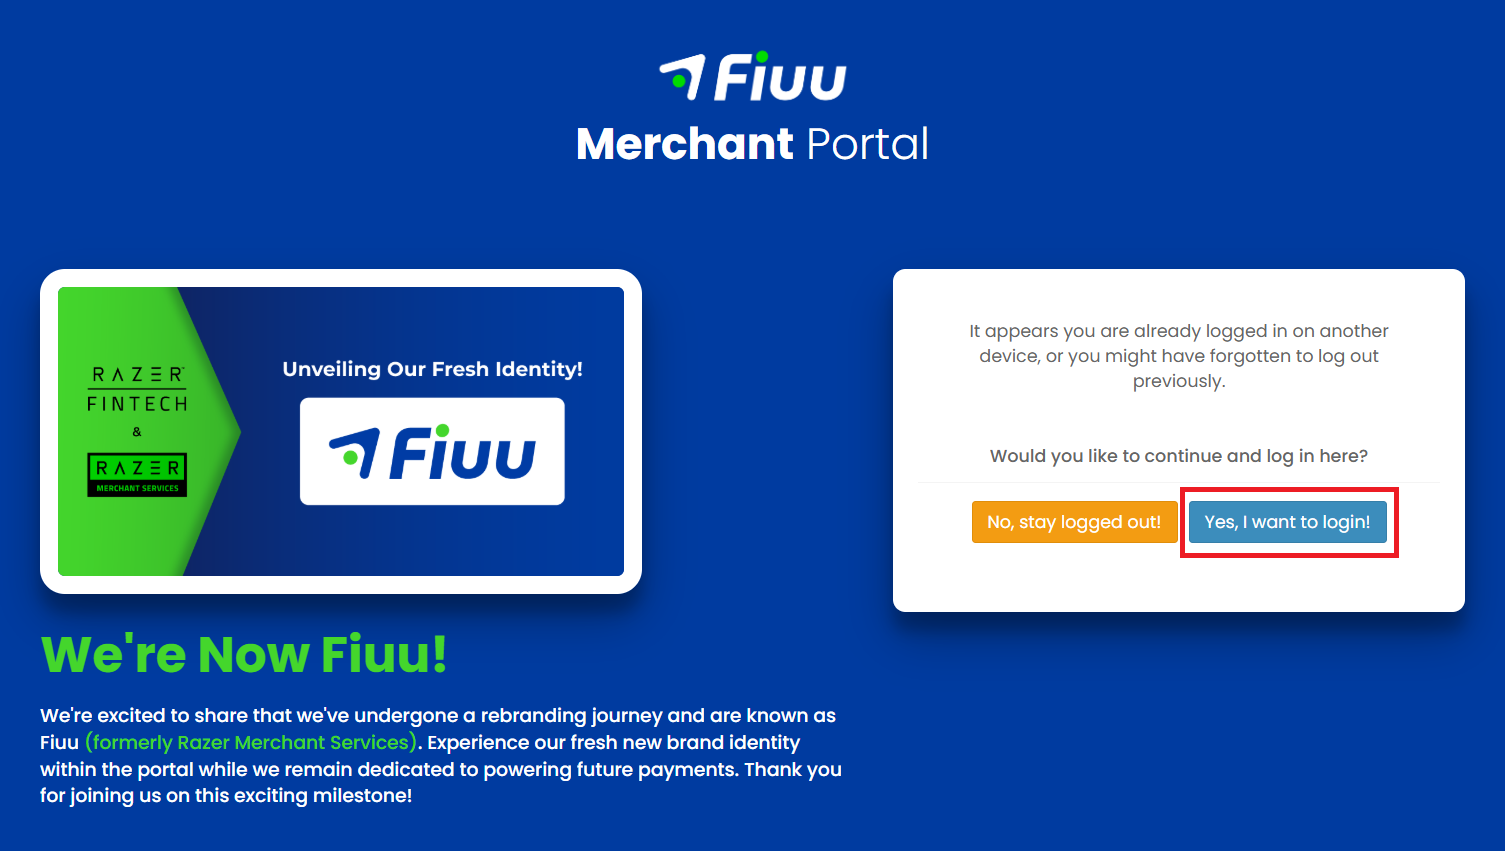
2) Select Yes, I want to login!
─────────────────────────────
New Account Setup
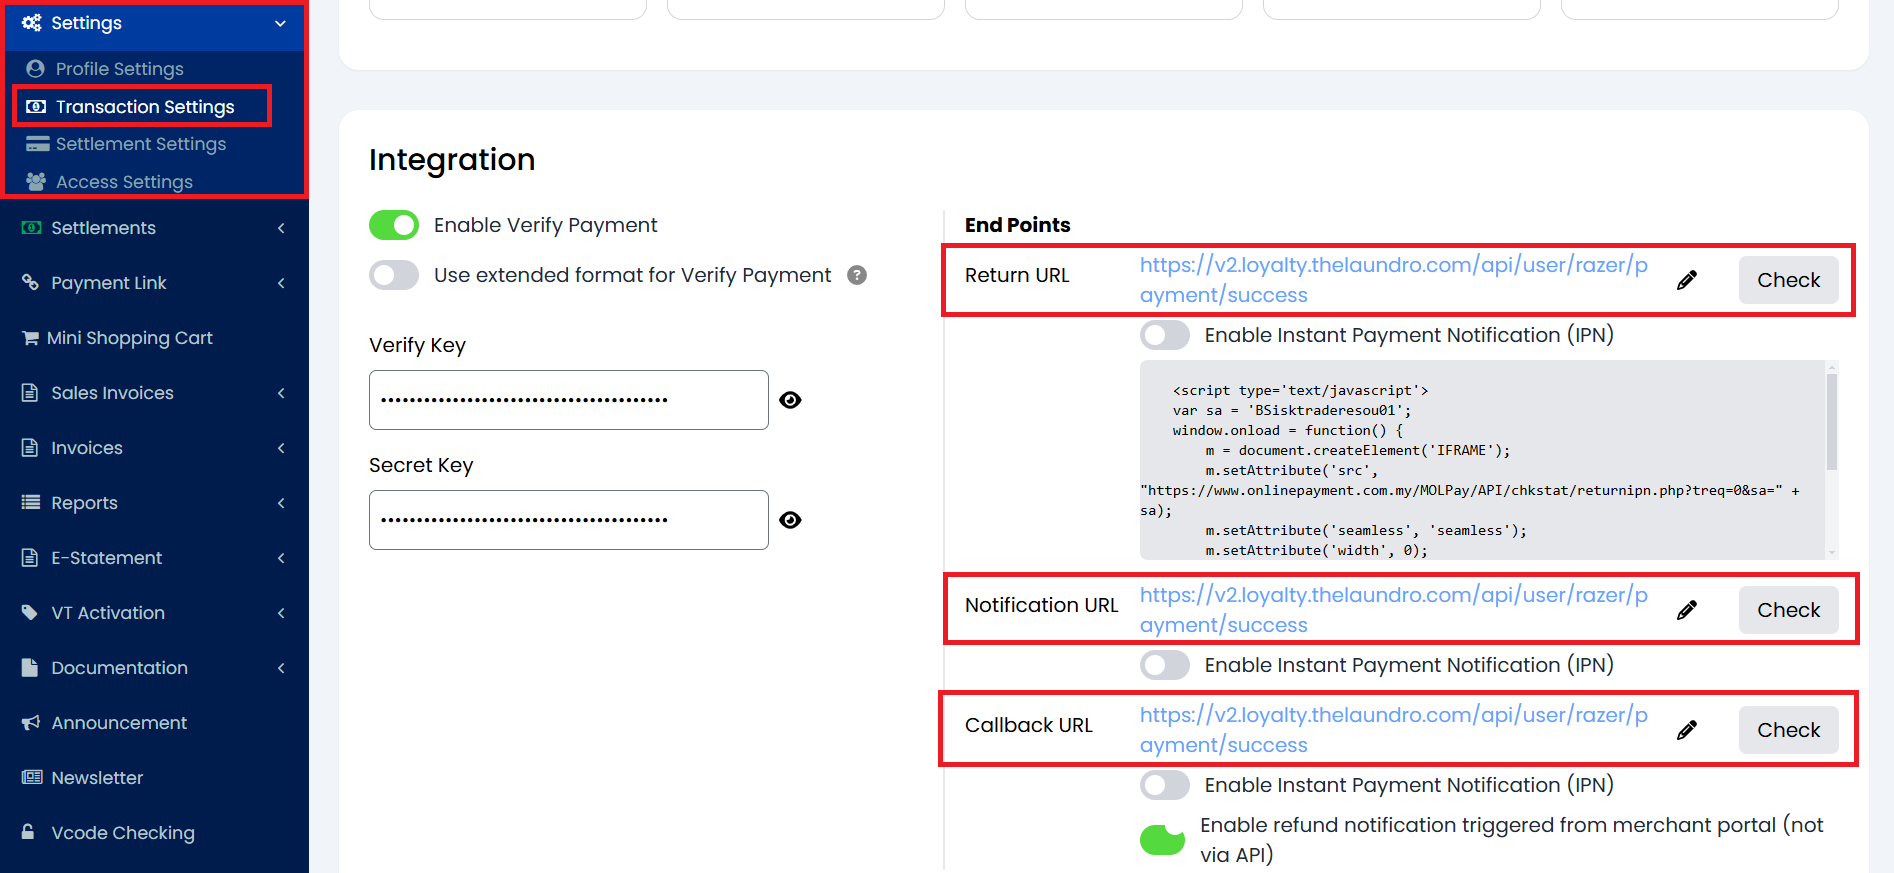
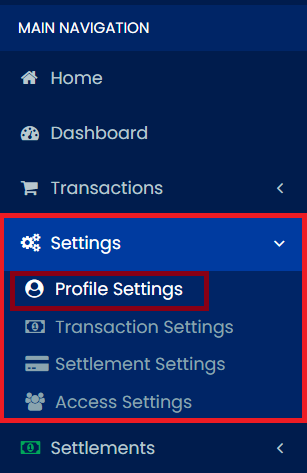
1) If it is a new account, have to set Return URL, Notification URL, and Callback URL. From Sidebar, under Transactions, select Settings, enter the URL
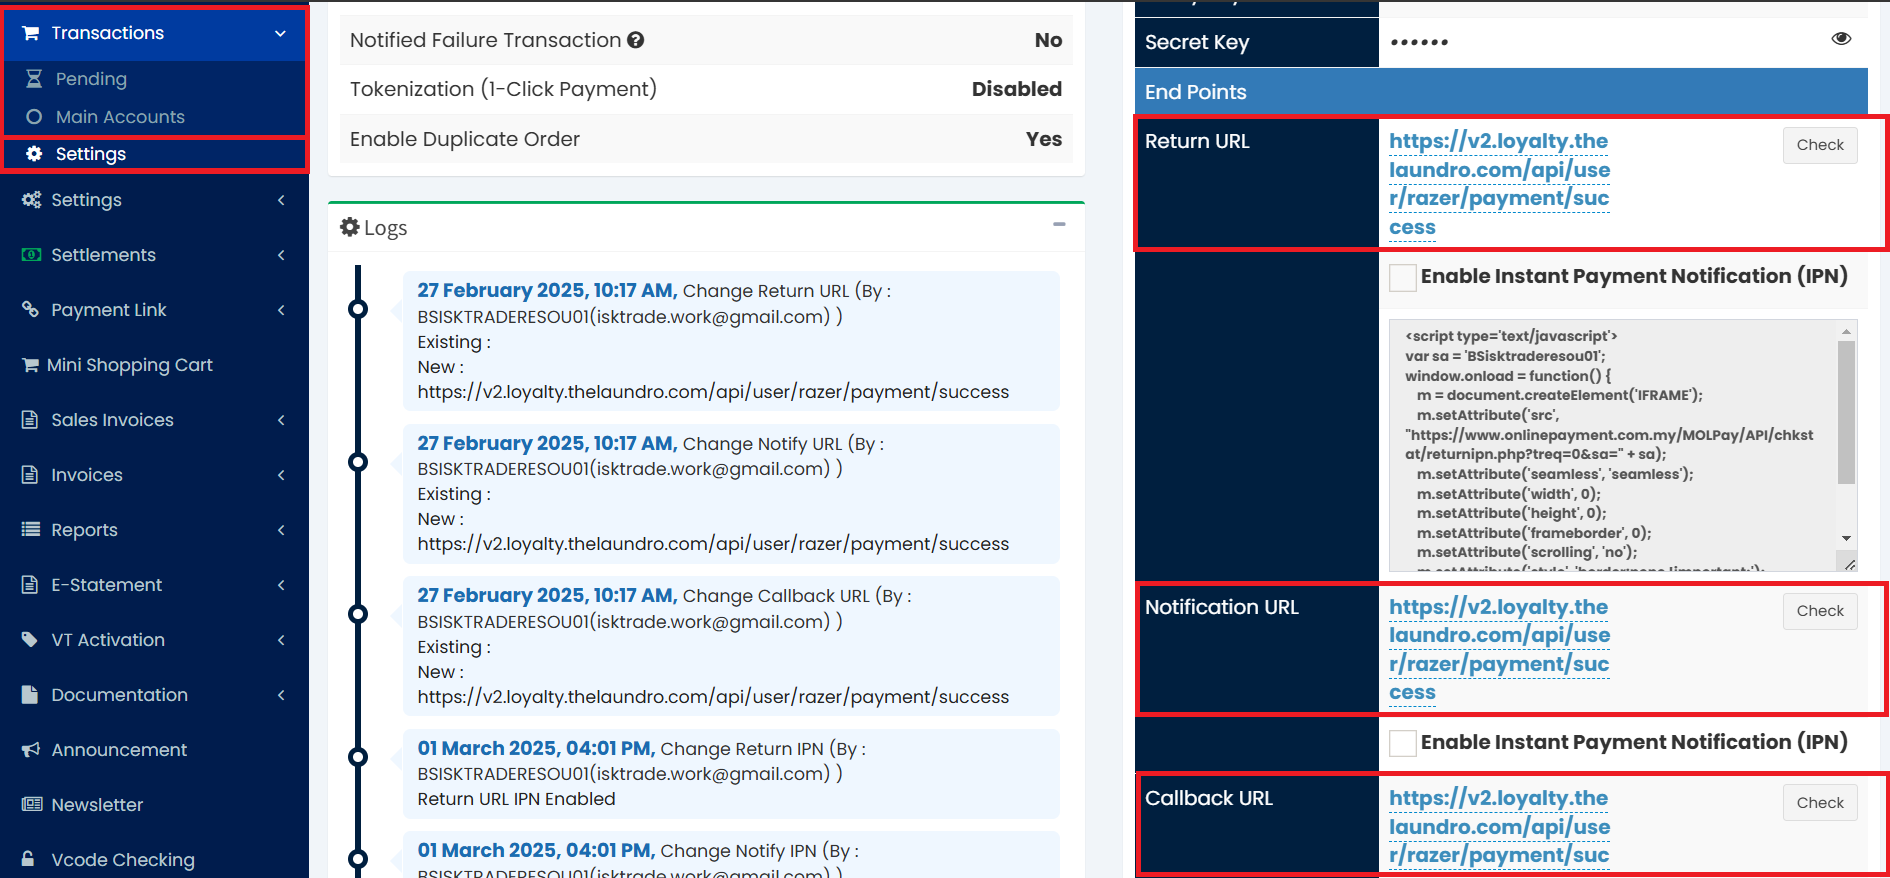
Return URL, Notification URL and Callback URL:
3) To register the domain, from sidebar, under Settings select Profile Settings
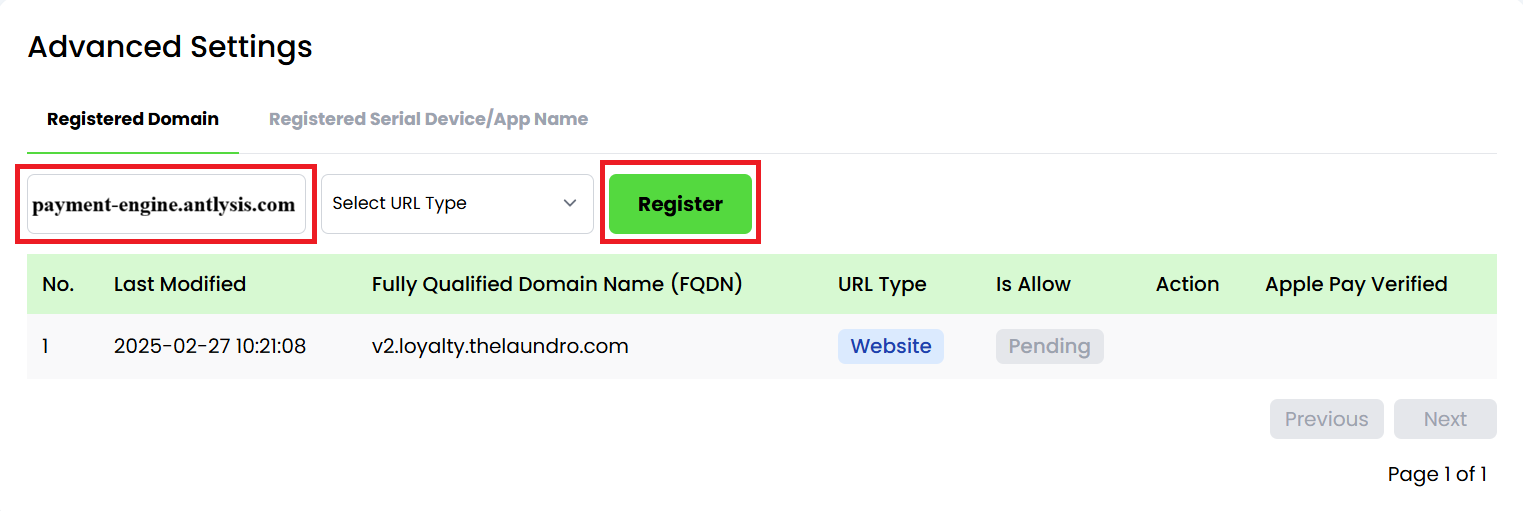
4) Enter the domain name (payment-engine.antlysis.com) and click Register button
─────────────────────────────
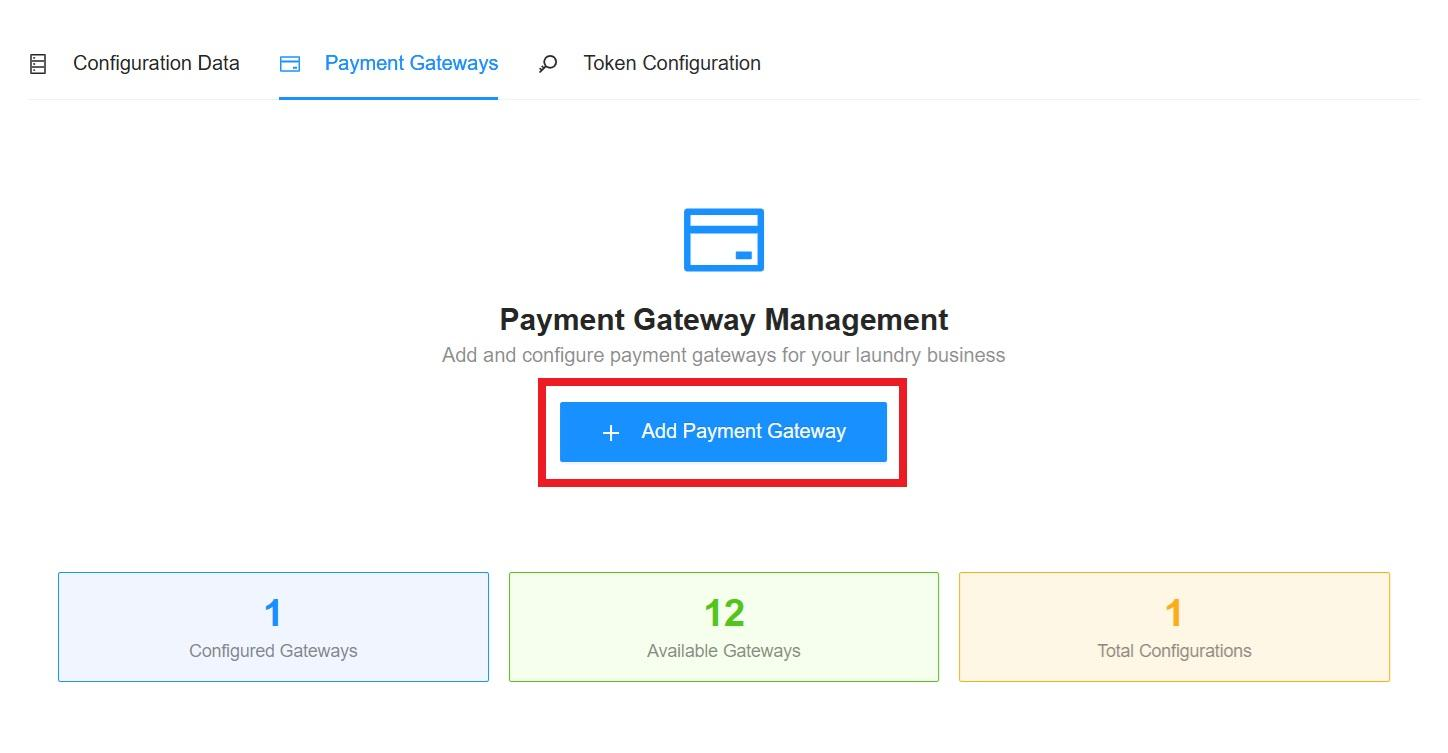
Config Setup
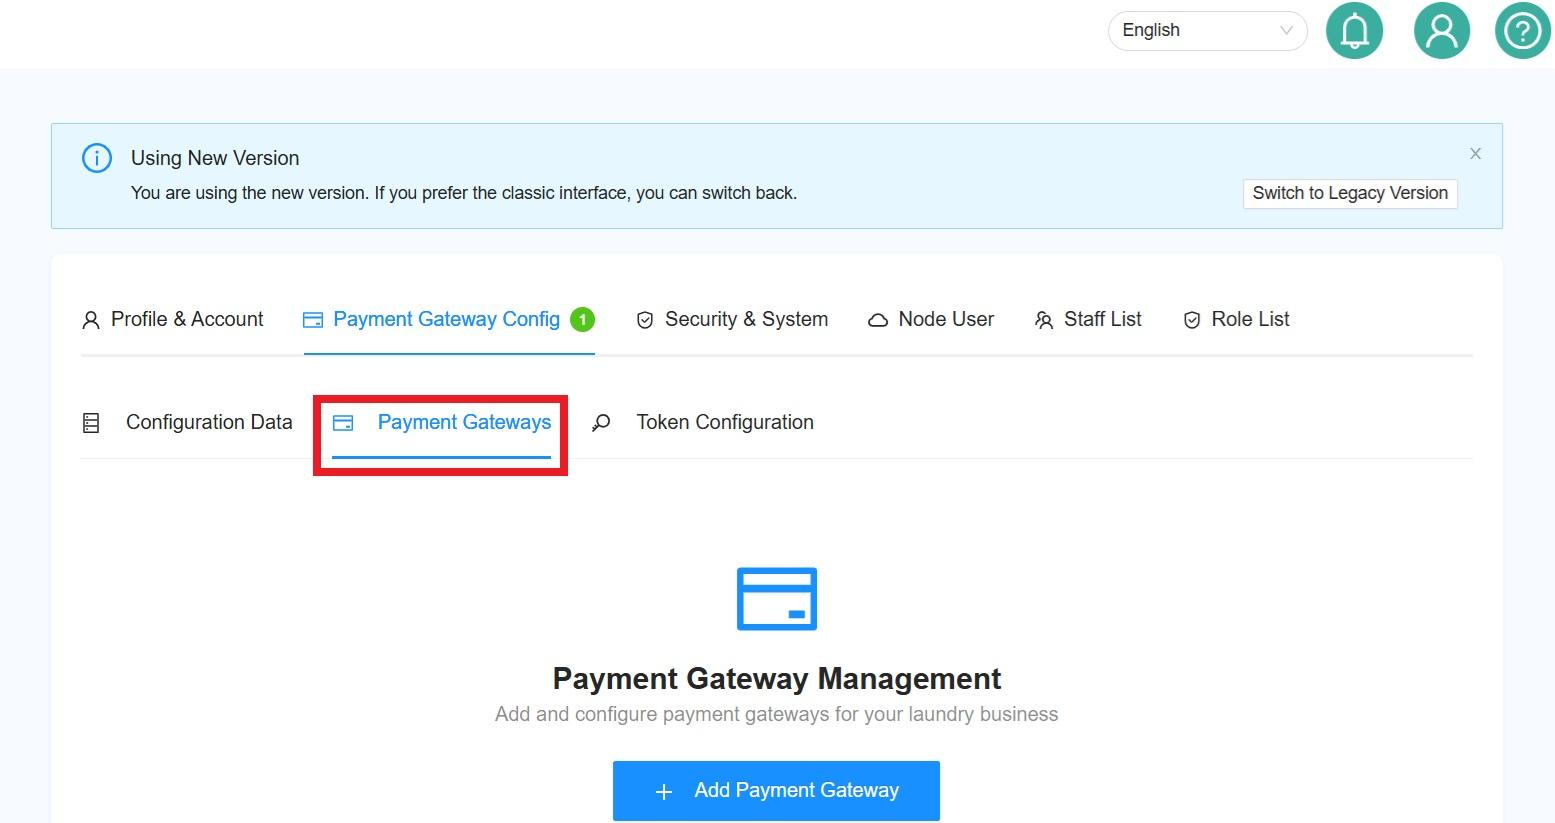
2) In Laundro Portal, go to Settings Page, under Payment Gateway Config, select Add Razer Config
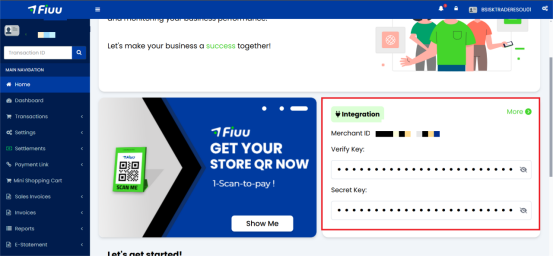
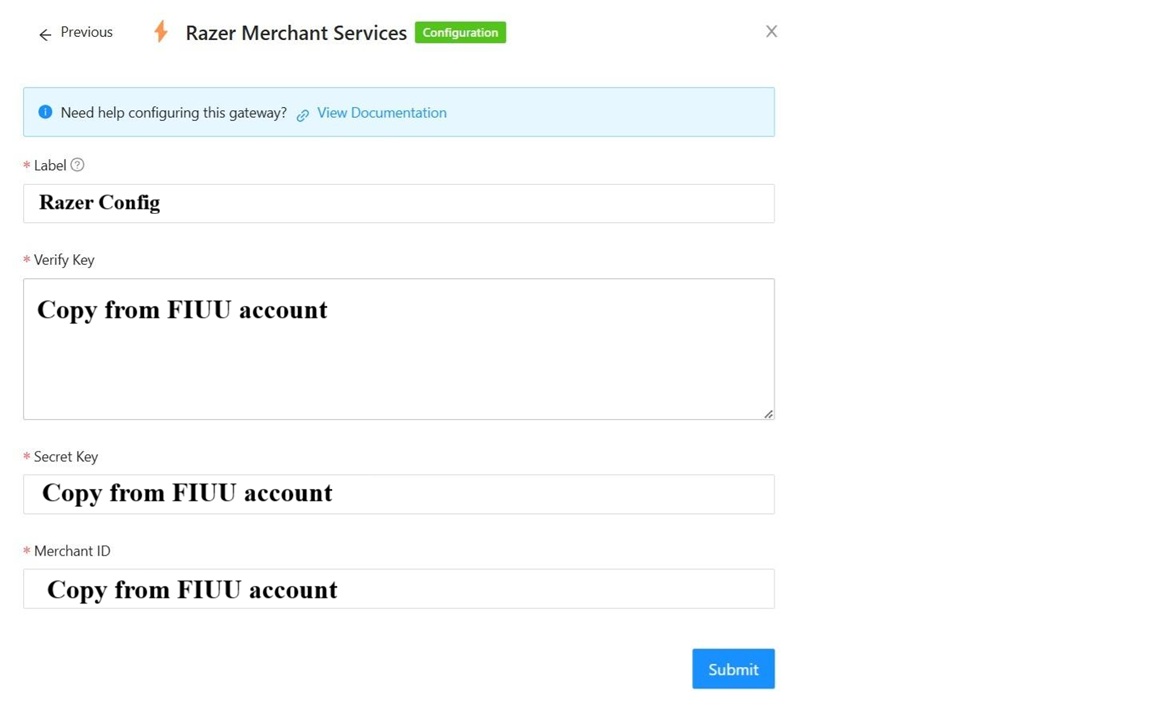
3) Enter the Label, paste the Merchant ID, Verify Key and Secret Key, then click Submit button

4) Enter the Label, paste the Merchant ID, Verify Key and Secret Key, then click Submit button.
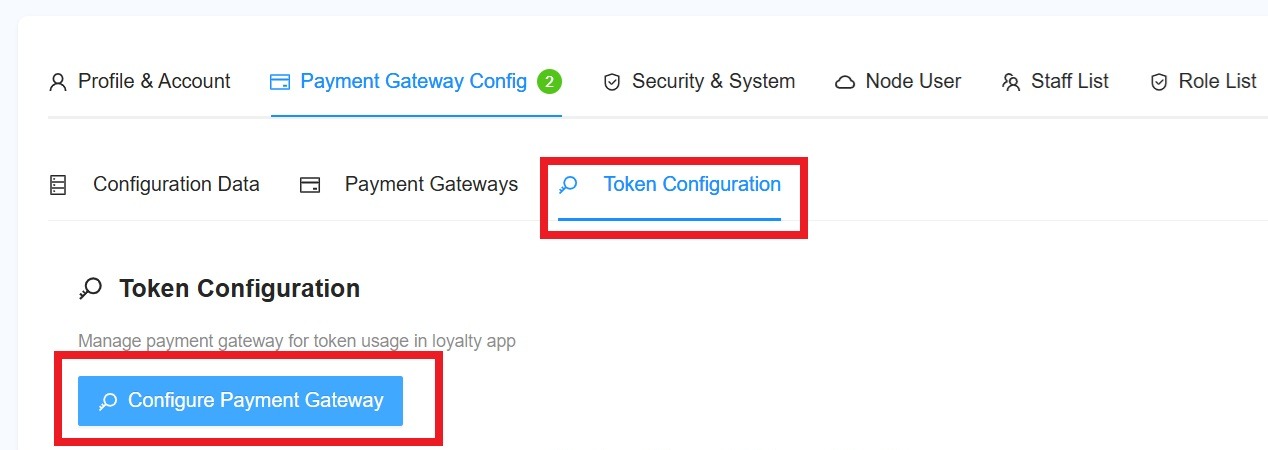
5) To enable Fiuu in machine payment (static DuitNow and ewallet), in outlet settings page, under Payment Gateway Config, select the token config.
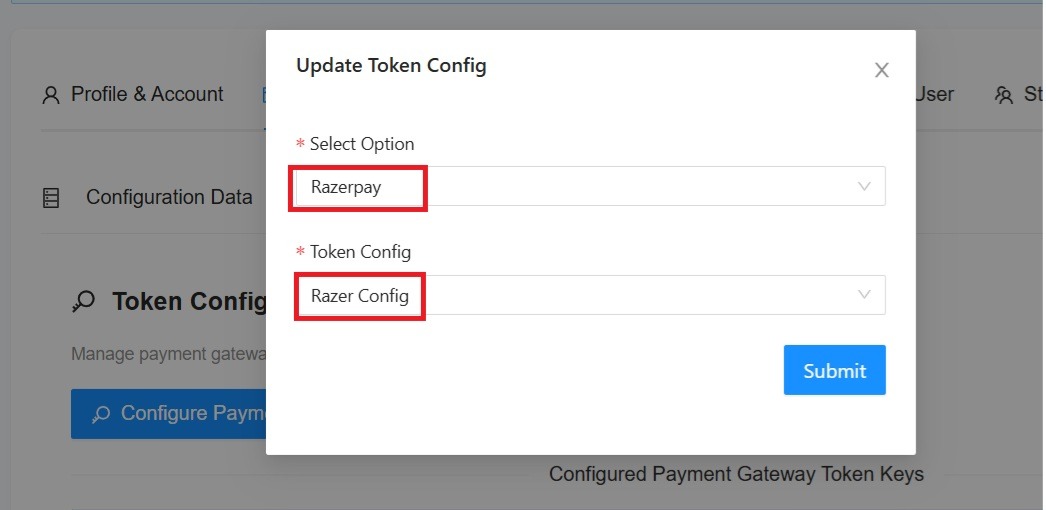
6) Payment Gateway select Razerpay, and select the Razer Config, then click Submit button.
7) To complete this process, the outlet details need to be updated in the payment configuration.
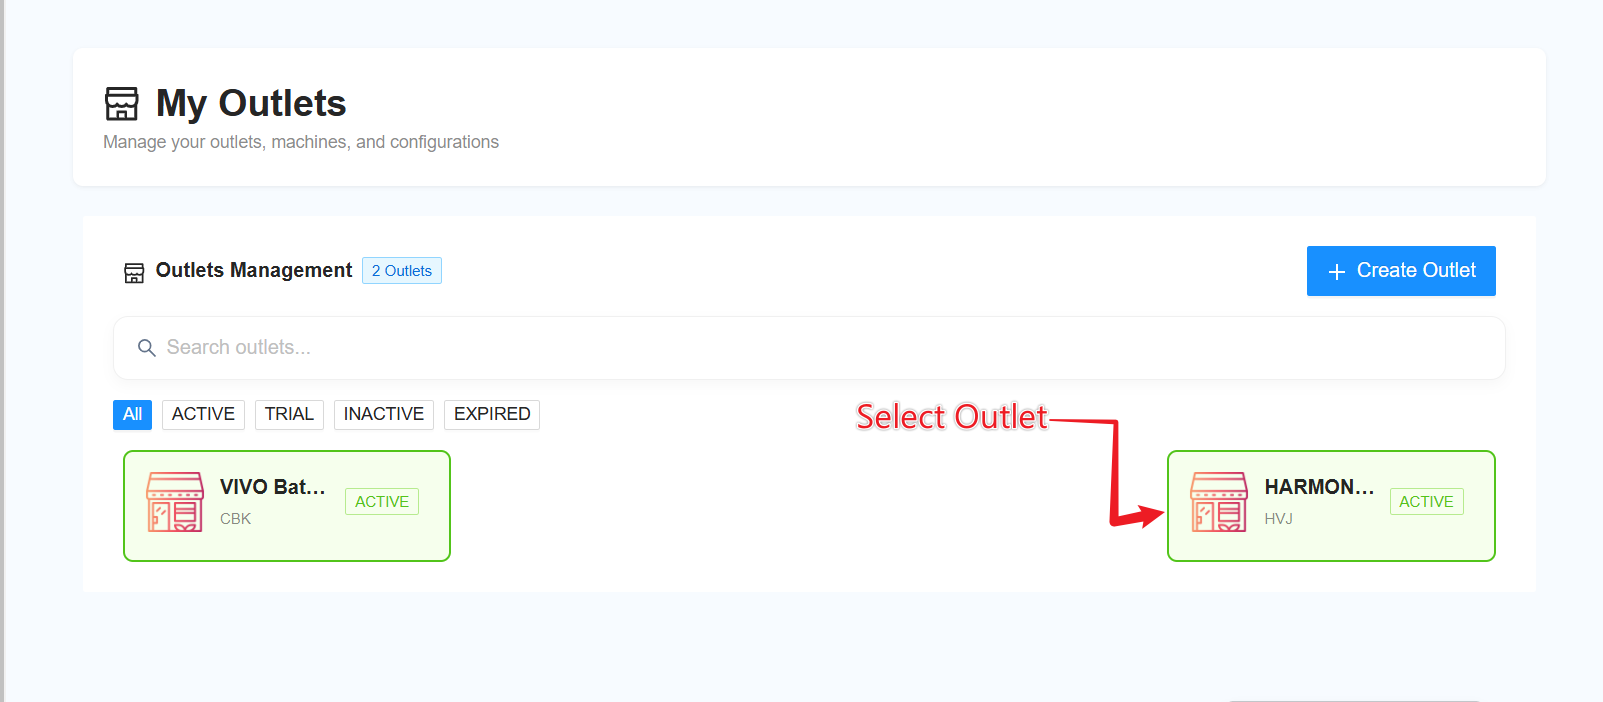
8) Go to ''My Outlet''

9) Select the outlet for which you want to update the payment configuration.
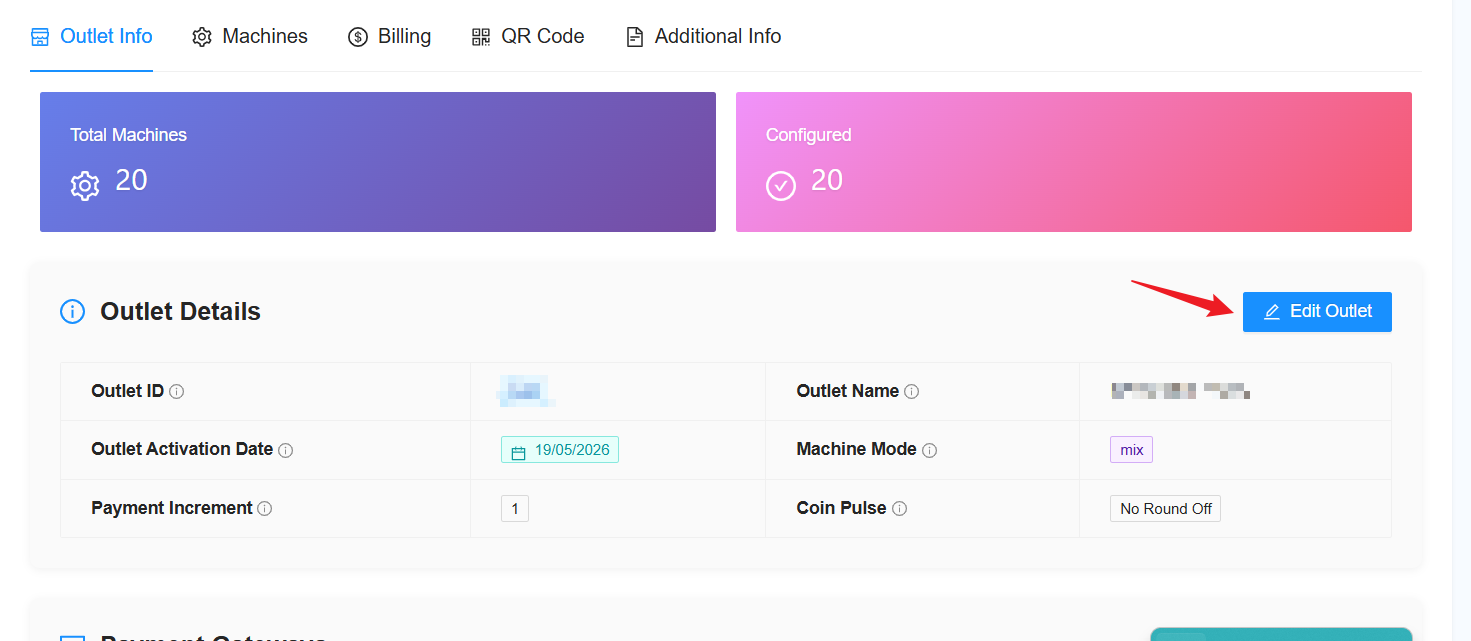
10) Click on “Edit Outlet”.
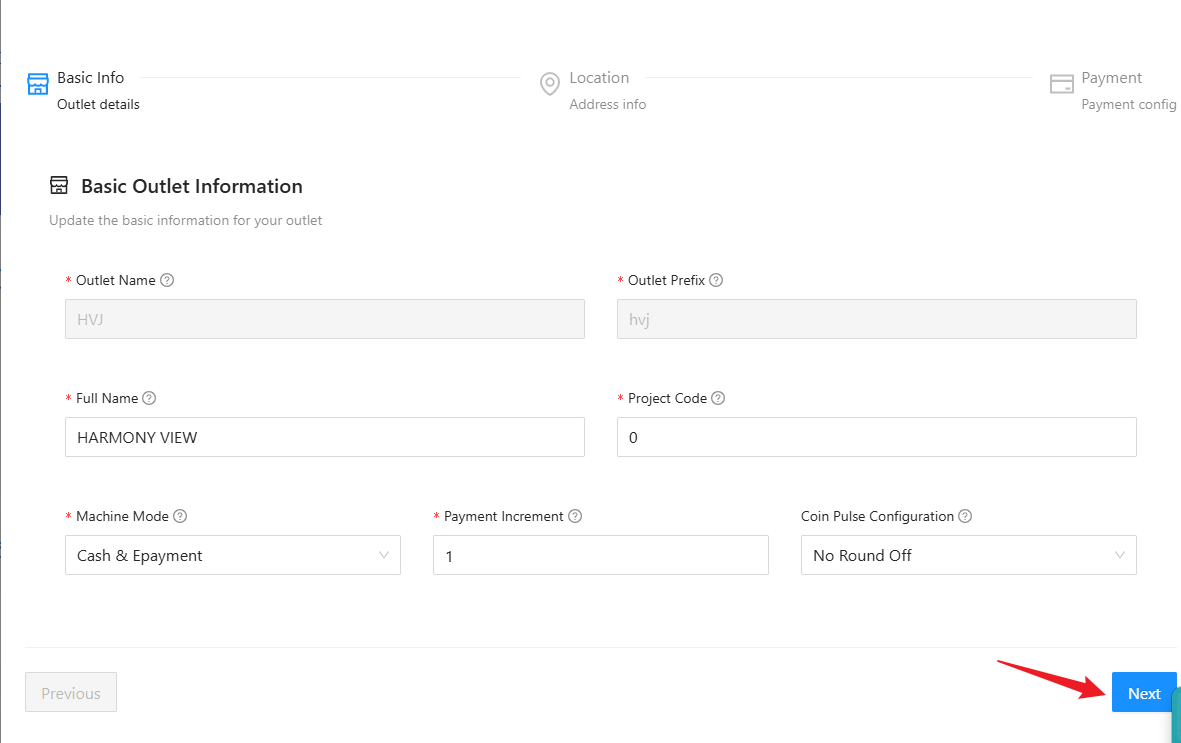
11) Click “Next” until you reach the Payment Configuration section.
12) In the Payment Configuration section, click on “Payment Gateway Config” and select “Razer Config (Razer)”.
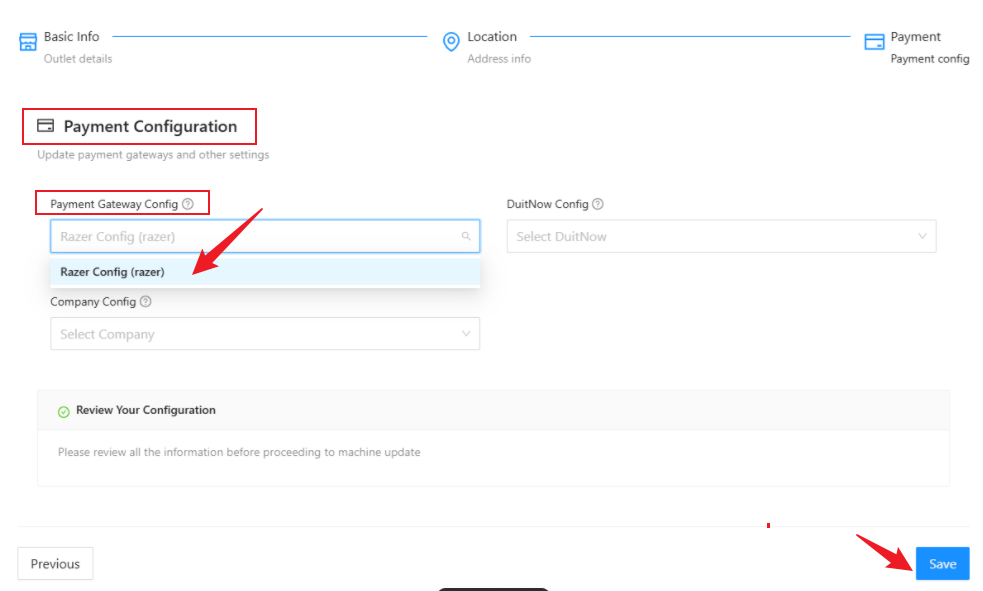
13) All done clickClick ''Save'Save'' and its done.