
Bill Collection v2
🎯 Purpose
The Bill Collection v2 report allows you to view and manage bill collection records by Operator, Outlet, Date Range, and View Type.
You can also select multiple outlets, customize the displayed columns, and view the related F1 Form and Collection Slip.
📍 How to Access
Step 1 — Open Laundro Portal
Log in to the Laundro Portal using your Username and Password.
Step 2 — Open Report
Report
Step 3 — Select Bill Collection v2
Under the Report menu, select:
Bill Collection v2
You will be directed to the Bill Collection v2 page.
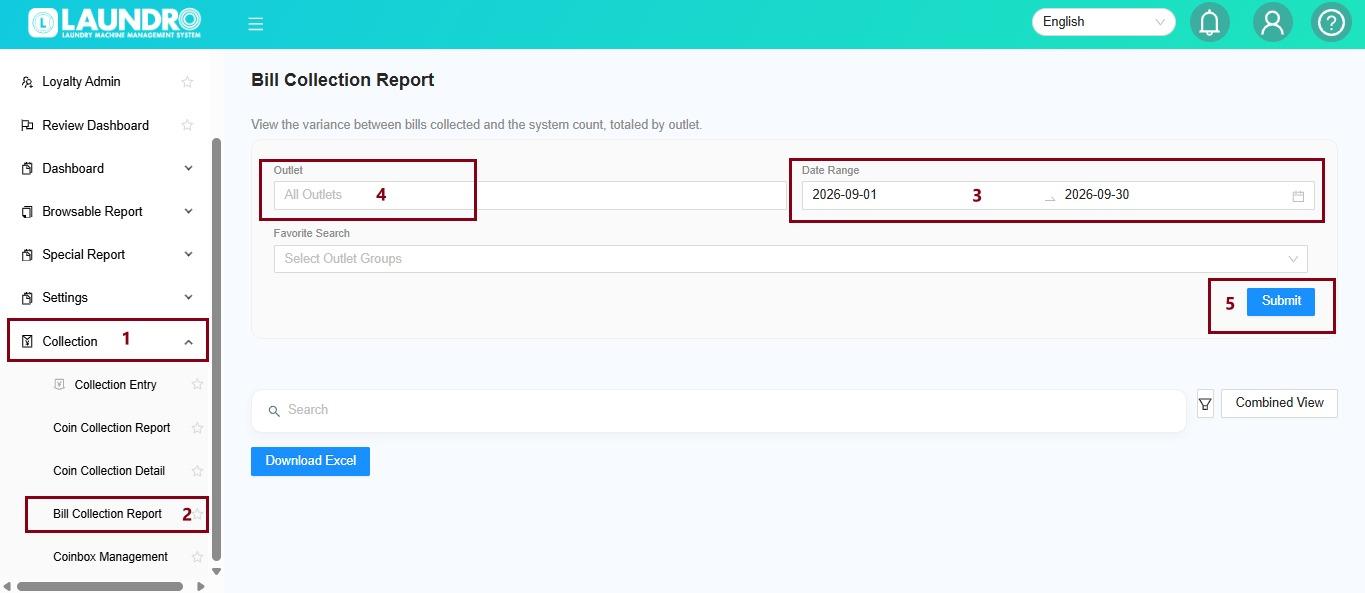
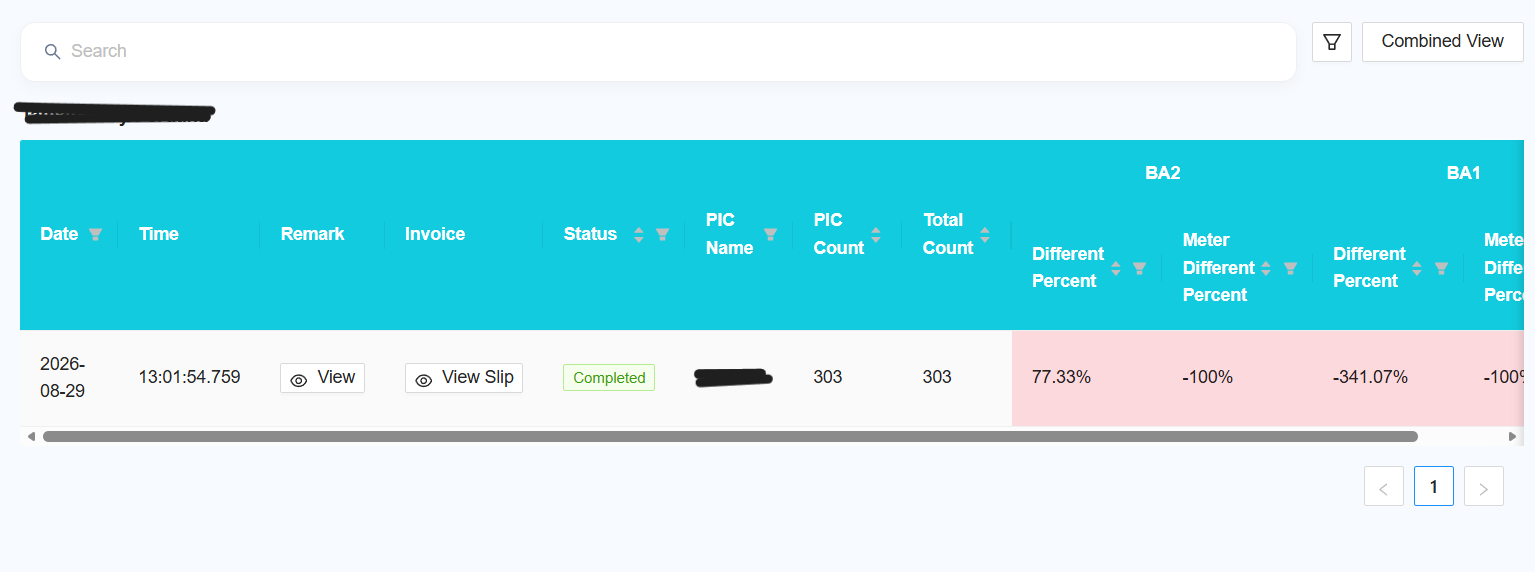
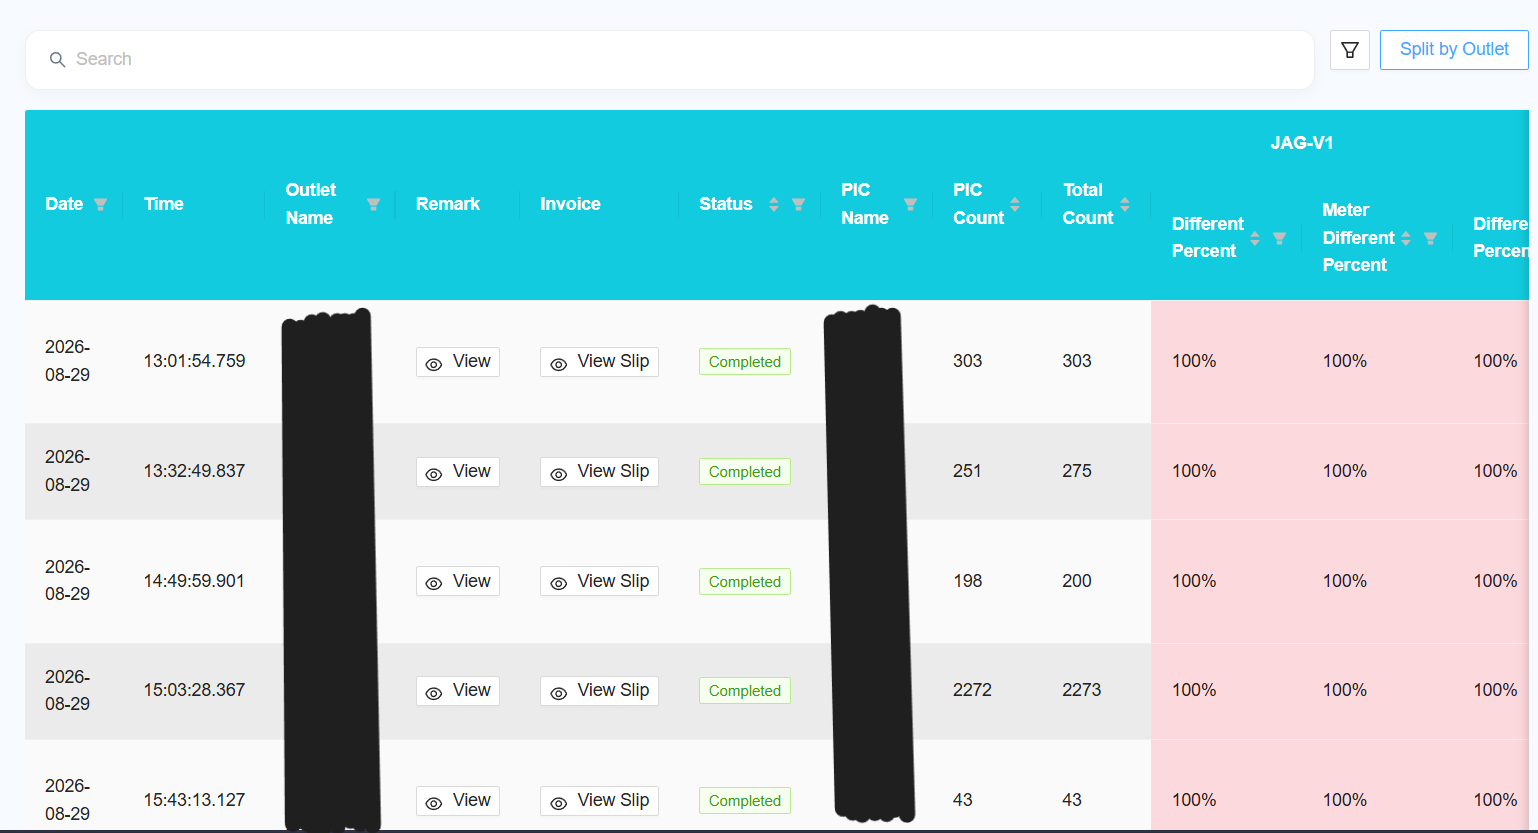
1️⃣ Select Your Filters
Before generating the report, select the information you want to view.
👤 Operator
Select the required Operator.
If you want to include all operators, leave the filter unchanged.
🏪 Outlet
Select the required Outlet.
You can select multiple outlets if you want to view several outlets in the same report.
📅 Date Range
Select the date range for the collection records you want to view.
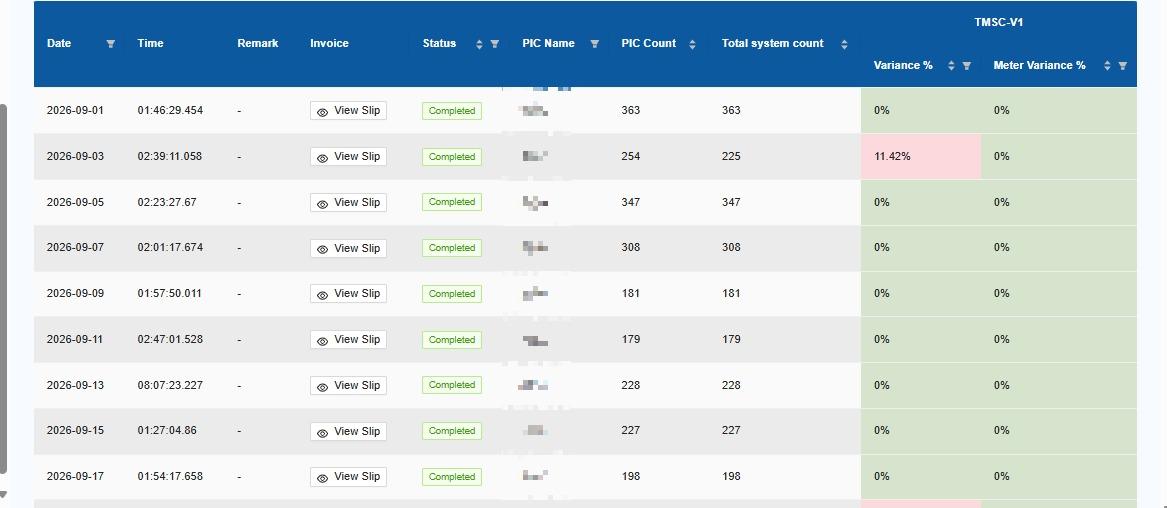
Filter2️⃣ Function
The following filters are available for generatingChoose the report:
Select OperatorSelect the required operator.Leave the filter unchanged to includeAll Operators.
Select OutletSelect the required outlet.Leave the filter unchanged to includeAll Outlets.
Select Date RangeSelect the required date range for the report.
[NEW] SelectView TypeChooseSelect how you want the report
shouldto bedisplayed:- displayed.
Combined View
— combine theDisplays data from all selected outletsintotogetherainsingleonereport.report.Split by Outlet
Displays the data
- separately for each outlet.
💡 Which one should I choose?
Want to see everything together?
→ Select Combined ViewWant to check each outlet separately?
→ Select Split by Outlet—display3️⃣ Generate the Report
After selecting all the required filters:
Click → Submit
The system will generate the Bill Collection report based on your selections.
4️⃣ Use the Report
Once the report
separatelyisforgenerated,eachyououtlet.
- displayed.
Report
The report table will includeuse the followingavailable options:actions to view additional information.
🔎 View Remark
Click View Remark to view the corresponding F1 Form.
🧾 View Slip
Click View Slip to viewopen the corresponding Collection Slip.
Reporting Changes
The followingslip changespreview andwill improvementsopen havewhen beenyou made toclick the report:button.
[NEW]5️⃣
Multiple Outlet SelectionAllow users to select multiple outlets when generatingCustomize thereport.
[NEW]Report⭐ Add Favourite
Add
theYou
option tocan mark the report as afavourite.[NEW]FavouriteAddforNeweasierColumnsAddaccess.
the following columns to the report:Outlet NamePIC NamePIC CountTotal Count
[NEW] Add☷ Column Filter
Use the Column Filter
Allow usersto select which columnsareyoudisplayedwantinto display.This allows you to focus only on the
report.information you need.📊 Available Information
The report includes additional information such as:
- Outlet Name
FollowPICtheName- PIC
sameCount - Total
column filter functionality used in other browsable reports.Count
[NEW]Remove F1 ColumnRemove theF1column from the report.
[NEW]🧾 Collection Slip
ChangeIn Bill Collection v2, thecollectionCollectionslipSlipfromis generatedone slip per machinetoone slipper collection.
[NEW]SlipinsteadPreviewDoofnotperdisplaymachine.theThe slip preview is not displayed directly in the report.
AddaTo
buttonview it:Click → View Slip → View Collection Slip
💡 Example
Scenario
You want to
opencheck theslipbillpreviewcollection records for two outlets for September 2026.Select:
Filter Selection Operator
All Operators
Outlet
Outlet A + Outlet B
Date Range
1–30 September 2026
View Type
Combined View
Then:
Click Submit → View Report
The system will display the collection records from both outlets in
aonepopupreport.when💡
required.
Need several outlets?
→ Select multiple outlets.
Want all outlets together?
→ Choose Combined View.
Want to compare outlets separately?
→ Choose Split by Outlet.
Need specific columns only?
→ Use Column Filter.
Need the collection document?
→ Click View Slip.