
WIFI Configuration (ALPHA-1)
(A) Step-By-Step WIFI Configuration
1. Login to Node-Laundro application (https://node.thelaundro.com/login) using given username and password.
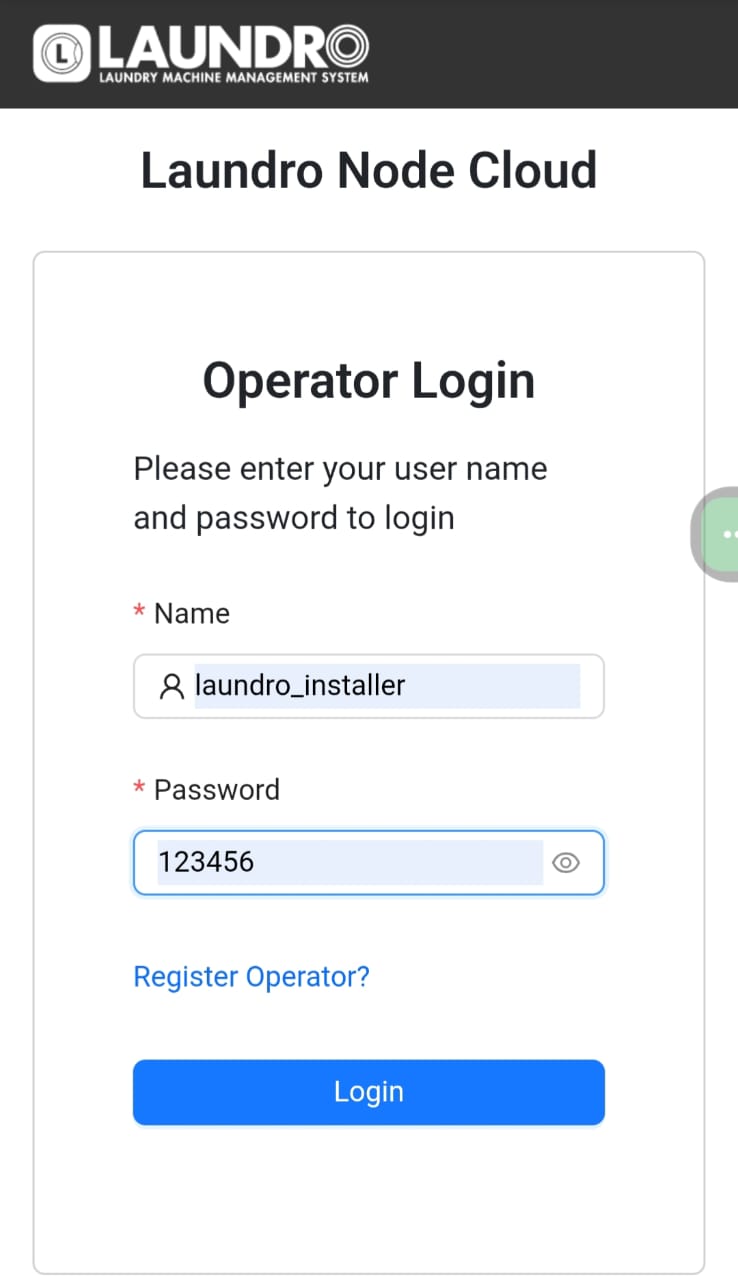 Example: Login Page
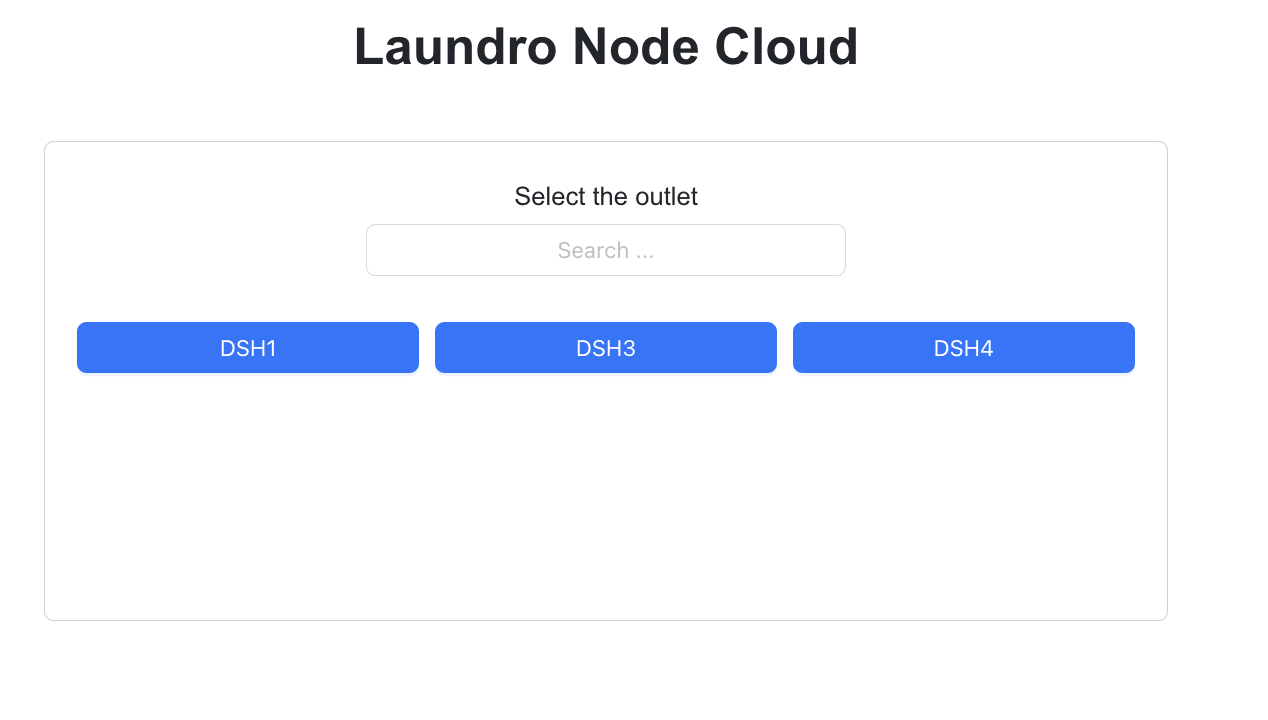
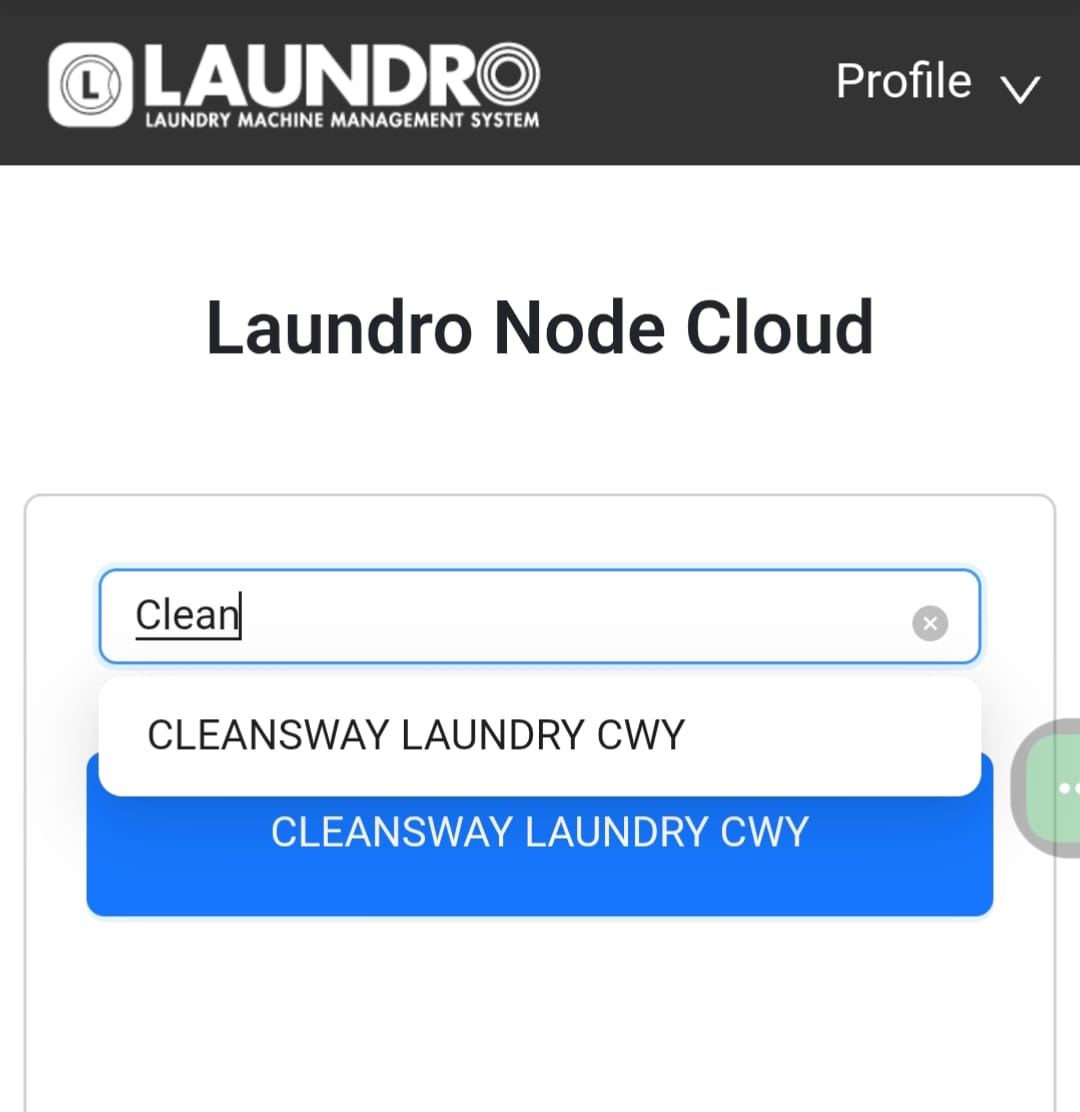
2. Search using the outlet name or ID provided, then click on the outlet to view its details.
3. By selecting an outlet name, you will be directed to the outlet details page. On this page, verify that all machine counts and details are correct before proceeding to the next step.
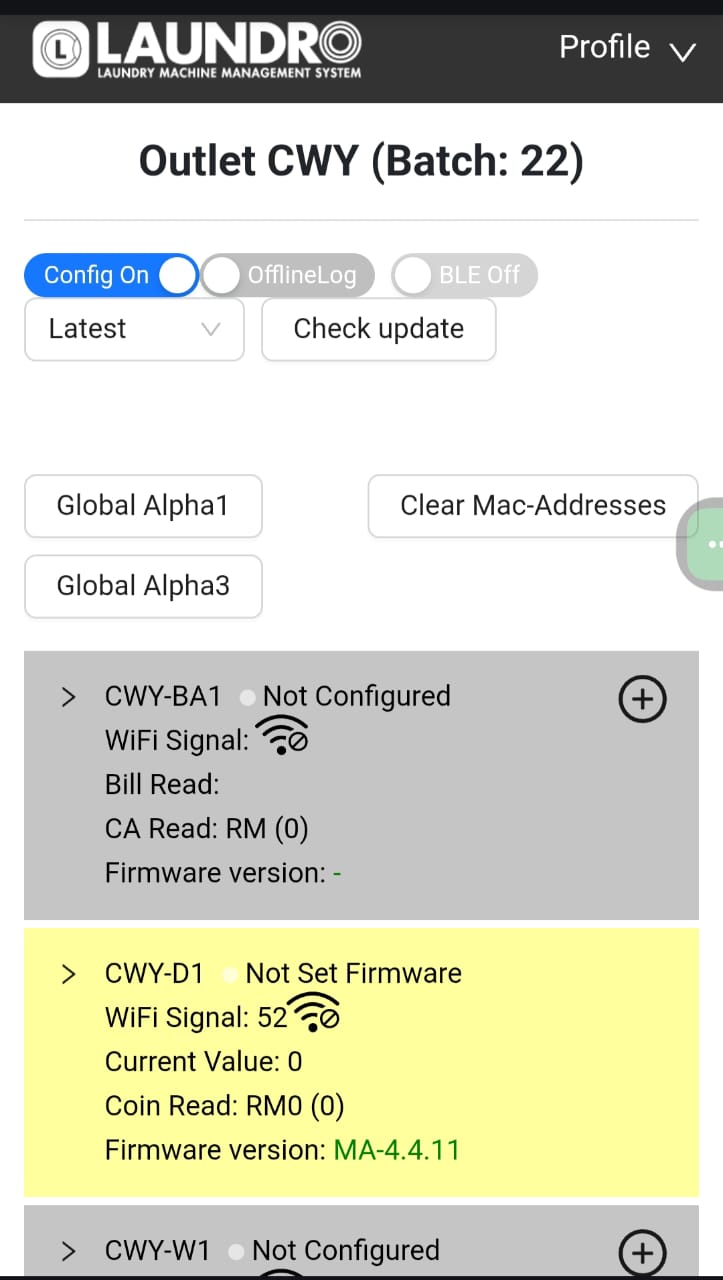
4. Click on enable config mode to allow this outlet to be configurable.
 Example: On Config Mode
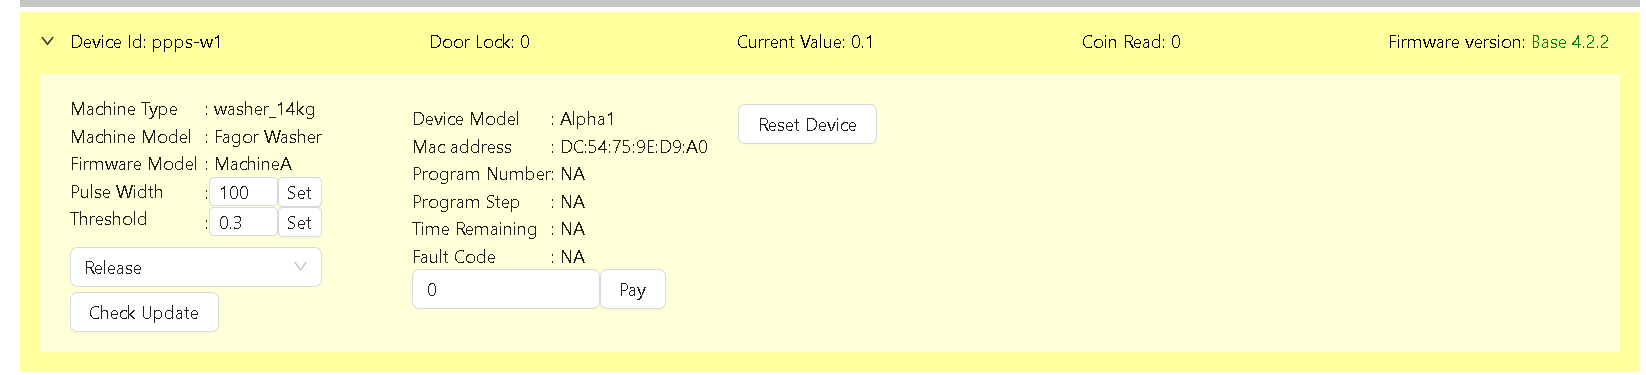
5. All machine details will be displayed in grey, indicating they are ready to be configured. Once a device is successfully configured, the background colour will change.
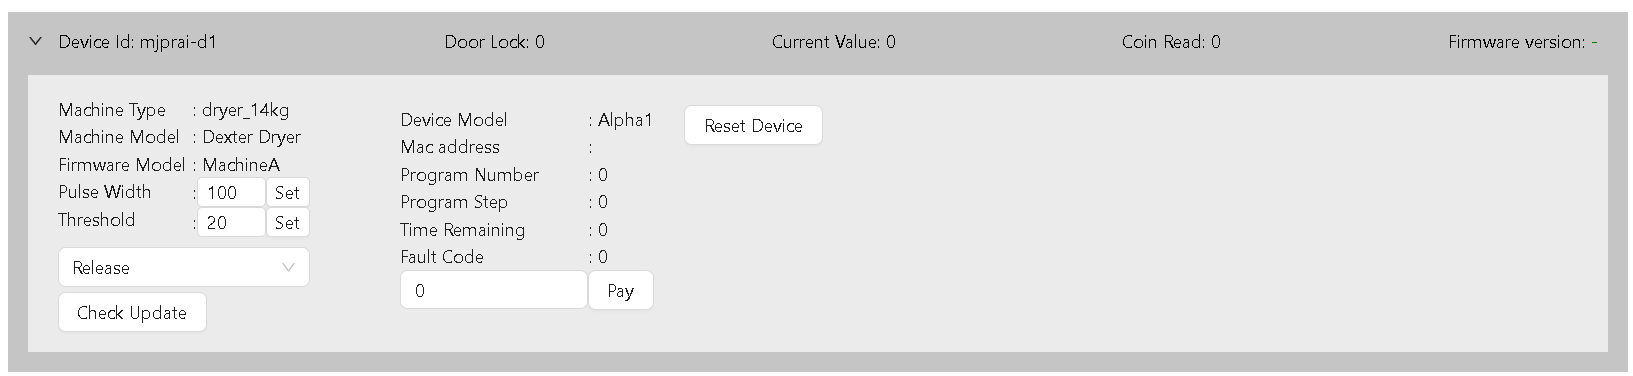 Example: Before configure device in grey colour
6. Turn on the switch on the Alpha-1 device and wait for the blue light to start blinking. This indicates that the device is ready for configuration.
 Example: Blinking blue light show it’s waiting for connection
7. Using your mobile phone, open the Wi-Fi settings. You will see the Laundro ID appear, as shown in the picture below.
8. Connect to newly broadcasted WiFi using default password (123456789)
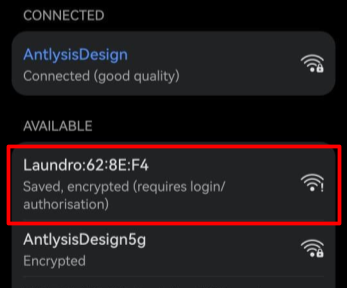 Example: Alpha-1 Laundro I'D
9. Once connected to the Laundro Wi-Fi, a pop-up will appear directing you to the Wi-Fi Manager page.
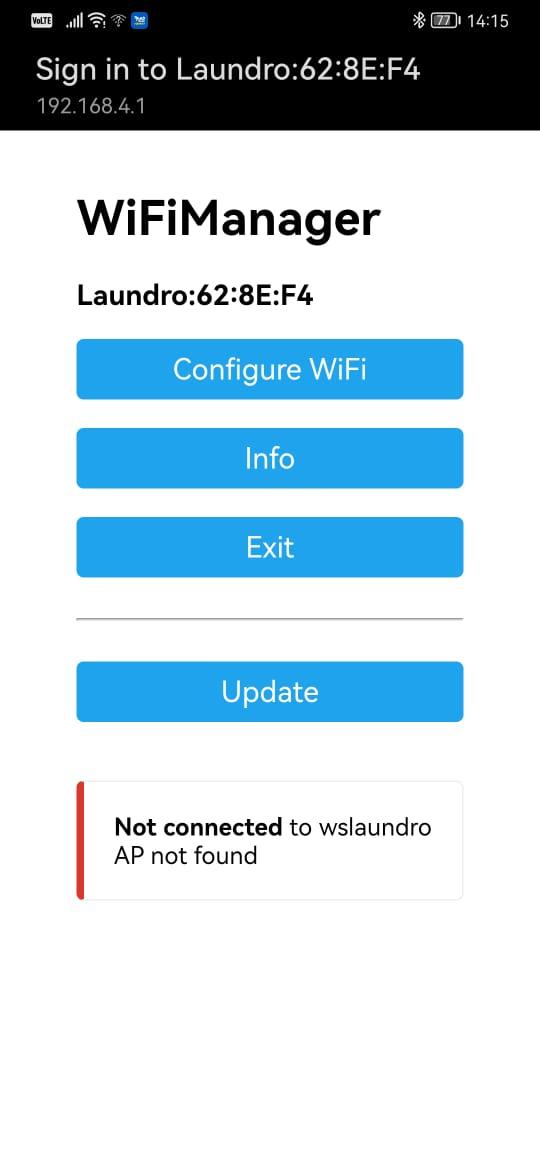 Example: WIFI Manger Page
💡 Tip:
- If the page doesn’t pop up, simply type 192.168.4.1 into your browser’s address bar, and the Wi-Fi Manager will open.
- Only for ''SAMSUNG'' Mobile follow the steps below.
-
Connect your Samsung mobile to the Laundro Wi-Fi.
-
An Internet Connection pop-up will appear. Tap “Always Connect.”
-
Tap the ⚙️settings icon.
-
Select “Manage Router.”
-
The Wi-Fi Manager page will open.
10. Press ‘Configure WIFI’ to open the configuration page. Then, select the correct SSID, enter the password, and the Outlet ID following in Node Cloud.
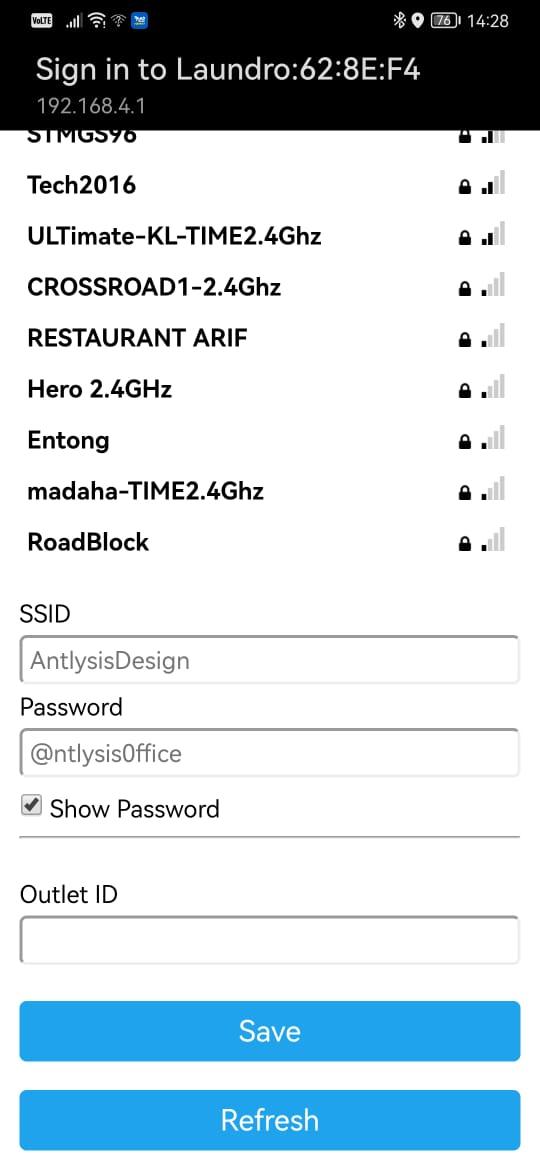 Example: WIFI Selection Mode
⚠️ Warning: Ensure that the Outlet ID and Wi-Fi password are correct. Also, check that there are no spaces before or after the characters before saving.
11. Once the device is successfully configured to Wi-Fi, the orange and green lights will appear. You can now proceed to the cloud setup.
⚠️ Warning: Ensure all devices have their WIFI configured before proceeding to the next step.
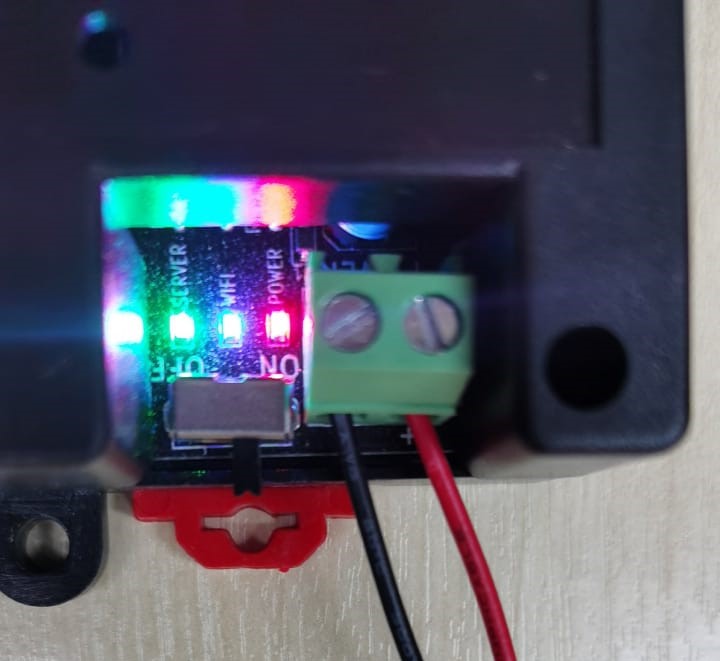
Example: Configuration LED and other 3 LEDs (Power, WIFI & Server) are lighted up
________________________________________________________________________________________________________________________________________________
(B) Steps of Cloud Configuration
1. Log back in to the Node-Laundro application https://node.thelaundro.com/login using the provided username and password. Then, follow the steps in ''(A) Step-by-Step WiFi Configuration'' until you reach the ''Outlet Detail Page.”
2. Stay on this page. You will need to press the (+) icon later, but first, continue following the next steps.
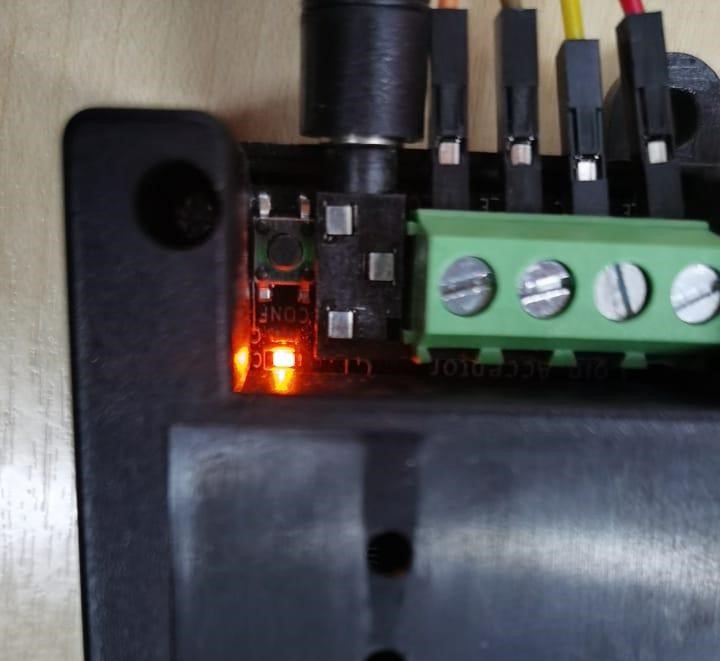
3. On the device, you’ll see a configure button next to the orange light. Press it, and the orange light will begin blinking.
Example: Config Button near Orange LED (Config)
4. Once the orange light starts blinking, you can press the plus (+) icon, and the Mac address will pop up.
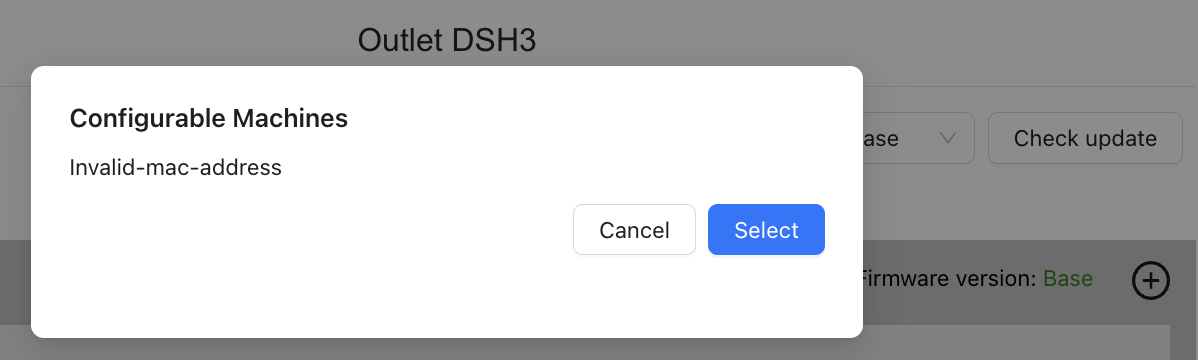
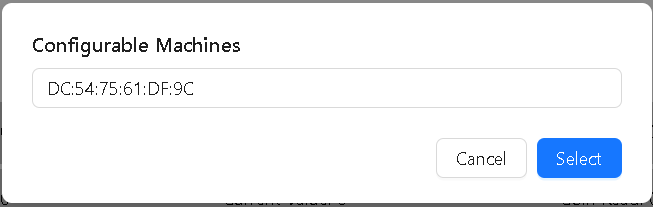
5. Once the MAC address pops up, click Select.
6. After selecting the correct MAC address, the section you configured from grey will turn yellow.
 Example: Section from Grey turn to Yellow
7. Select the latest option, then click Check Update. The latest version will appear, and you can click Update