
Speed Queen v1- Installation
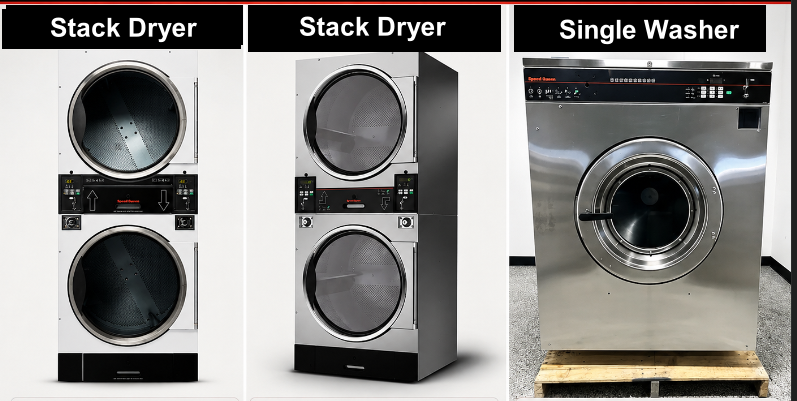
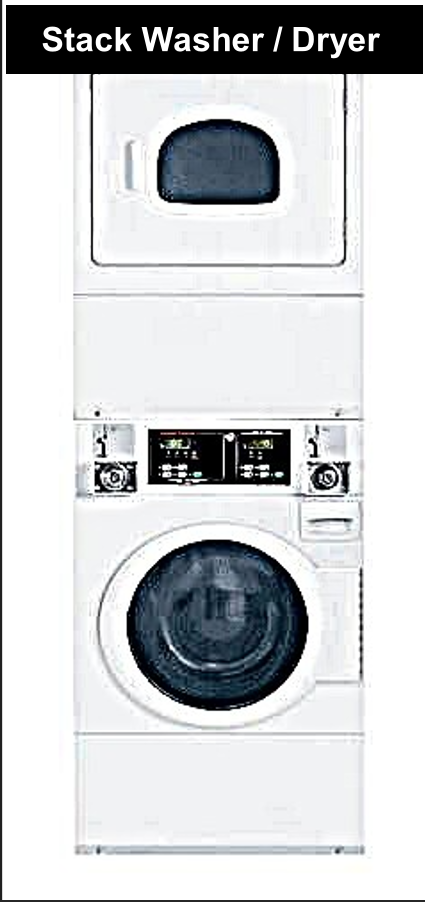
Speed Queen Single Washer & Stack washer / Dryer
Type off Speed Queen Machine
______________________________________________________________________________________
“Types of installation for Speed Queen machines”
Cashless Installation- Speed Queen Stack Washer/Dryer STGNCASP116TW01
☞ Cashless connection for E-payment transactions only, suitable for machines without a coin acceptor or machines with a coin acceptor where token capture is not required.
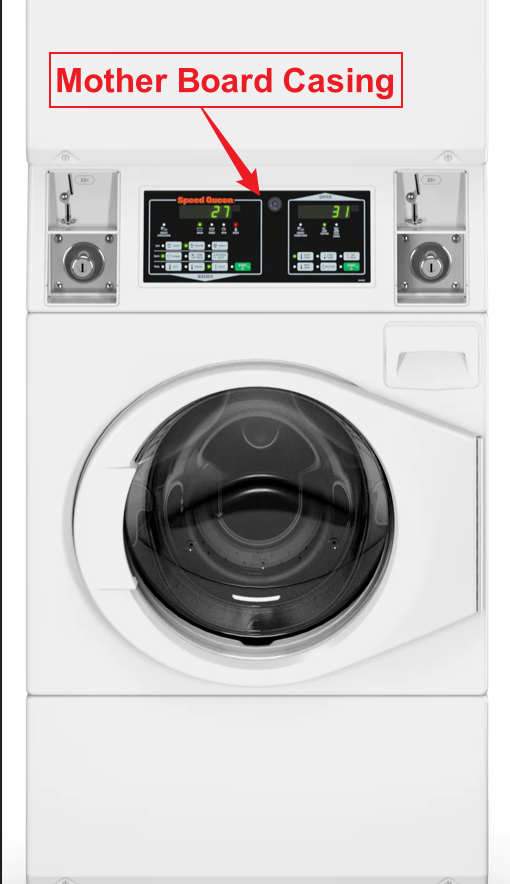
1) Open the motherboard casing using the specific machine key provided.
2) Pull the wires from the front to the back of the machine, where you will be placing the Alpha-1 device.
👉 For the Speed Queen machine, it is recommended to use 1.5 mm thick cables for the OUTPUT (-/+) connection.
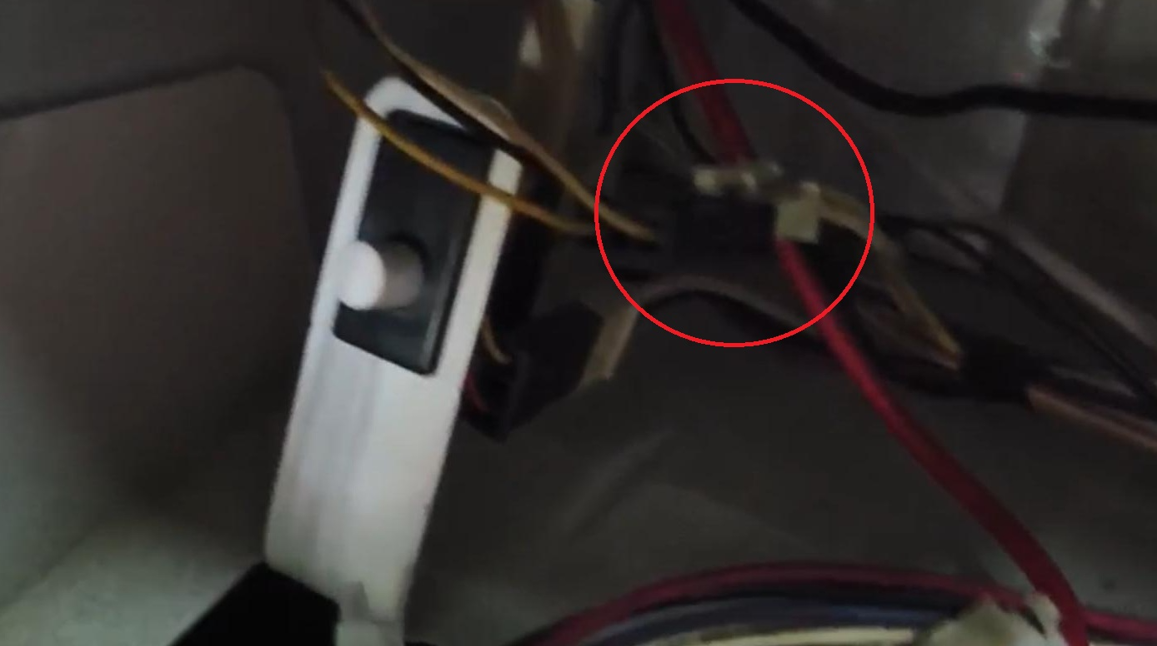
3) On the machine, you will see two identical male connectors — one yellow and one red.
👉 It is recommended to use the red male connector.
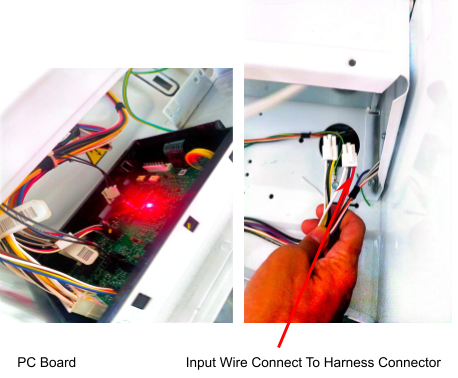
4) We provide a specific female harness connector to connect to the machine’s male connector.
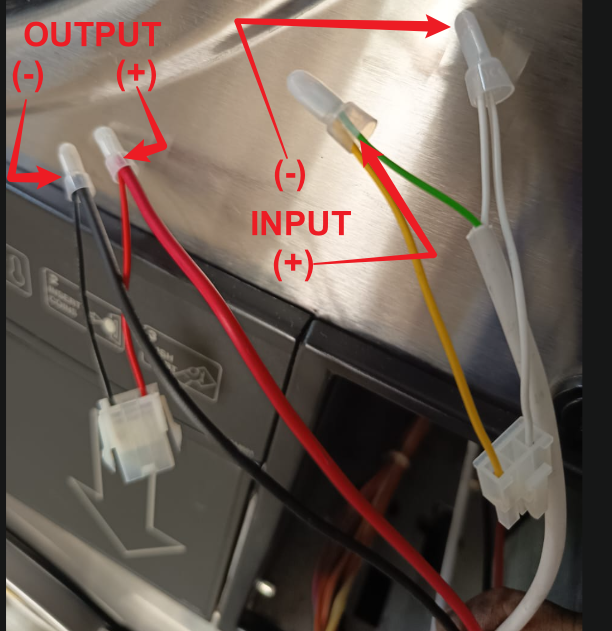
5) Connect the Output Harness to the cable from the device, ensuring that the output negative (–) and positive (+) are correctly connected.

_______________________________________________________________________________________________________
Coin Acceptor Installation
☞ For coin acceptor installation, it will capture token records as well as E-payment transactions.
1) For coin acceptor machines, use the yellow connector as shown in the picture below.
2) Connect the wire pulled from the back of the machine to the male and female connectors according to the INPUT and OUTPUT connections.
👉 For the Speed Queen machine, it is recommended to use 1.5 mm thick cables for the OUTPUT (-/+) connection.
3) Connect it to the machine’s male and female connectors, ensuring the INPUT and OUTPUT connections are correctly matched.
________________________________________________________________________________________________________________________________________________
Device Installation - Speed Queen Stack Washer/Dryer & Single Washer
Cashless Device Installation
1) Place the device at the back of the machine or in a safe location where it will not be damaged.
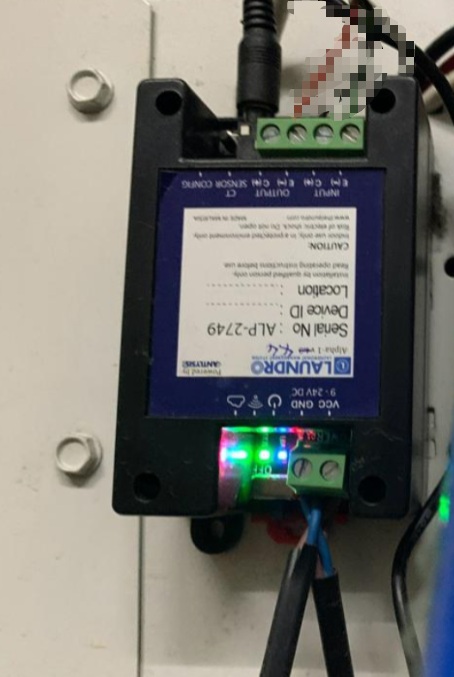
2) Connect the wires to the output negative (–) and positive (+) , then loop them back to the input negative (–) and positive (+).
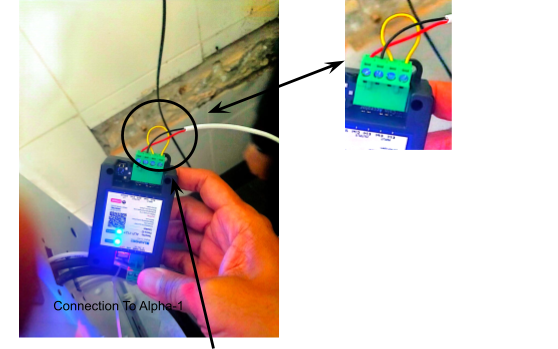
Quality Note - To Do Looping Input (-) to (+)
''Speed Queen Stack Dryer Connection''
1) For this machine model, the same harness connector will be used as other Speed Queen models. However, the wire connection from the Alpha-1/Device is slightly different.
👉 For the Speed Queen machine, it is recommended to use 1.5 mm thick cables for the OUTPUT (-/+) connection.
2) Open both the upper and lower coin acceptor casings.
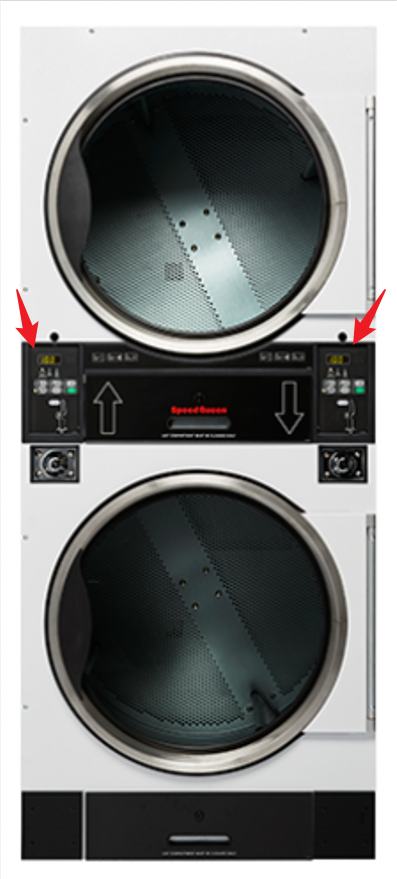
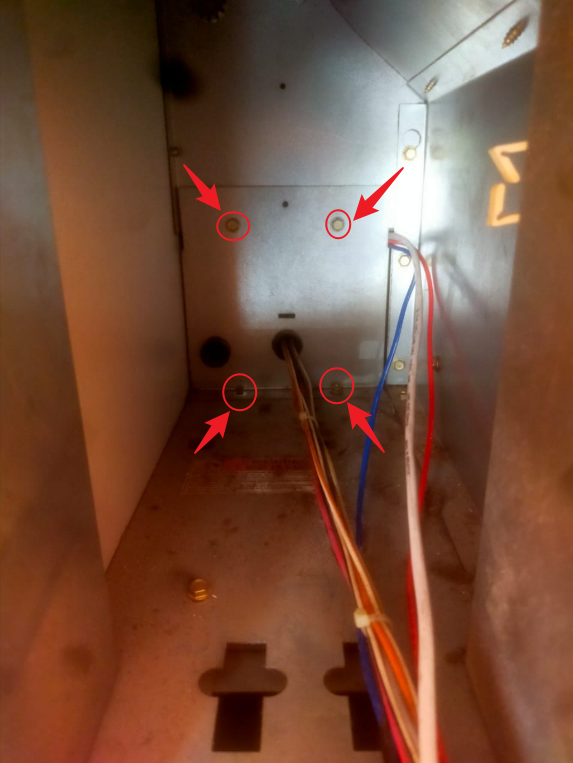
3) After opening the casing, you will see 4 screws at the end. Remove all 4 screws to access the inside of the machine.
4) To pull the wire, start from the upper side of the casing.
5) The diagram below shows how the wire should be pulled in side the machine from the front to the back, where the device will be placed.

6) Cable Routing Steps for Left/UP (1) (Refer to Picture)
1. Route the cable from the top side (1) to the bottom side (2).
2. Pull the cable to the back of the machine.
3. Locate the small hole (3).
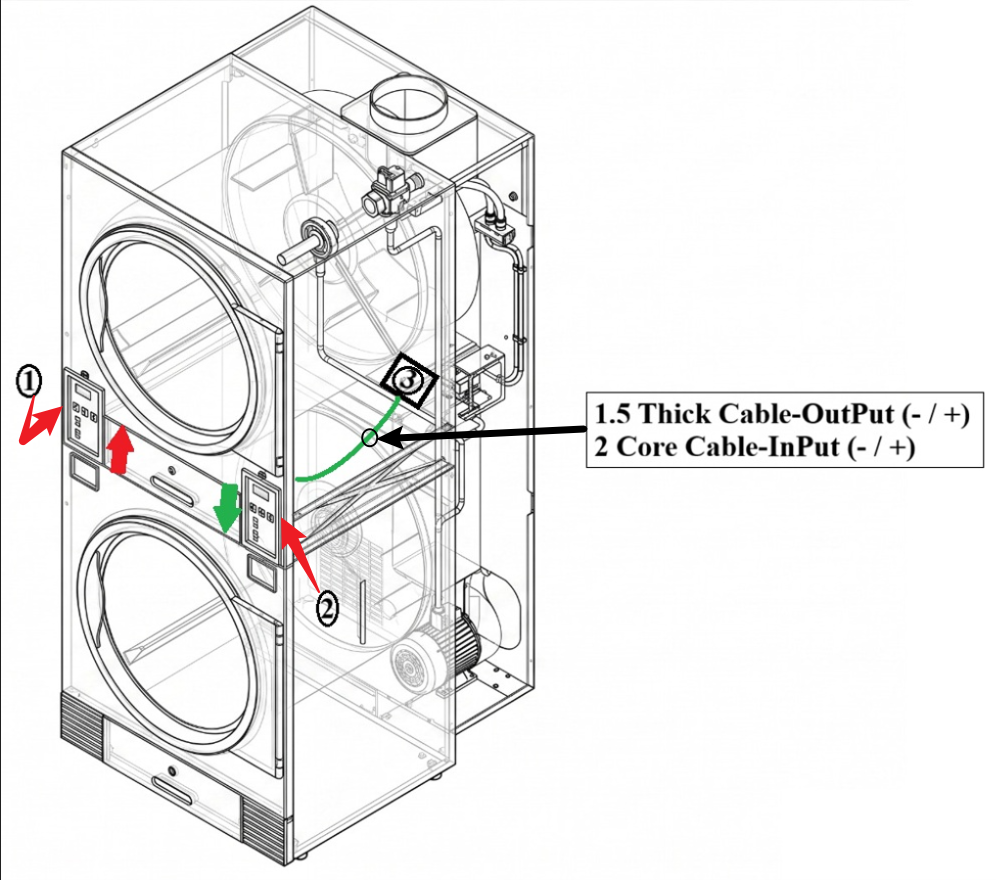
7) Cable Routing Steps for Right/Down (2) (Refer to Picture)
1. From the (2) bottom side, pull the wire straight to the (3) rear section.
There are other hoses passing near this hole, so pull carefully.
7) Feed/push the cable through the small hole (3) until you can see the cable coming out at the back of the machine.
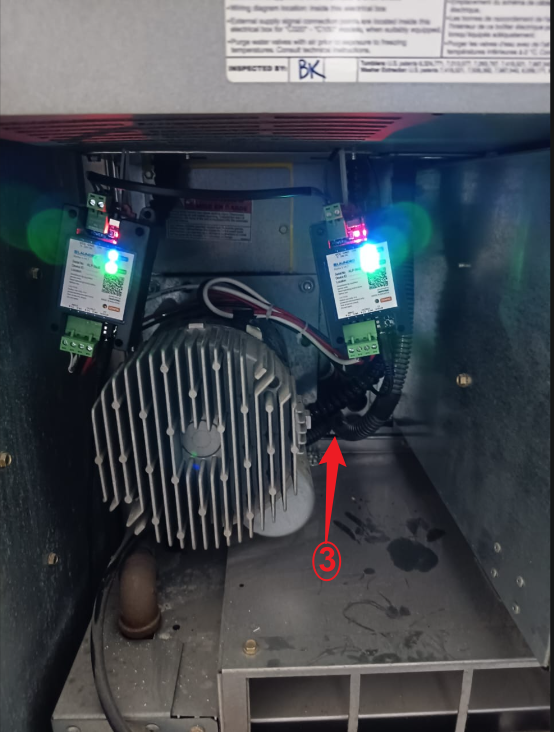
8) Pull the cable through hole (3) until it reaches the device installation location.
Click this link to next step: