# Troubleshooting
**General Troubleshooting Techniques**
1. Identify the problem, validate the problem, and collect evidence.
2. Do not jump to conclusions and consider all possible scenarios.
3. Have a well thought out troubleshooting plan.
4. Keep good notes for easy analysis and follow up.
5. Isolate or narrow down the issues before starting disassembly.
6. Create a report.
7. Communicate the issue to Antlysis team.
# Scan Token
1.Select the outlet in Node Cloud, then tap on the machine number you want to scan the token for.
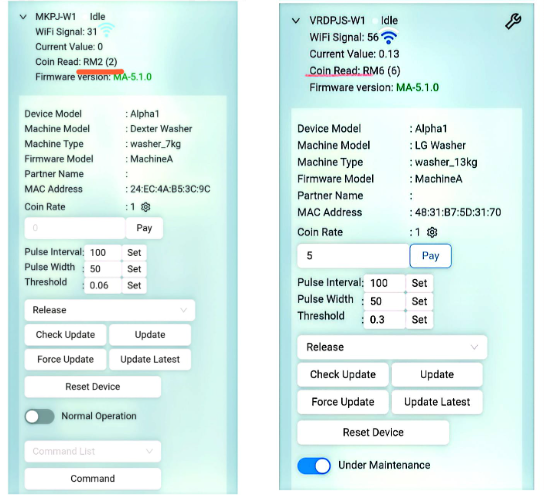
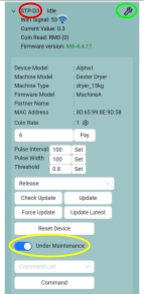
2.After selecting the machine number, you need to set it to 'Under Maintenance' on the top right will appear the spanner logo.
Example Below:
Circle in RED is machine number
Circle in YELLOW is Under Maintenance
Circle in GREEN is spanner logo
[](https://docs.antlysis.com/uploads/images/gallery/2025-08/oqgOSsHuCOgzog7w-image2.png)
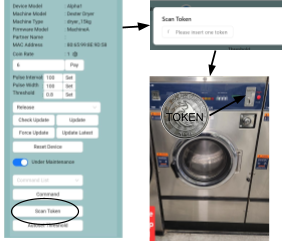
3.Next, tap 'Scan Token'—but before that, make sure you're standing near the machine with the token ready to drop into the coin slot.
4.Once you are ready, tap 'Scan Token'. When 'Please insert one token' appears, immediately insert the token into the coin acceptor.
[](https://docs.antlysis.com/uploads/images/gallery/2025-08/Lcboxkjx2wCSVpWs-image4.png)
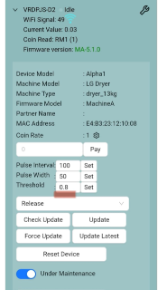
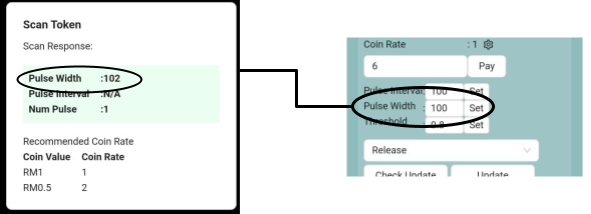
5.After successfully scanning the token, the system will display a number on the model. You can then adjust the 'Pulse Width' and 'Pulse Interval' based on the displayed value.
[](https://docs.antlysis.com/uploads/images/gallery/2025-08/9YOYnI4DXQBualu0-image3.png)
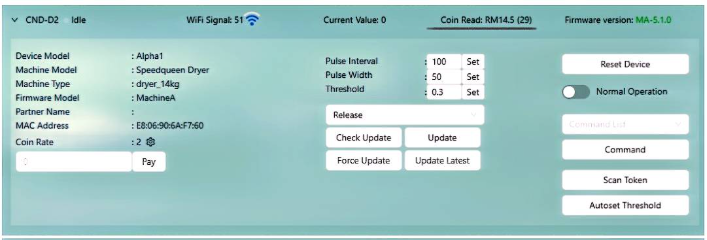
6.After updating the Pulse Width, tap 'Set'.The system will then be fully updated,
7.You can run a test, and you'll see that the coin will be detected during the test on ‘coin read’ .
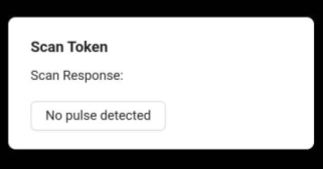
8\. If the test result displays 'No Pulse Detected', you will need to repeat the process.
[](https://docs.antlysis.com/uploads/images/gallery/2025-08/7ebMKYGHq0K8uHaO-image1.png)
9.If the same message still appears, check your device’s input and output connections, along with the harness cables, to make sure everything is connected properly. Also, when inserting the token, ensure it’s accepted and deducted. If the coin acceptor rejects the token, it won’t be detected.
# Coin read not detect
1. When a customer makes a payment using **token**, **coin**, or **Cloud Pay**, the payment amount is expected to be displayed on the **cloud node** as a **coin read**. However, there are cases where the payment **cannot be read or detected by the coin reader**, resulting in the transaction not being properly recorded on the **device / transaction record.**
**Root Cause Identified:**
The issue was caused by a **loose connection between the cable harness and the coin reader**, which disrupted communication between the device and the cloud node.
**Corrective Actions:**
1. Checked and reconnected the cable harness properly.
2. Ensured all connectors are securely fastened to prevent loose connection recurrence.
3. Conducted a transaction test to confirm proper payment detection.
Turn on node cloud & do testing is started by pressing the **Scan Token \[ can see step in SCAN TOKEN \]** button first.
Please ensure that the number of **tokens/coins** displayed on the coin reader matches the amount inserted into the **coin acceptor**.
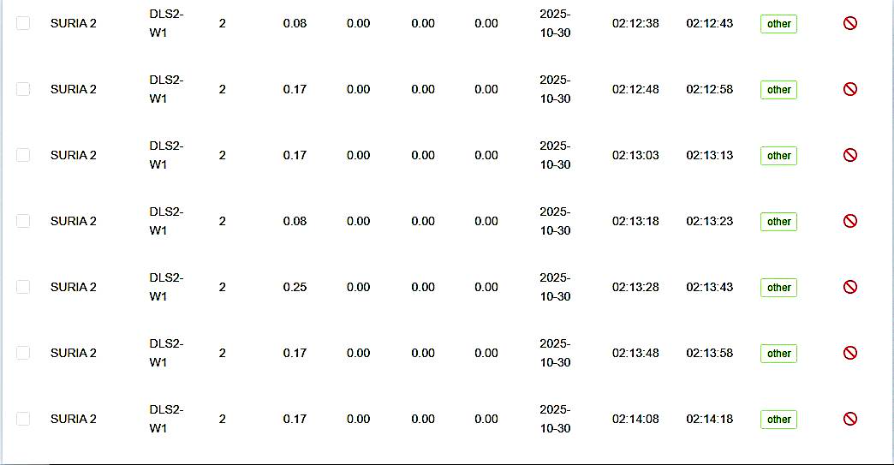
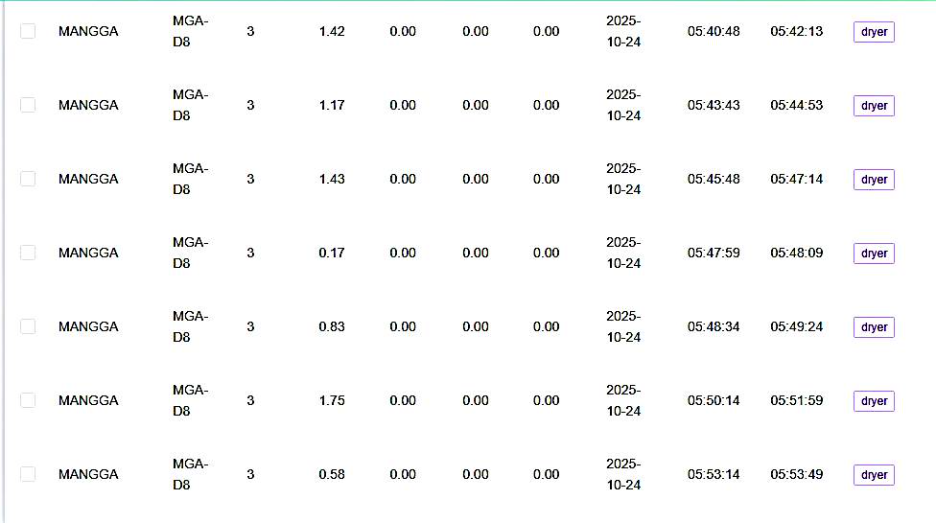
# Short Running Cycle
When we check the data in the transaction record, we found a Short Running Circle as shown \[in the image\].
### **Threshold**
1. **After configure, observe the threshold menu for each device at the configuration page.**
2. **The default “Threshold” value is set to 0.8. However you should increase or decrease the value based on its idle value.**
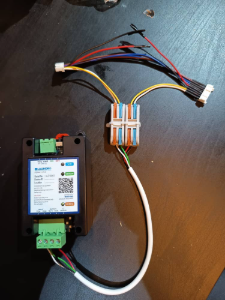
### **Wire Harness**
1.**Make sure the connection is tight by checking the wire harness and screw terminal.**
# The current value is not increasing
1. **Issue Description:**
When the washer or dryer starts its cycle, the current value does not increase as expected. Consequently, the app display does not change from blue to green.
**Possible Cause:**
**There may be an issue with the current sensor, communication between the device and the app, or a delay in data update during the start of the cycle.**
**Recommendation:**
**Check the wiring connection between the current sensor and the Alpha-1 device, ensure sensor clip tighten to device properly, and verify that the threshold at node cloud increasing during the machine running.**
**Clip the given split-core current transformer at the Live wire.**
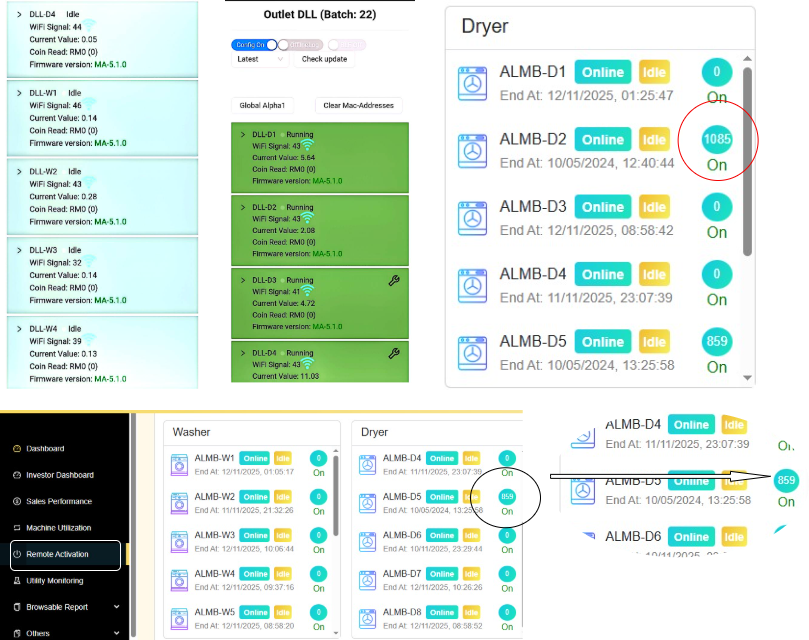
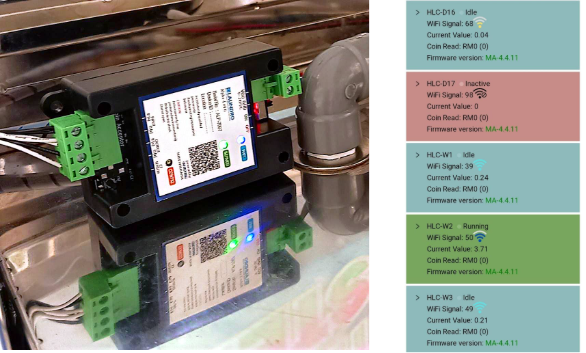
# Offline Device
**In a normal situation, the device status LED displays blue and green lights. \[as shown in the picture\]**
**Blue : Device / Machine idle & Ready to use Green : Device / Machine in use \[ Running \] Red : Device offline**
**However, there are situations where the device will go offline.**
**Possible Cause:**
**1. Internet connection error / WiFi signal lost.**
**If this situation occurs, what needs to be done is as follows.**
**Recommendation:**
1. **Check WiFi connectivity**
2. **You can check through CCTV if there’s one.**
3. **Restart modem/router. If connection okay**
4. **Restart device**
# Specific Case
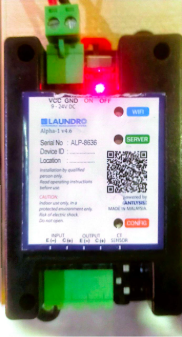
**1. Alpha-1 - Blue LED turns off and nothing happens for a long time.**
- **WiFi password was most likely keyed in wrongly. Wait for 10-15 mins until the blue LED starts blinking again.**
- **Reset the device with the power switch and check if the blue and green LED blinks twice. If not, the device has a firmware issue and needs to be replaced.**
******2. **Alpha-1 - Yellow LED blinks once then blue LED starts blinking again.********
- **“Outlet ID” keyed in was wrong. Check if outlet ID was keyed in correctly. (Case sensitive)**
- **Check if the config mode is enabled in the config page.**
**3. Alpha-1 - Red Light only turn on**
- Chip damage on the Alpha-1 board
**Recommendation:**
- **(It is recommended to replace the damaged Alpha-1 board if repair is not feasible.)**
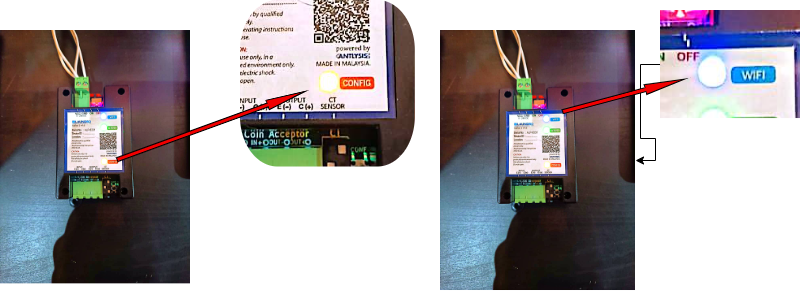
**4.** Fail to enter Web interface - WiFi service failure
- **Check WiFi connectivity**
- **Reset WiFi through the following steps:**
- **Turn off router**
- **Wait for 1 minute**
- **Turn on router**
# E-Payment Success But Machine Not Start / Display Not Deduct
**If this situation occurs, what needs to be done is:**
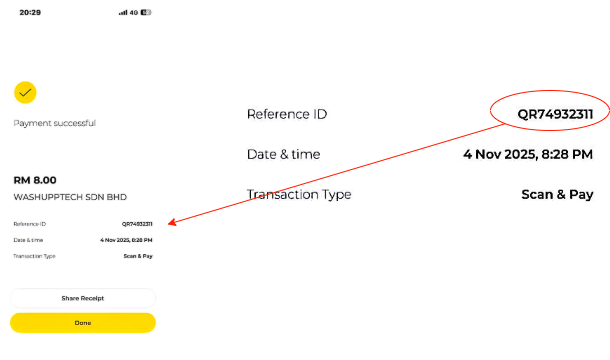
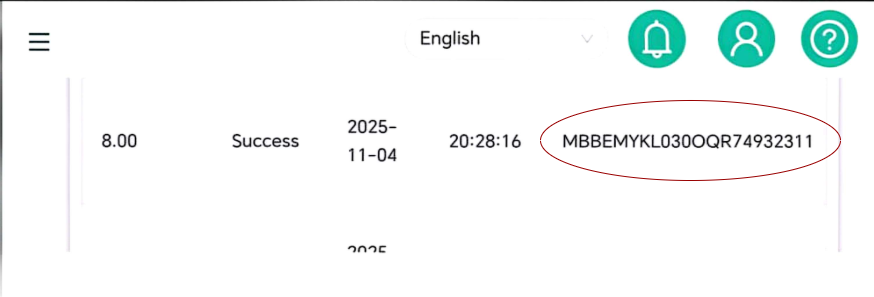
1. Obtain the **payment details**, such as the **receipt**, for the **E-Payment transaction.**
2. **Log in to the **operator dashboard**, then go to the **e-payment report & Fill in TransactionI'd****
3. **Fill in Transaction I'd**
Next, it will display the transaction status as either **“Successful”** or **“Failed.**
If the transaction shows **“Success,”** what needs to be done is:
- **Check the cable connection between coin acceptor to device.**
- **Ensure the device is in **online mode**.**