Payment Gateways
- PeGePay Ambank Duitnow
- HitPay
- Razer (Fiuu)
- RHB Duitnow
- Revenue Monster
- Duitnow Setup
- EGHL
- Ampersand
- Kiple
- Scan2pay
- 2C2P
- Pagbank
- Cybersource
PeGePay Ambank Duitnow
PeGePay Setup Guide
Login
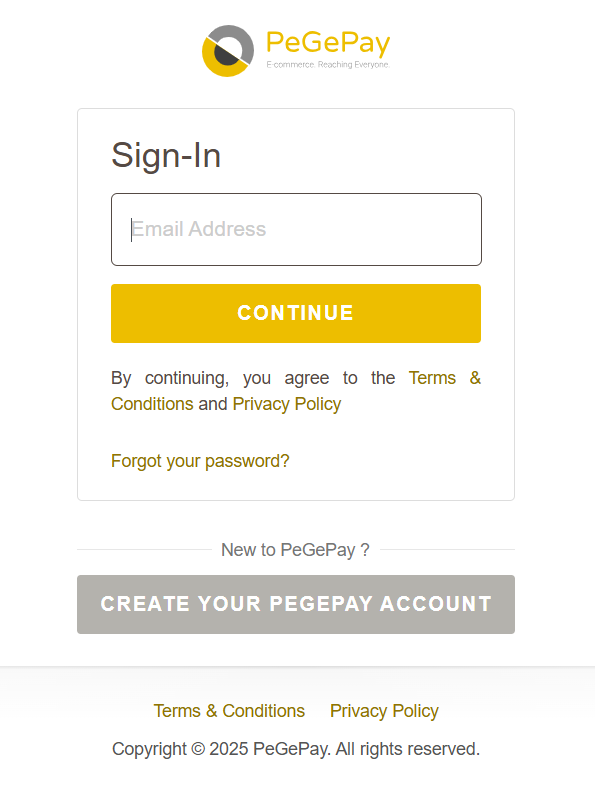
- Open URL PeGePay: https://pegepay.com/ Click LOGIN Button

- Enter email address and click CONTINUE button

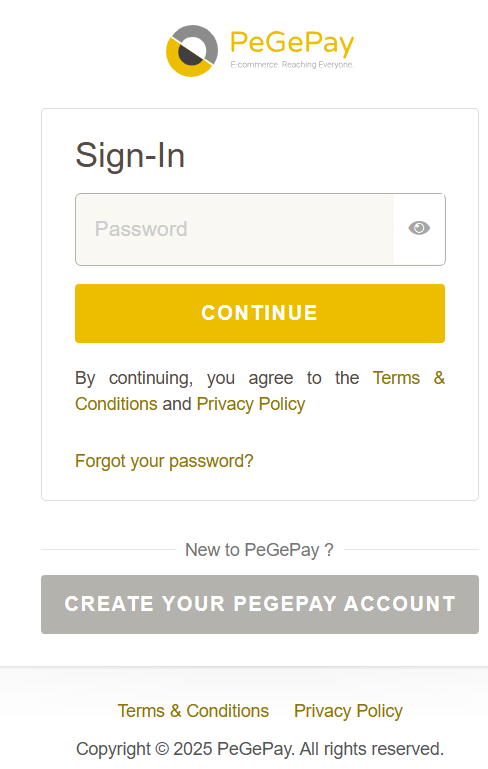
- Enter password and click CONTINUE button

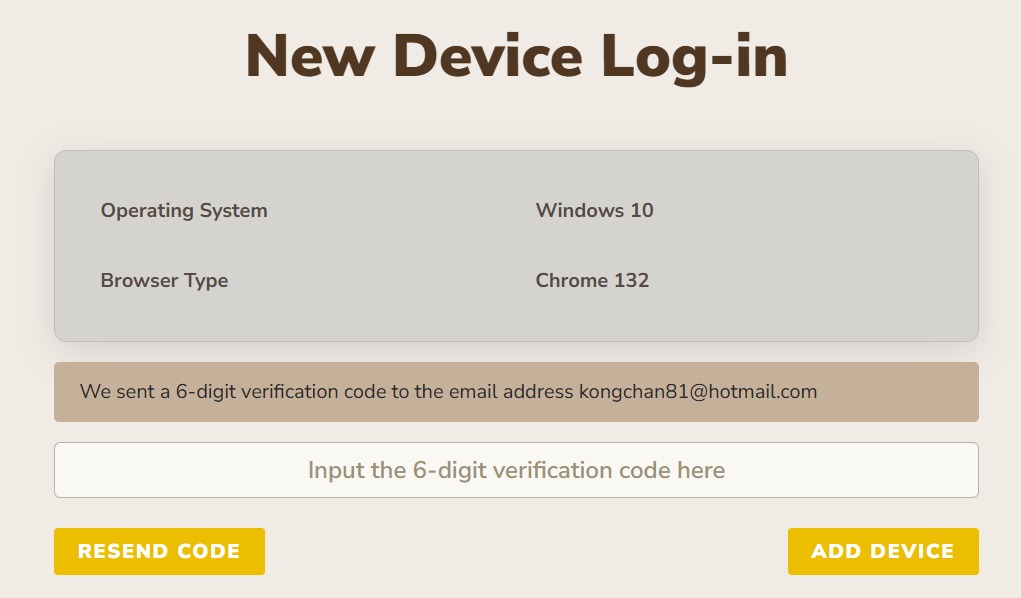
- Enter verification code and click ADD DEVICE button, if verification code expired, click RESEND CODE button

New Account Setup
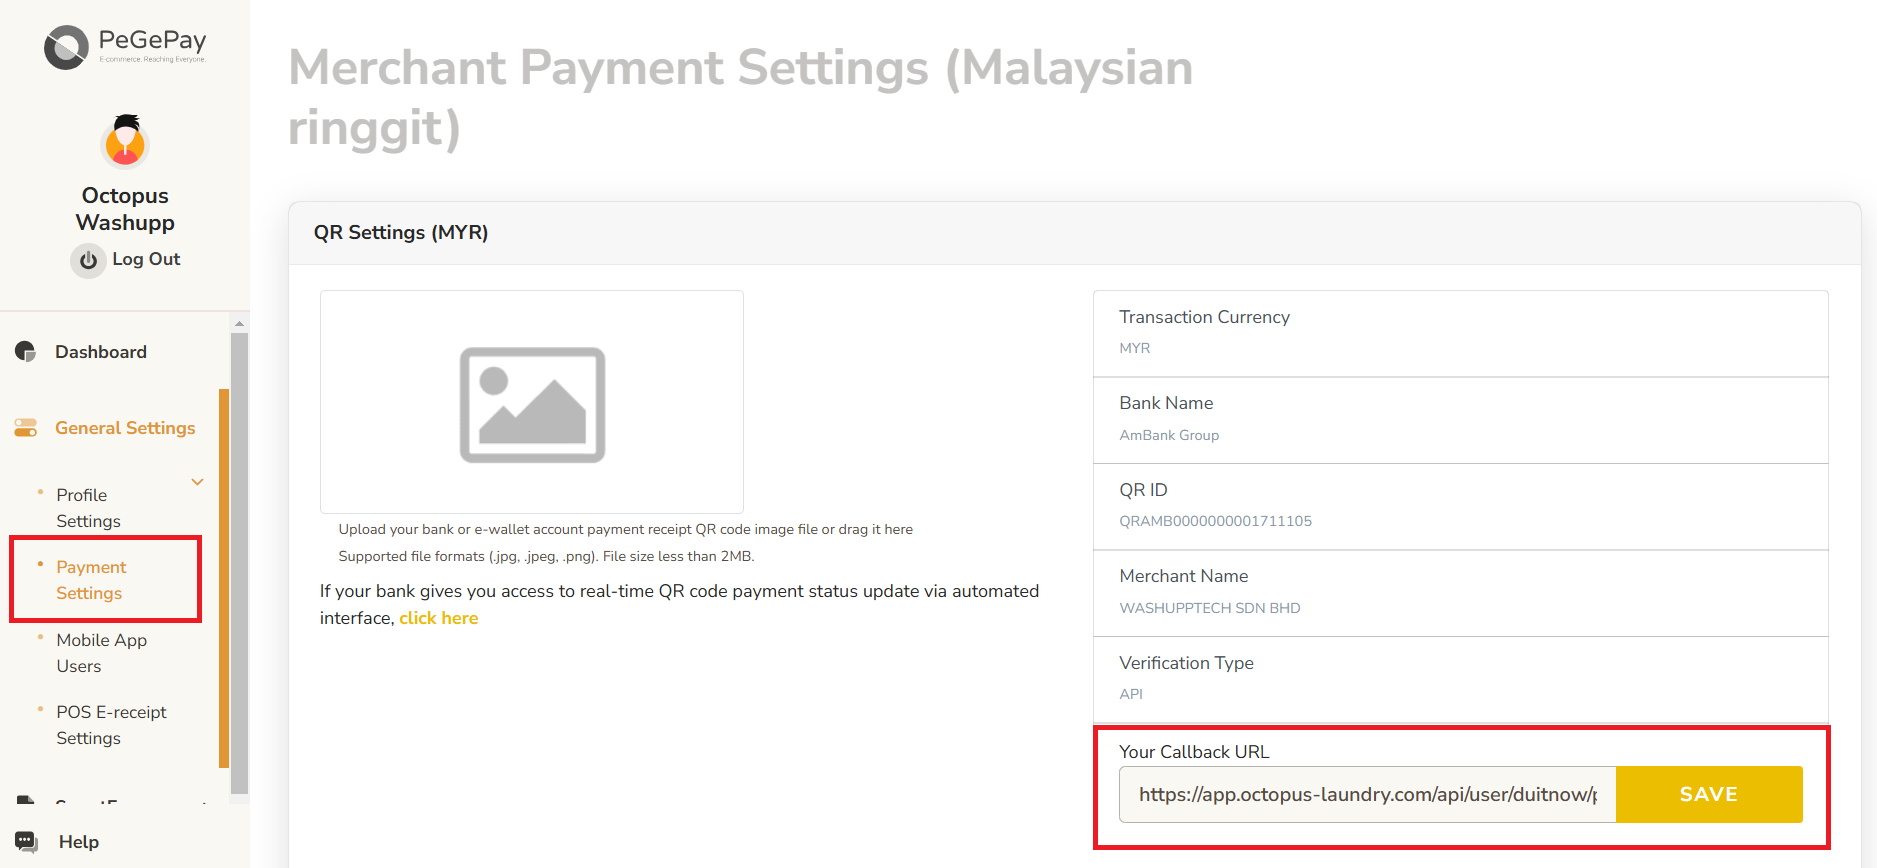
- If it is a new account, have to set callback URL. From sidebar, click General Settings, click Payment Settings, enter callback URL and click SAVE button.
Callback URL:https://payment-engine.antlysis.com/api/payment/duitnow/success

Generate QR Code
Dynamic QR Code
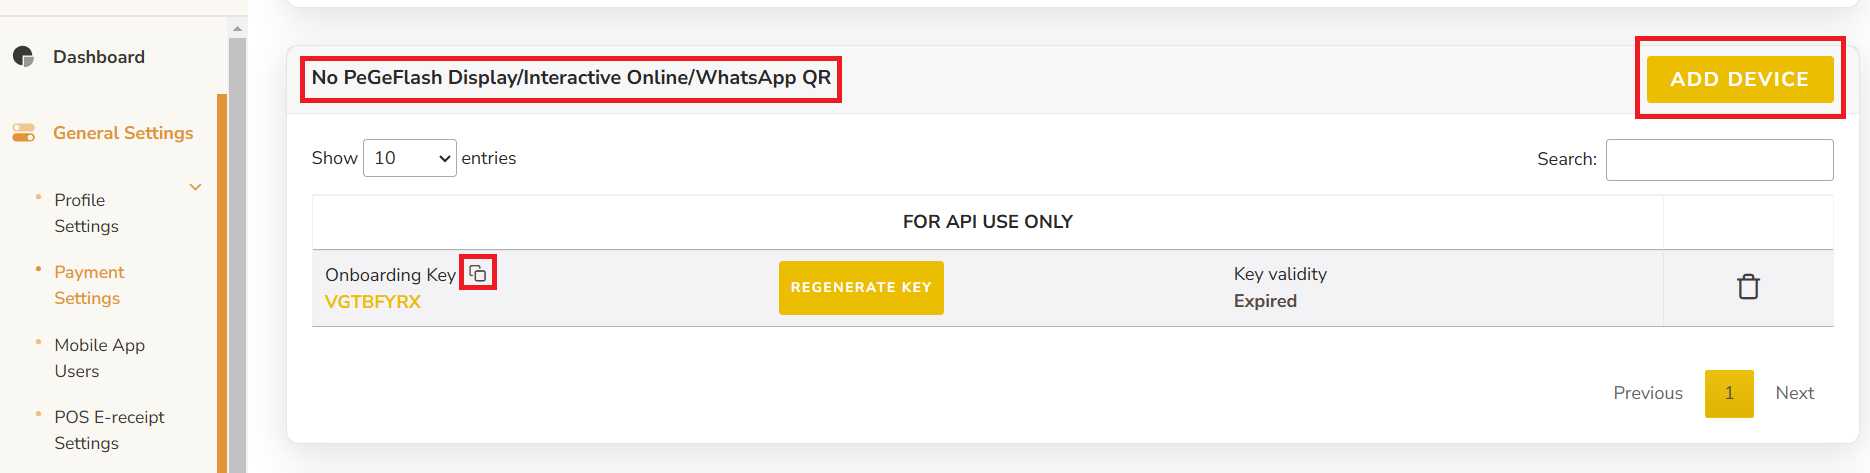
NOTE: if already setup dynamic QR code, when click REGENERATE KEY, all the old key will be expired and need to update to the latest key - From Sidebar, click General Settings, click Payment Settings, under No PeGeFlash Display/Interactive Online/WhatsApp QR, click ADD DEVICE button, then copy the Onboarding Key and paste into Laundro Portal

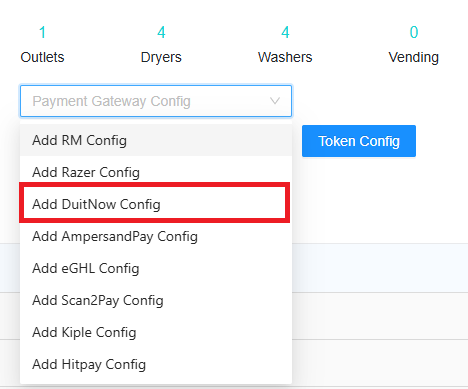
- In Laundro Portal, go to Settings Page, under Payment Gateway Config, select Add DuitNow Config

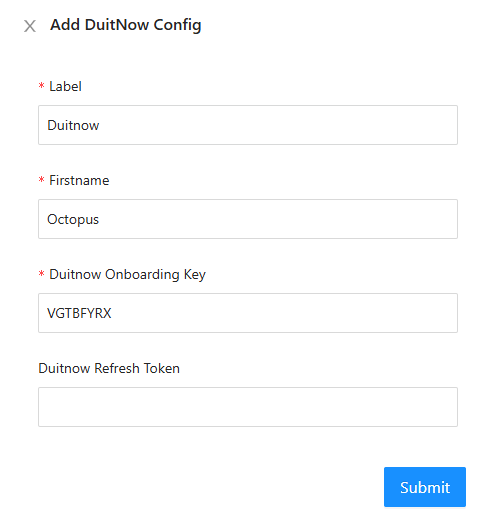
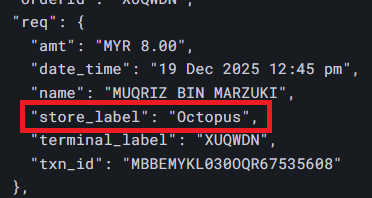
- Input Label, firstname and paste the Onboarding Key from PeGePay into Duitnow Onboarding Key input, then click Submit button. The Firstname have to same with the store_label in static Duitnow callback URL. If you want to use back the old Duitnow Refresh Token, you can just copy and paste in Duitnow Refresh Token input.


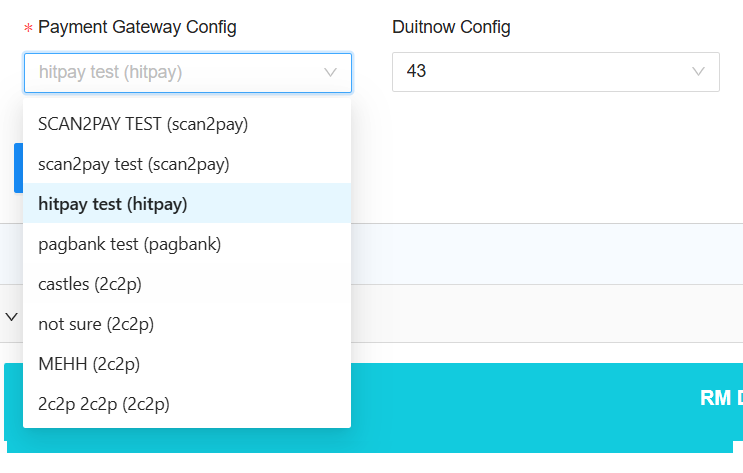
- To enable DuitNow in machine payment page in loyalty, in outlet settings page, under Duitnow Config, select the config and save

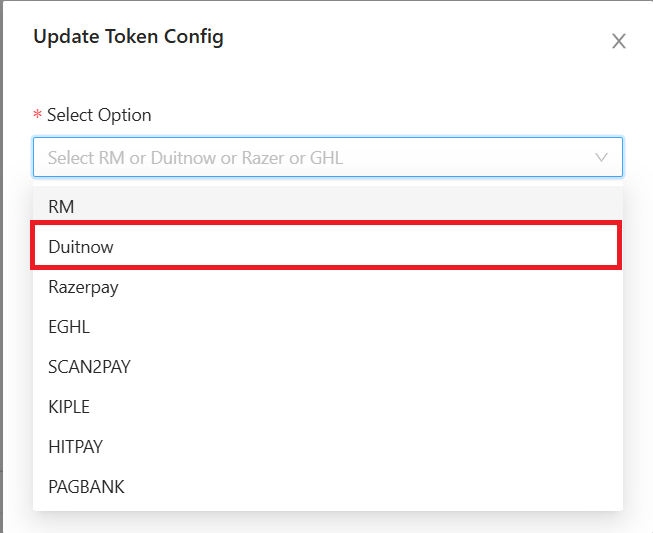
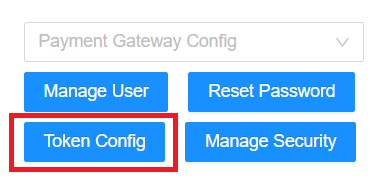
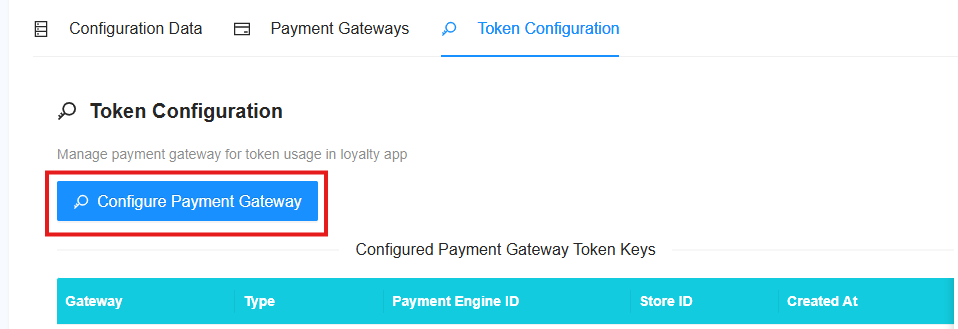
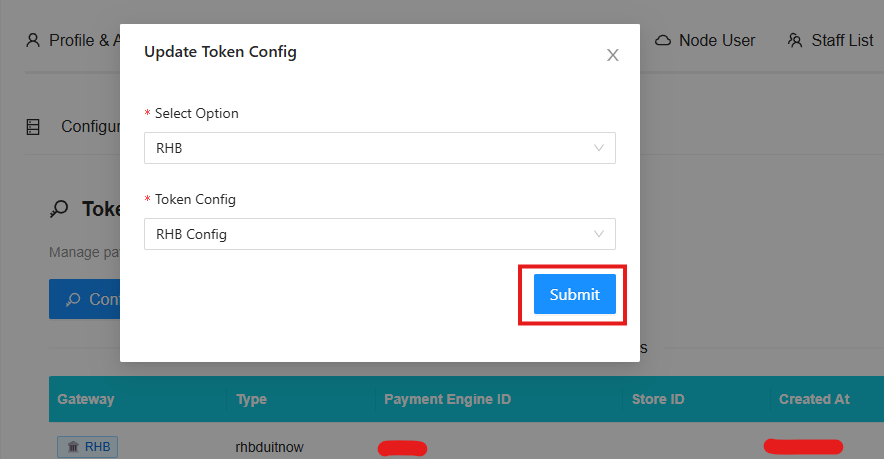
- To enable Duitnow for eToken reload in loyalty, click Token Config button

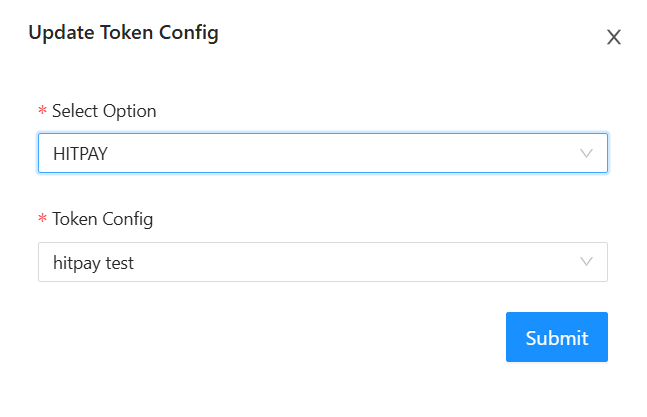
- Payment Gateway select Duitnow, and select the duitnow Config, then Submit button

Static QR Code
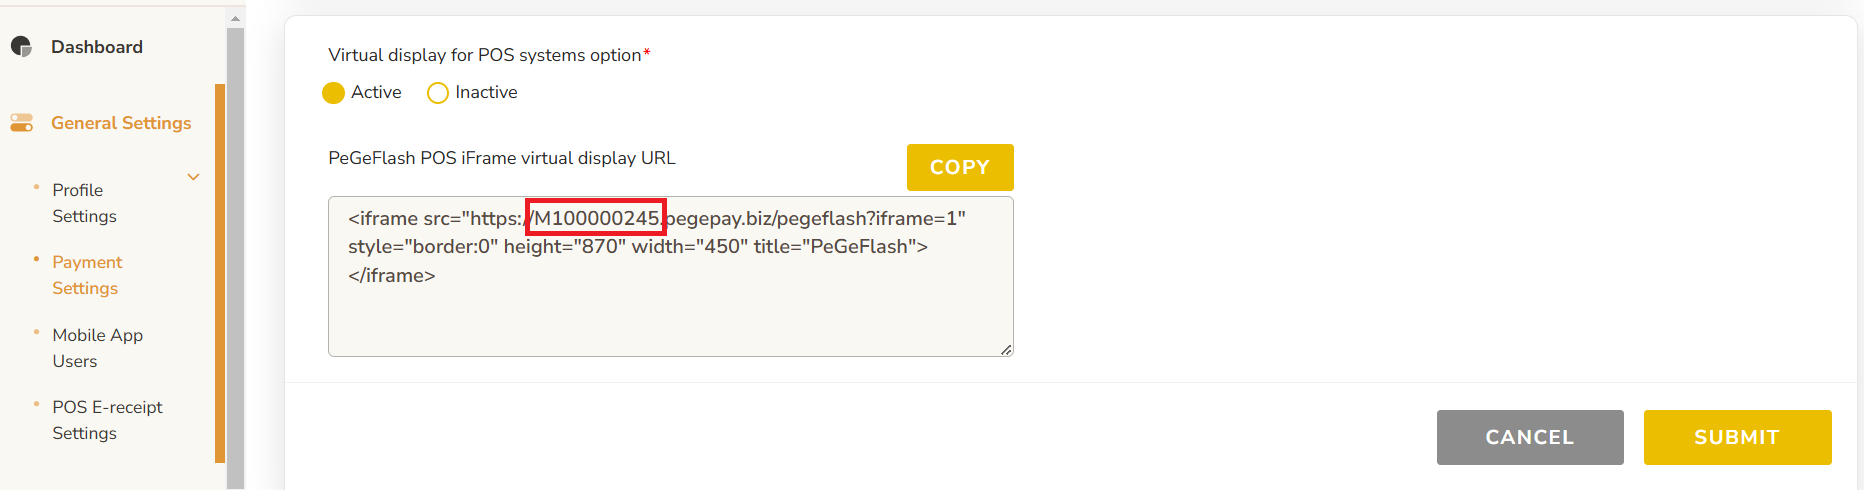
- You can get the static QR code from https://pegepay.com/iframe.php?merchant_id=<merchantID>, replace <merchantID> with PeGePay merchant ID

- To get the PeGePay Merchant ID, you can get from Payment Settings Page, for example, M100000245 is the merchant ID and you can open the url: https://pegepay.com/iframe.php?merchant_id=M100000245

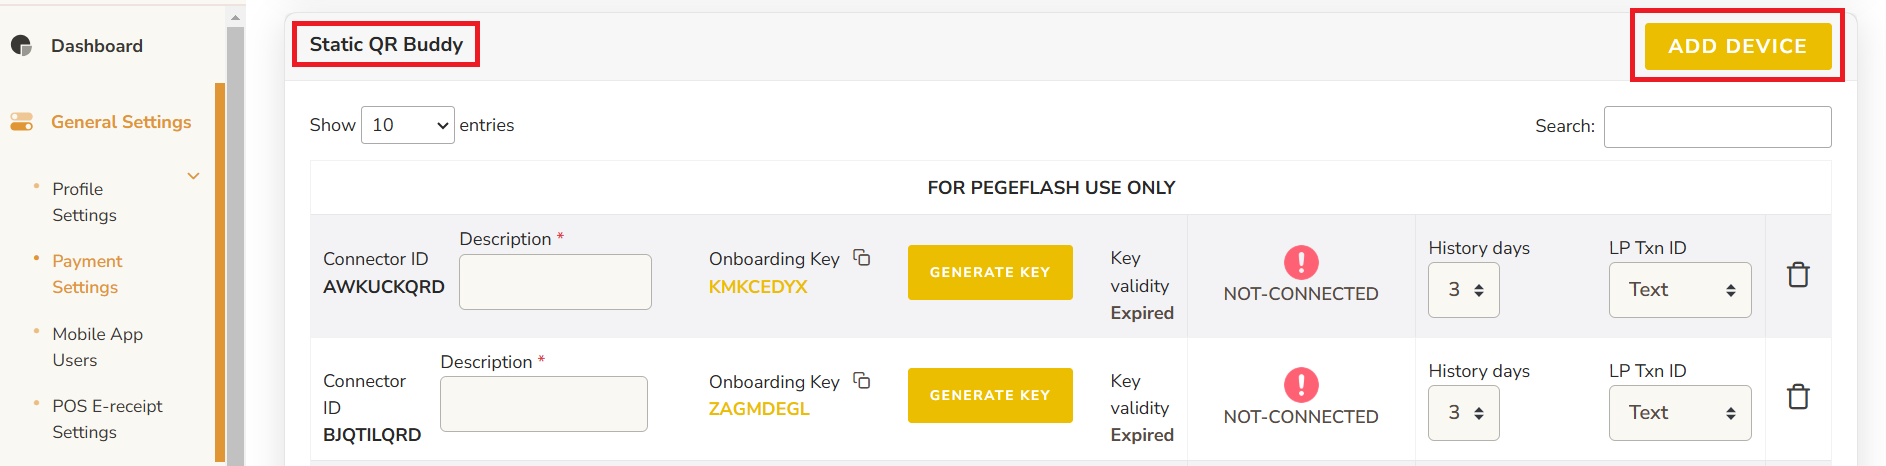
- From Payment Settings page, under Static QR Buddy, Click ADD DEVICE button

- Enter the description and click GENERATE KEY button
* The new connector ID will be empty Onboarding key and key validity, if already have onboarding key and key validity that is old connector ID

- Copy the Onboarding Key, the key expired time is showing on Key validity

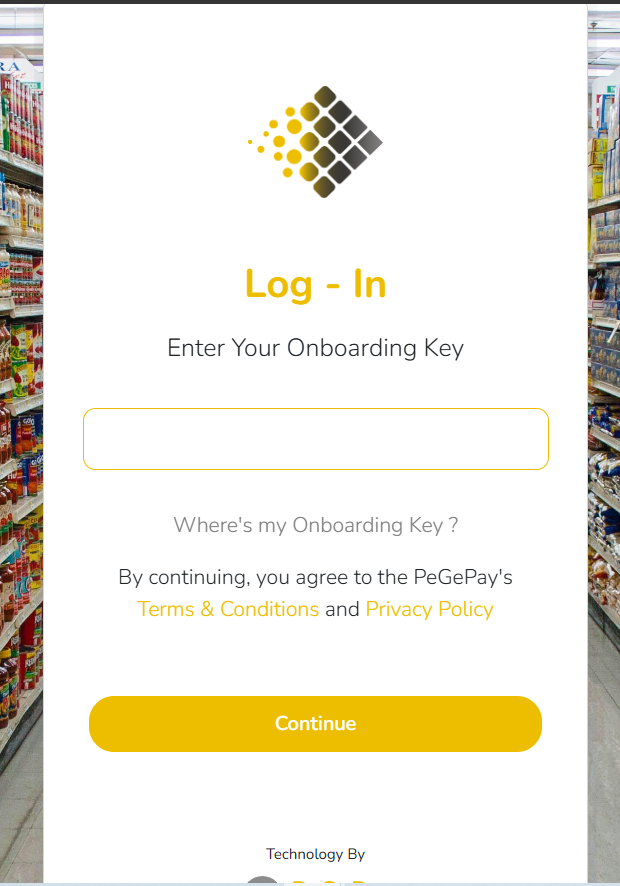
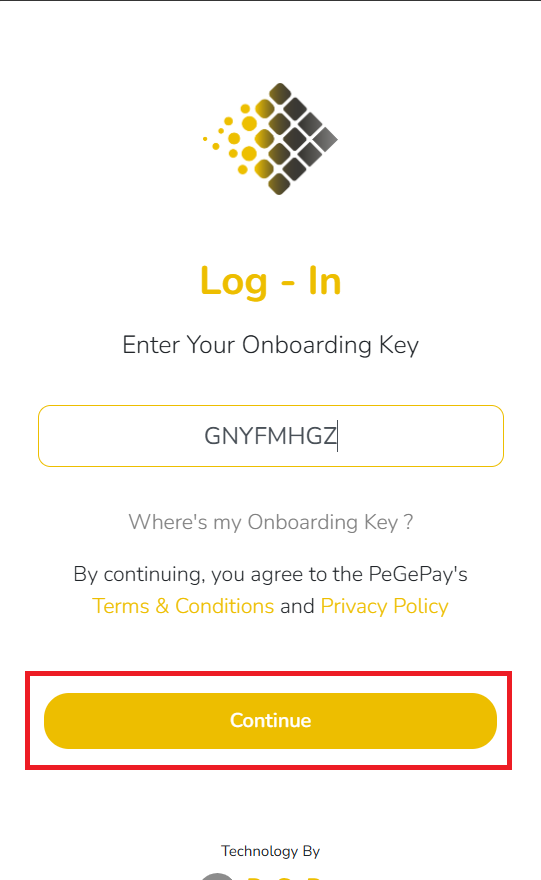
- Paste the Onboarding Key to static QR code page and click Continue button

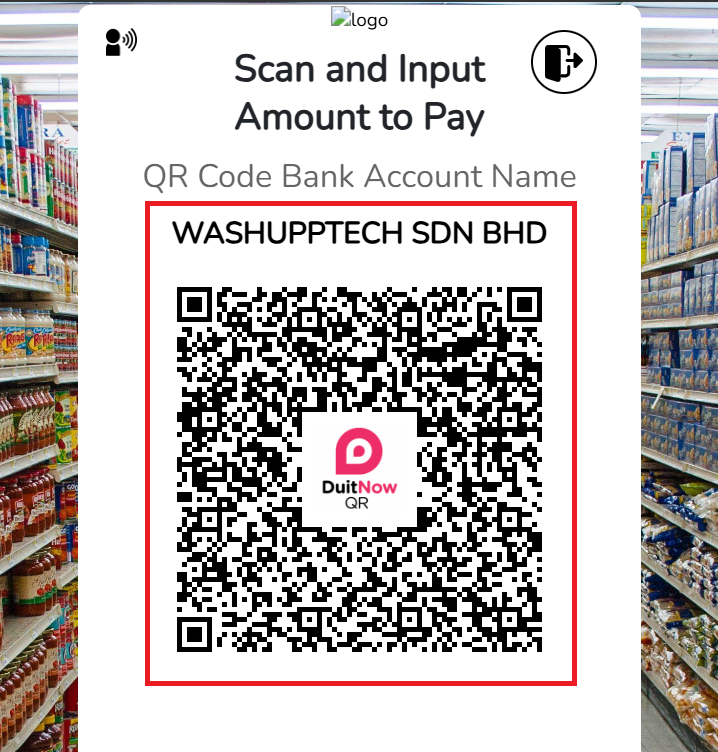
- The Static QR Code is showing, you can screenshot the QR code with the company name

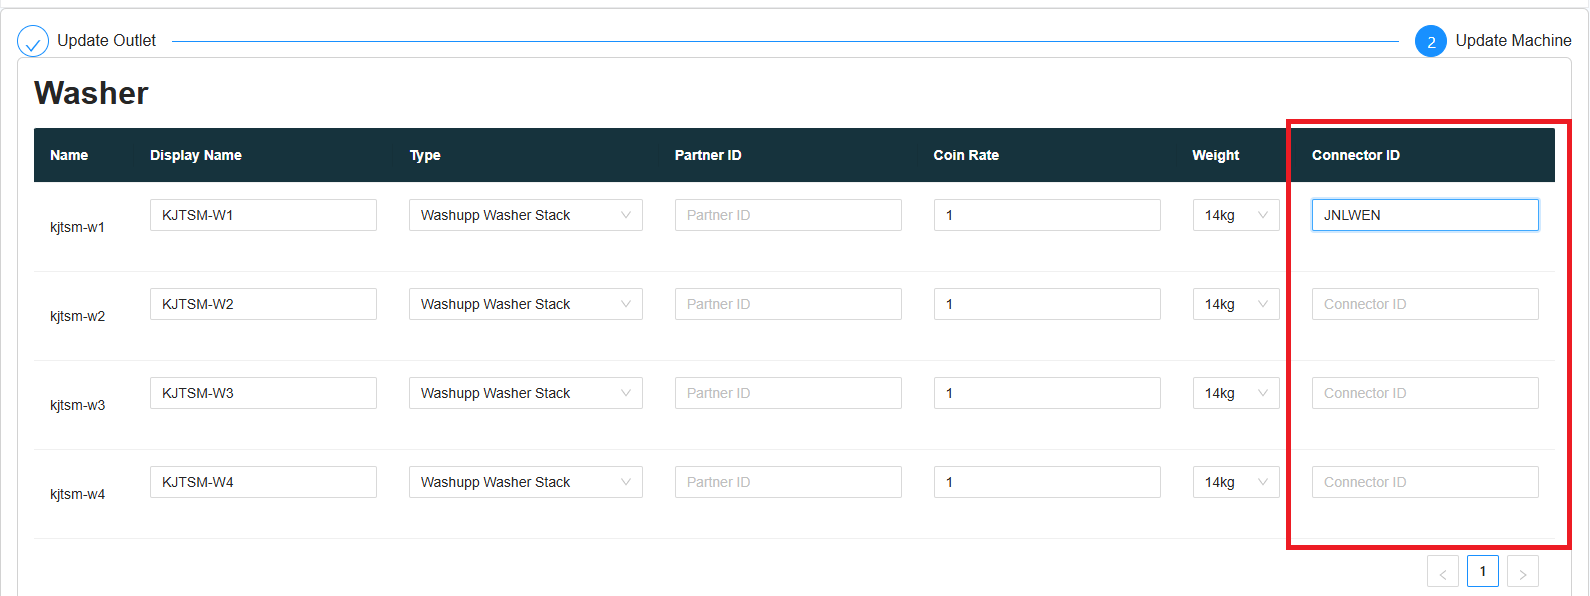
- When the static QR code is showing, it will show CONNECTED, copy the first 6 character of Connector ID and paste into Laundro Portal, no need to copy the last three character (QRD), QRD is stand for QR Display

- In Laundro Portal, in machine settings page, paste the Connector ID into the input and click save

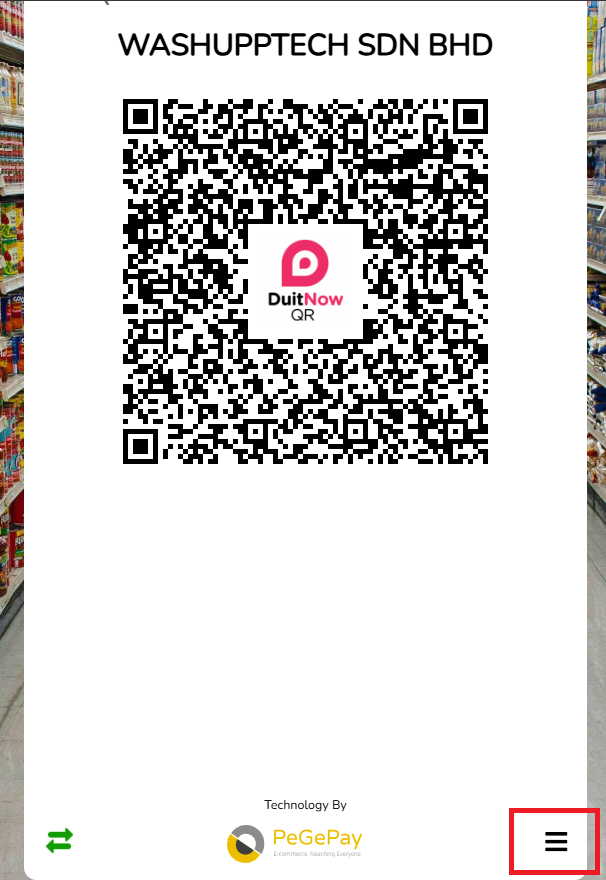
- To generate the second machine static QR code, you can click the icon at the bottom of the page

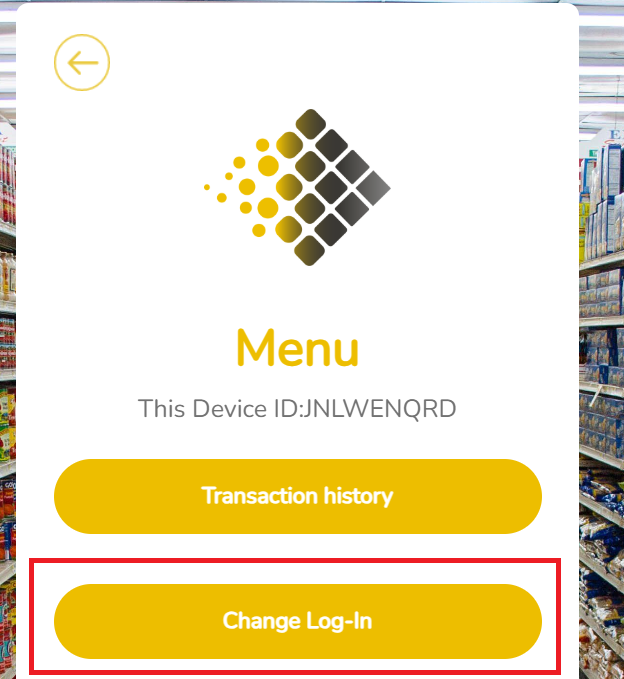
- Click the Change Log-In button to logout

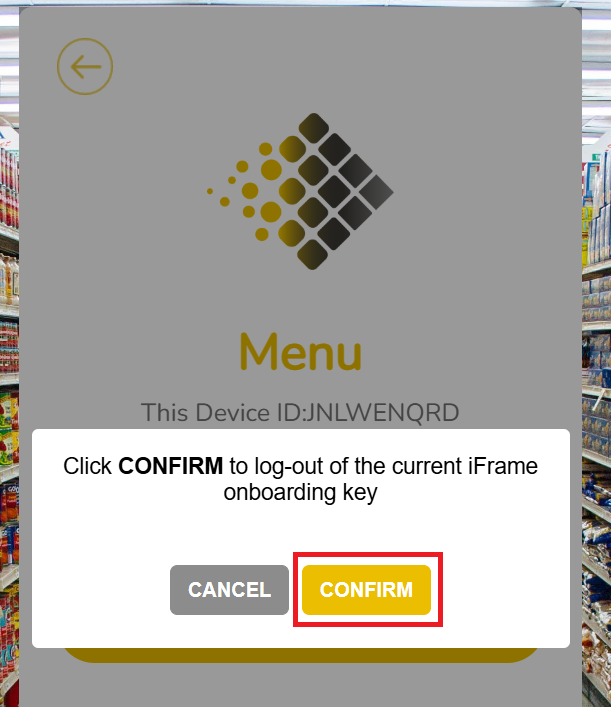
- Click CONFIRM button to confirm logout

- You can repeat the step to generate the static QR code for all the machine


Transaction Checking
Static QR Transaction
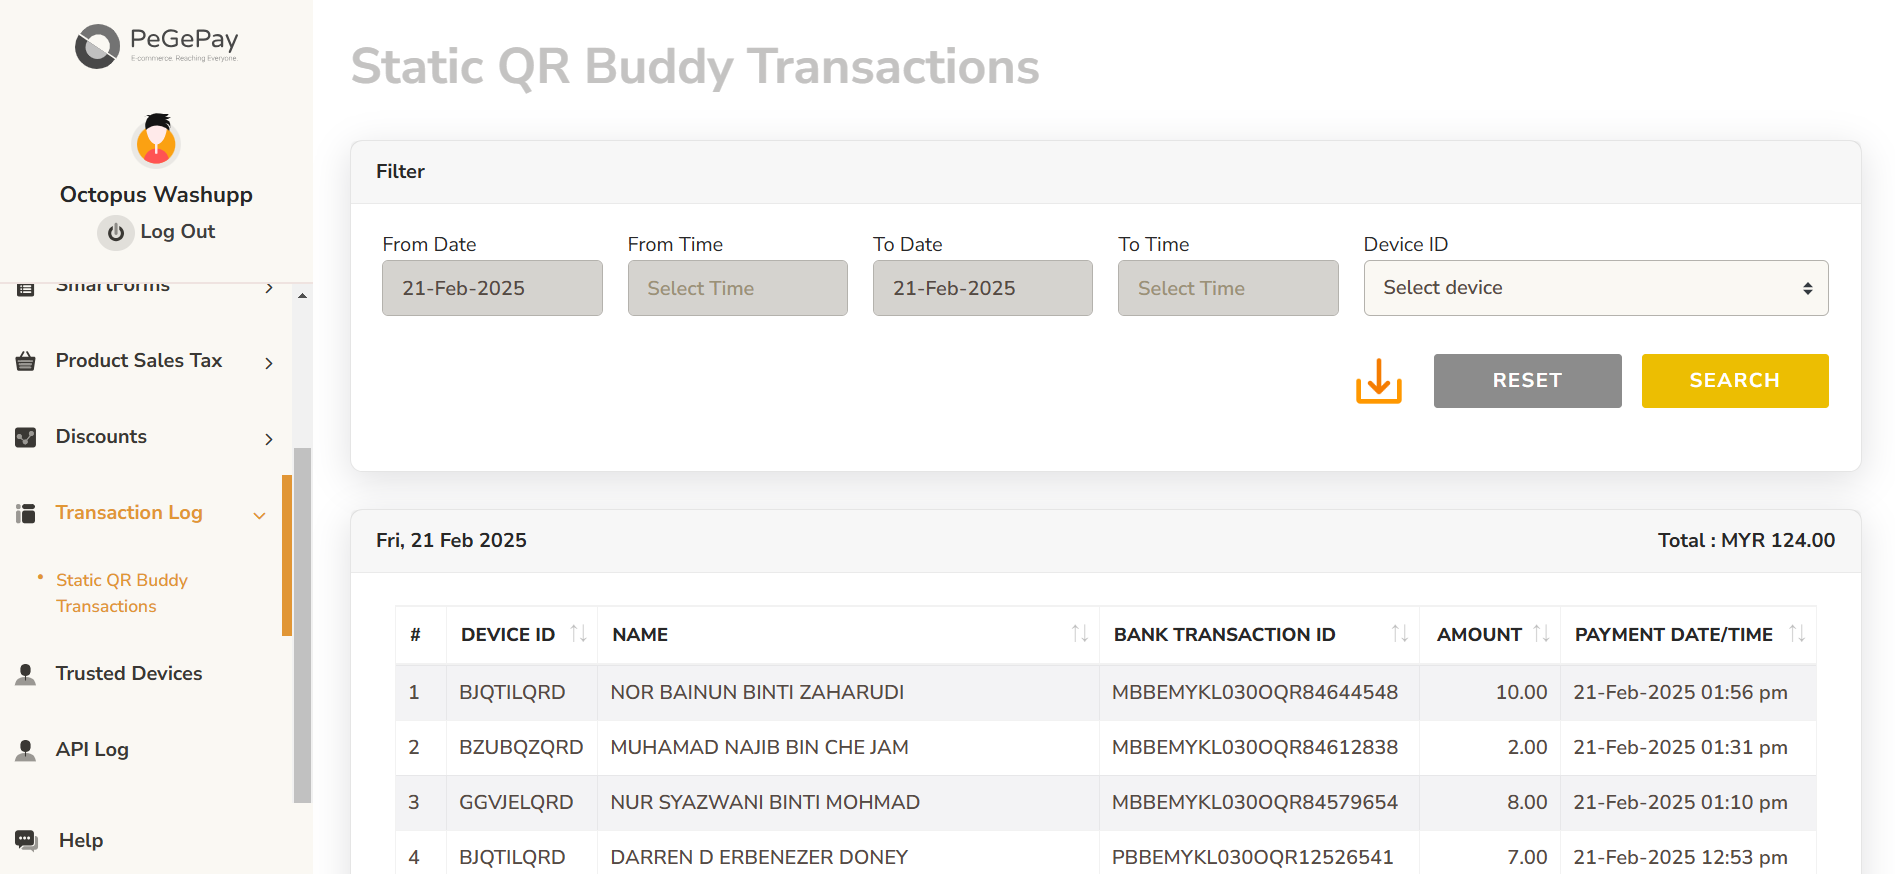
To check the static QR code transaction status, from sidebar, click Transaction Log, click Static QR Buddy Transactions
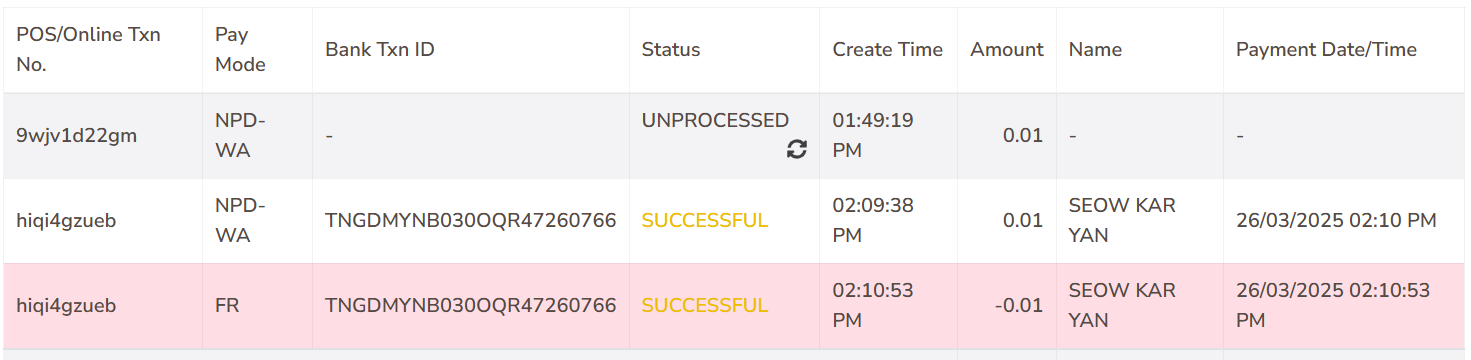
Dynamic QR Transaction
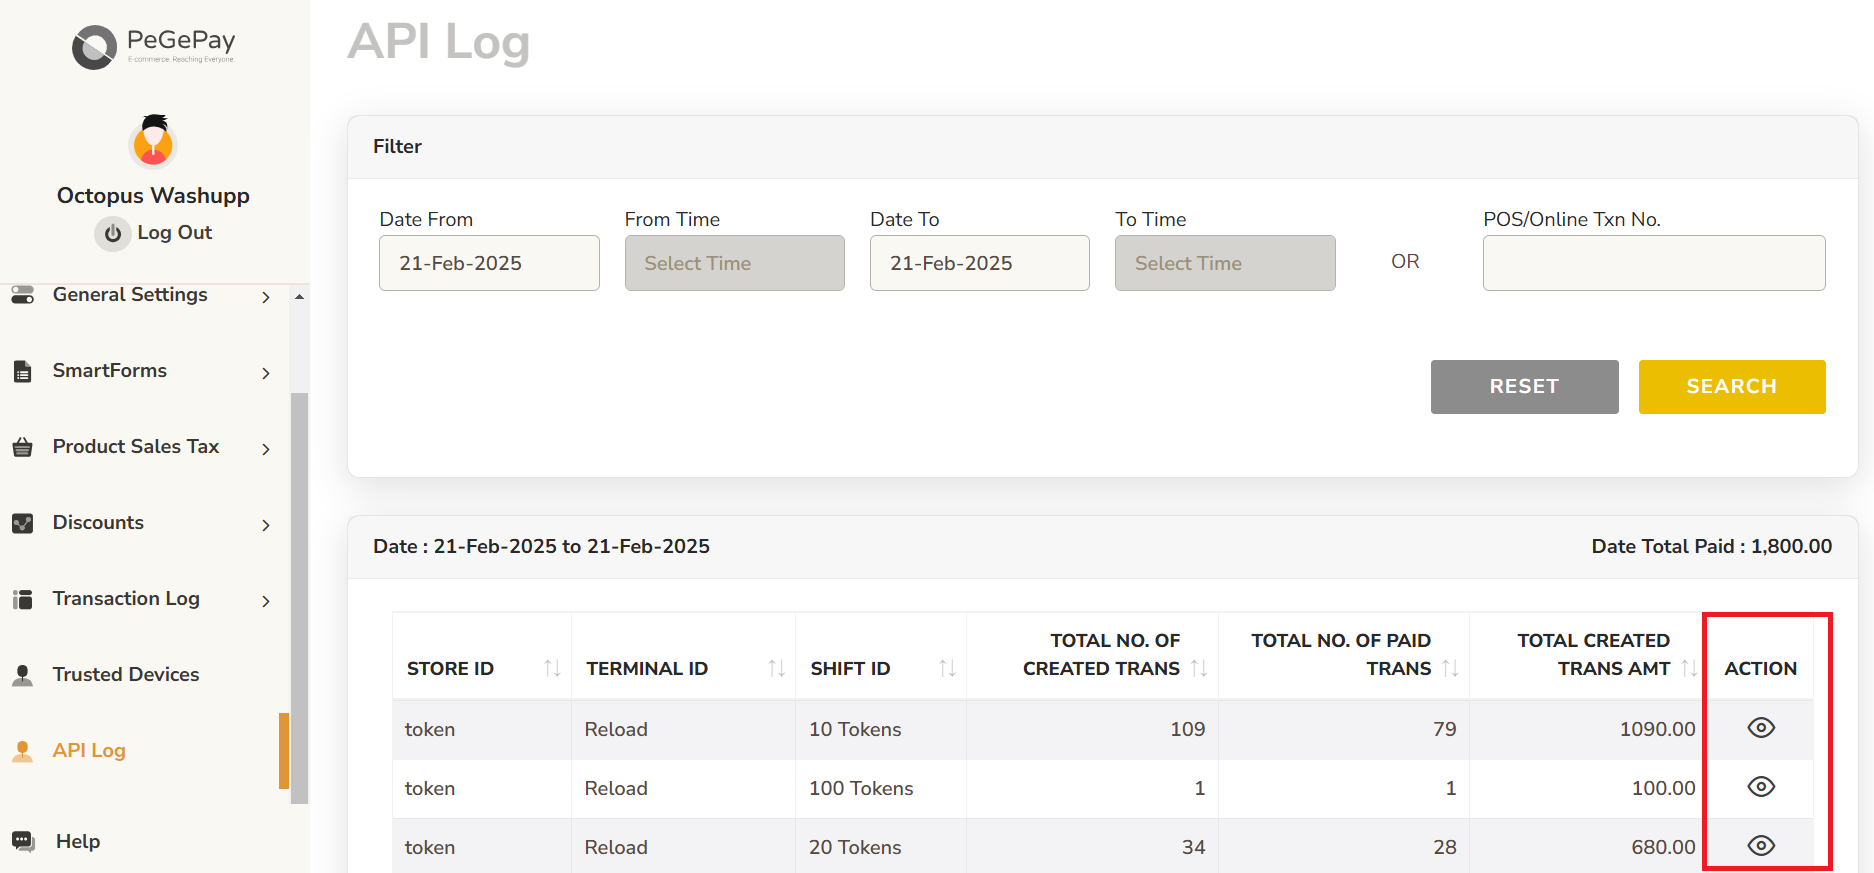
To check the dynamic QR code transaction, from sidebar, click API Log, you can click the icon to check for each transaction
There will be 3 status
UNPROCESSED: the QR code is generated but the user didn't make the payment
SUCCESSFUL (yellow): payment the successful
SUCCESSFUL (red): payment duplicated, the user using the same QR code to pay 2 times

If the Pay Mode is FR and the Amount is negative, this transaction is refunded
HitPay
HitPay Setup Guide
Login
Open HitPay Portal URL: https://dashboard.hit-pay.com/login . Enter the email and password to login 
Config Setup
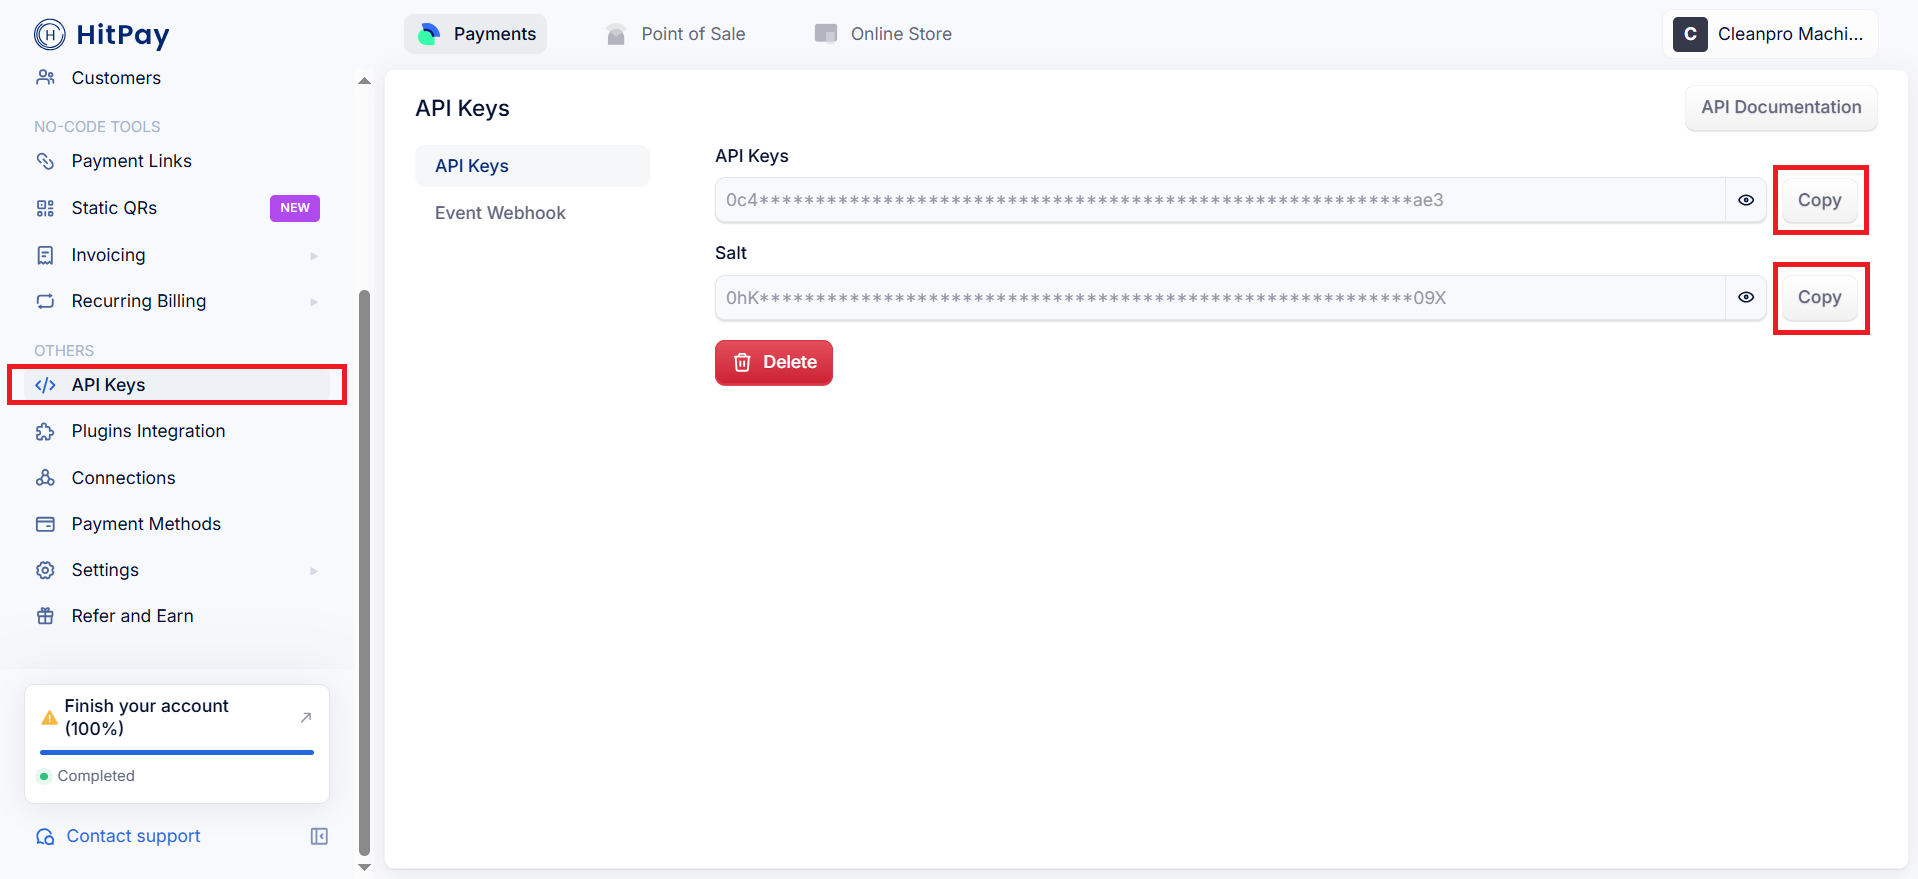
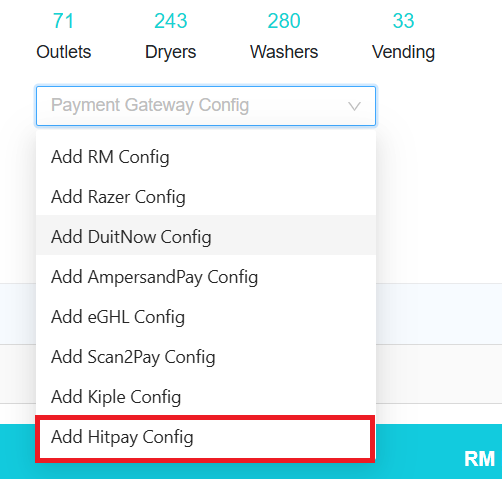
In Laundro Portal, go to Settings Page, under Payment Gateway Config, select Add Hitpay Config
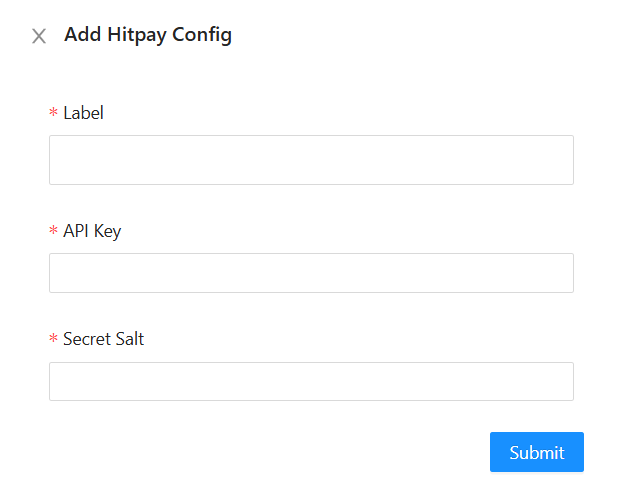
Enter the label, paste the API Key and salt from the HitPay Portal, then click Submit button
To enable HitPay in machine payment page in loyalty, in outlet settings page, under Payment Gateway Config, select the config and save
To enable HitPay for eToken reload in loyalty, click Token Config button
Payment Gateway select HitPay, and select the HitPay Config, then Submit button
Razer (Fiuu)
Fiuu Setup Guide
Login
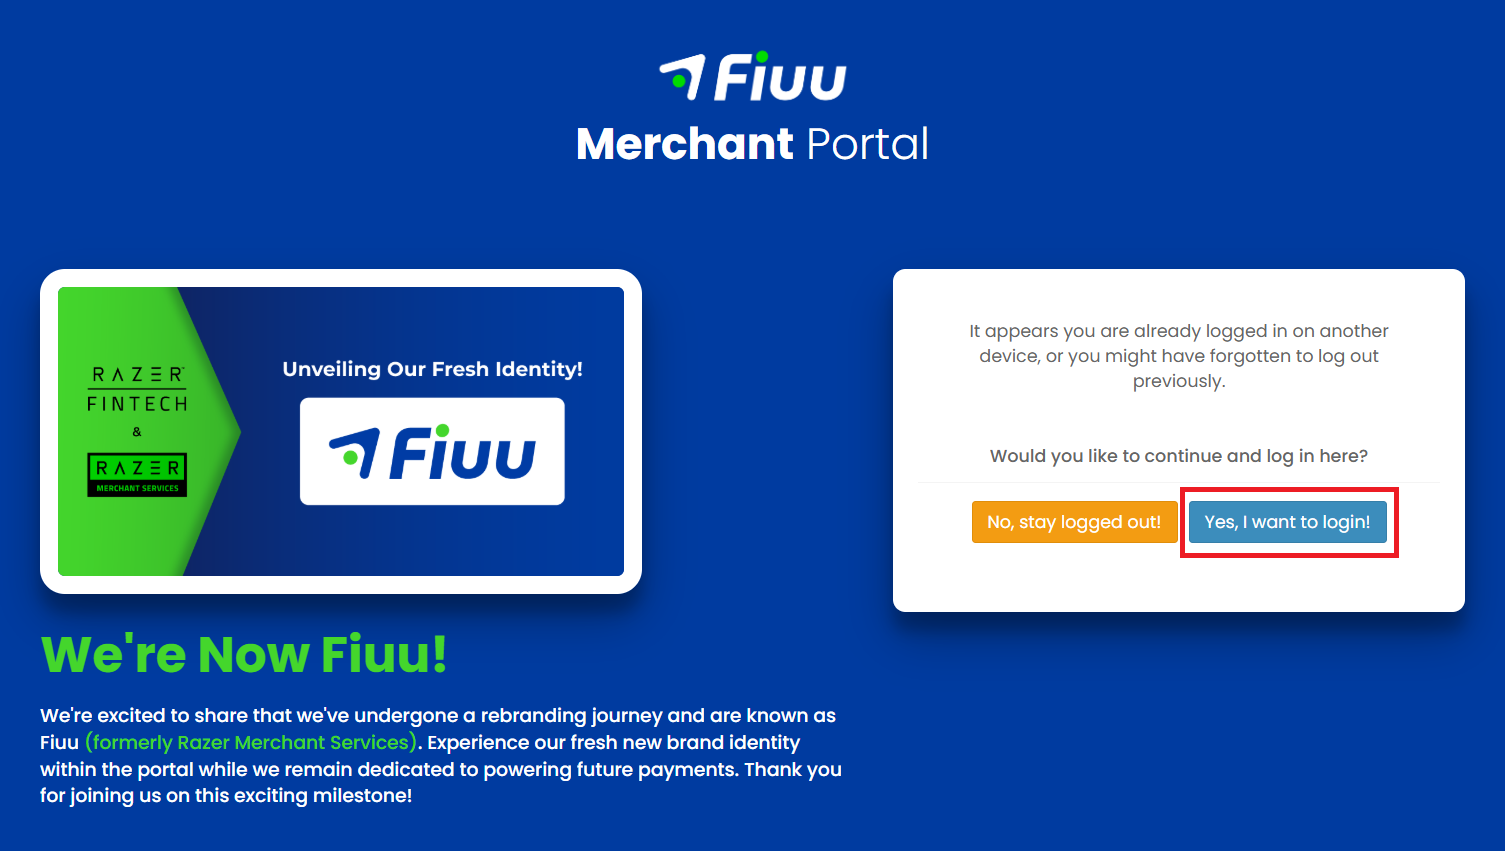
1) Open Fiuu Portal URL: https://portal.fiuu.com/index.php?mod=authentication&opt=login . Enter Merchant ID, email and password to Login
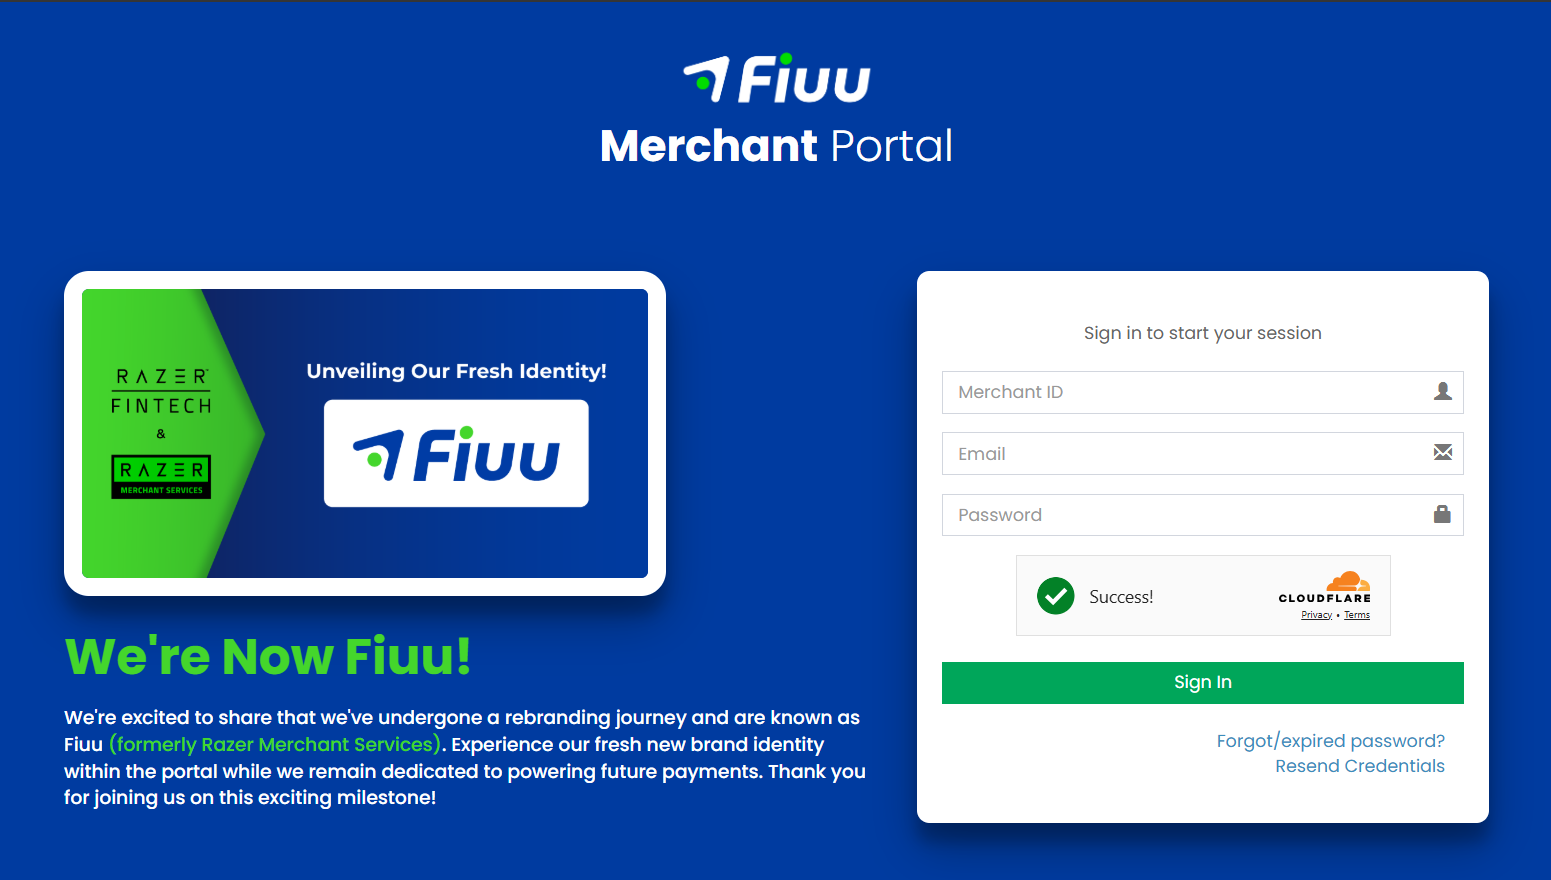
2) Select Yes, I want to login!
─────────────────────────────
New Account Setup
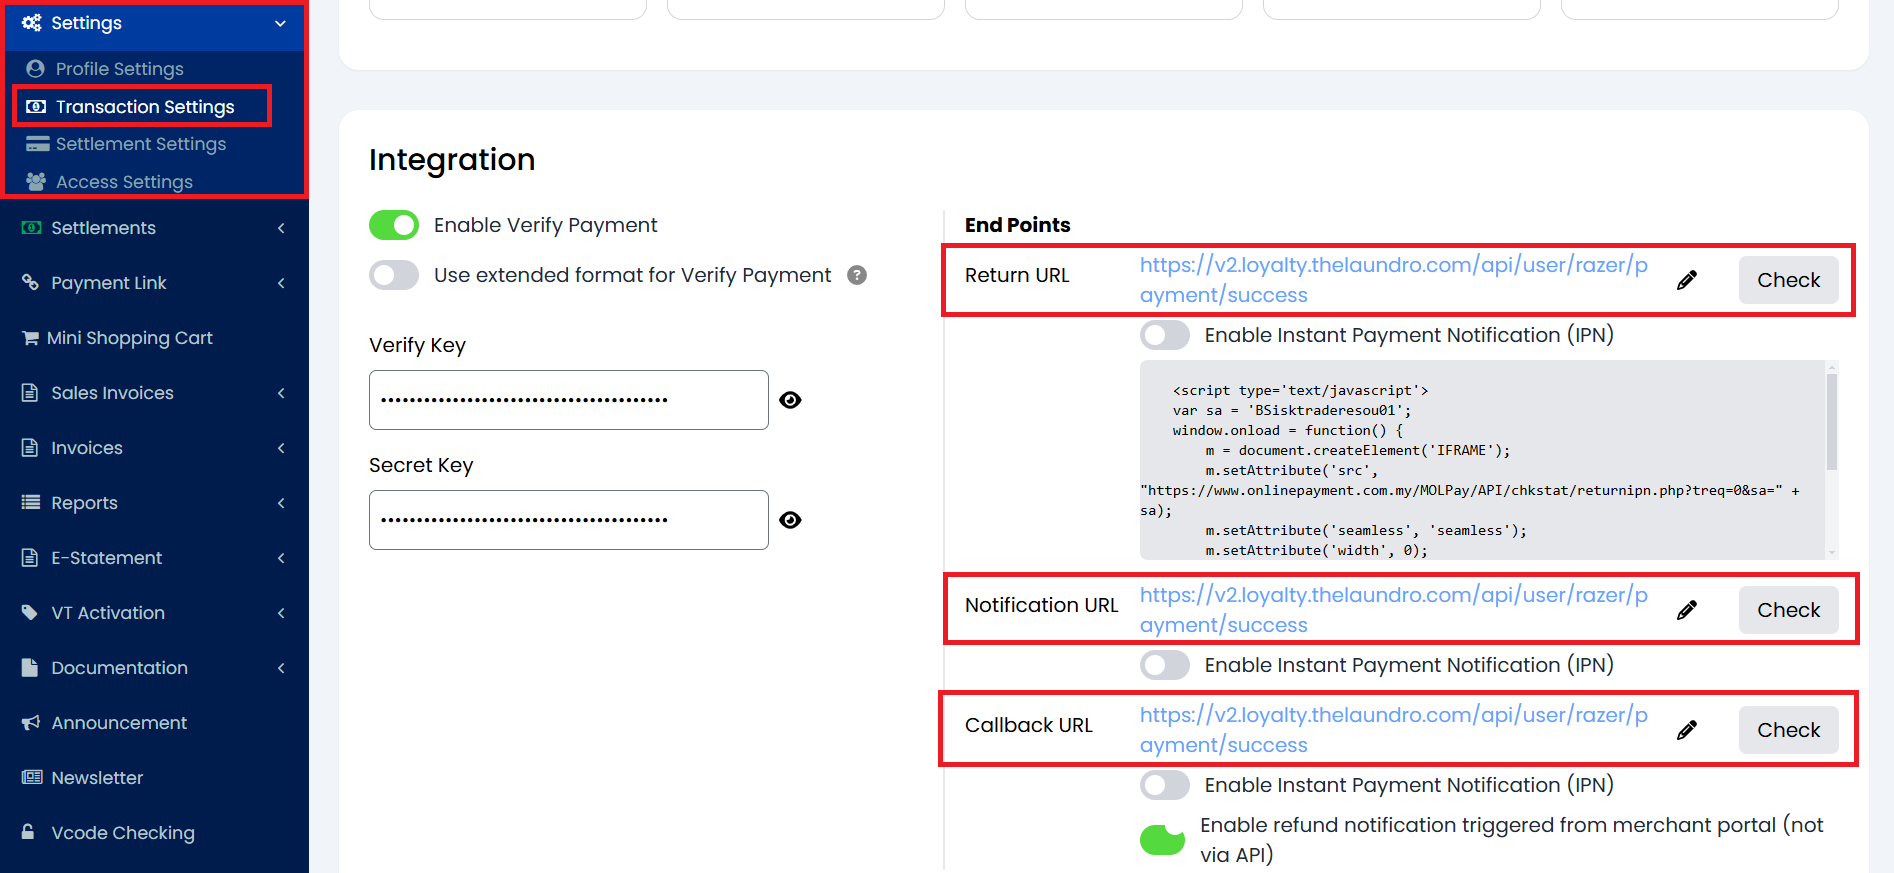
1) If it is a new account, have to set Return URL, Notification URL, and Callback URL. From Sidebar, under Transactions, select Settings, enter the URL
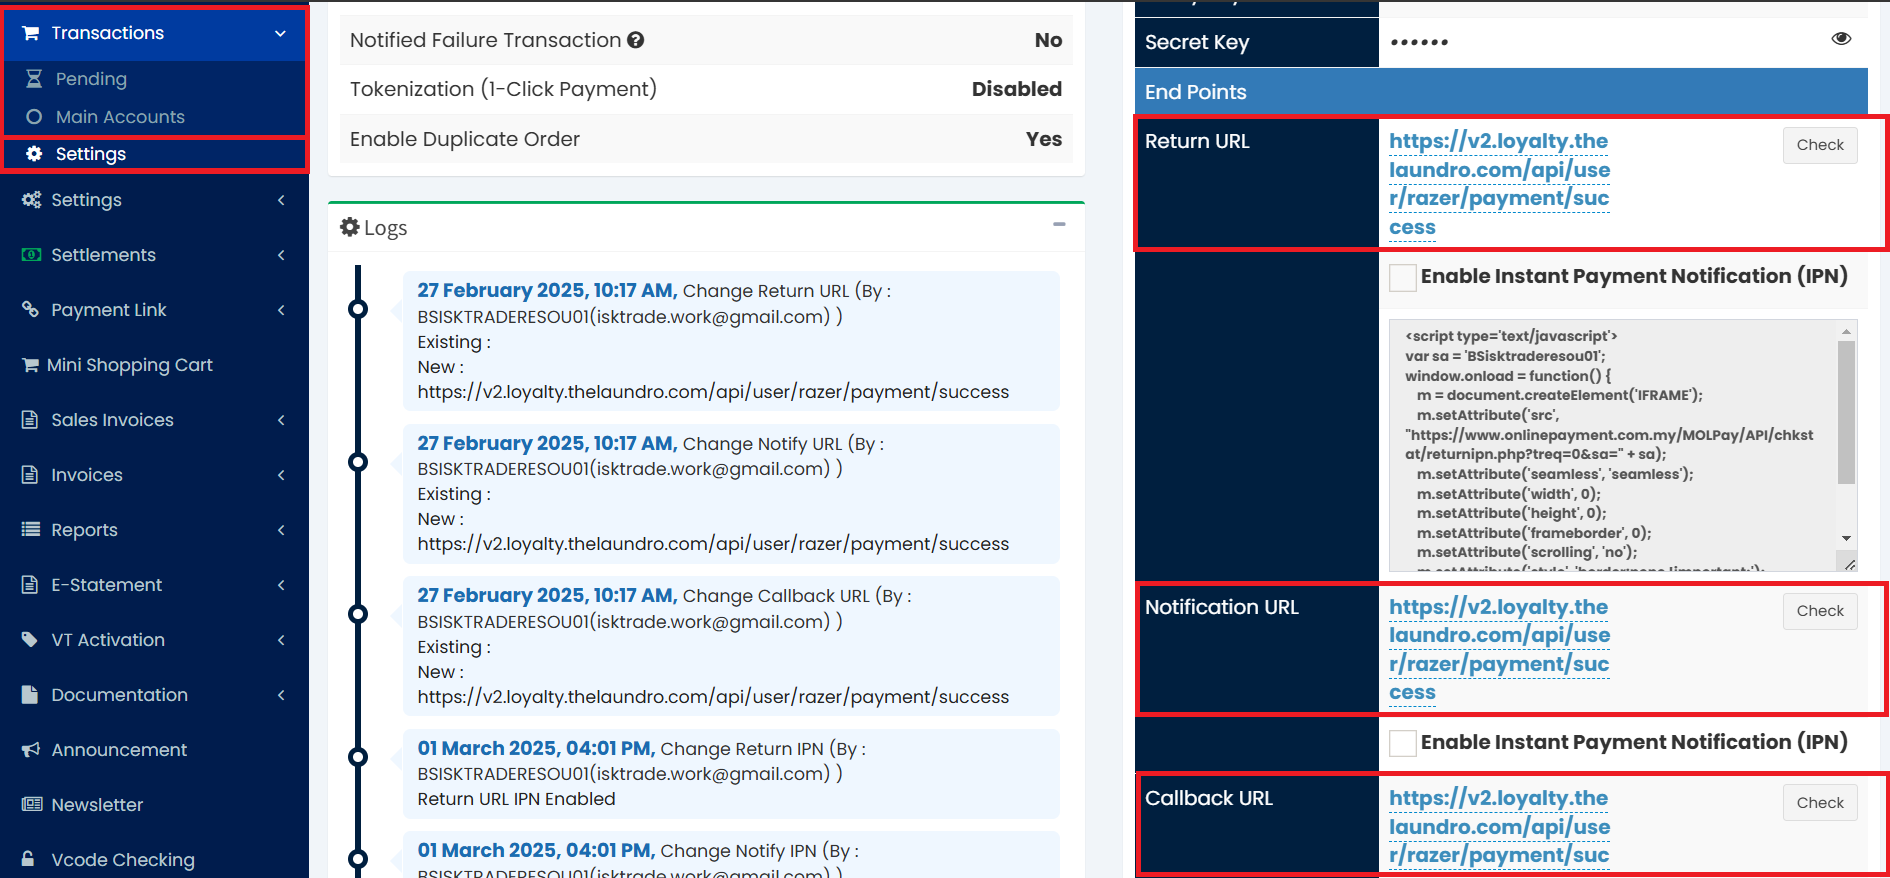
Return URL, Notification URL and Callback URL:
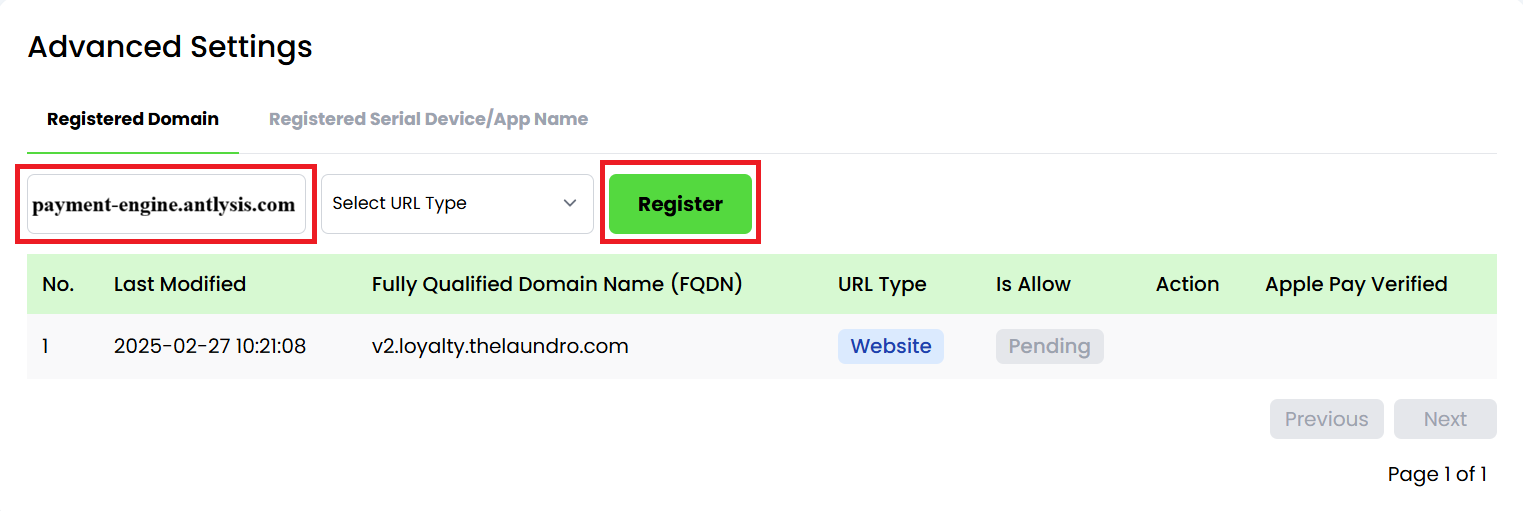
3) To register the domain, from sidebar, under Settings select Profile Settings
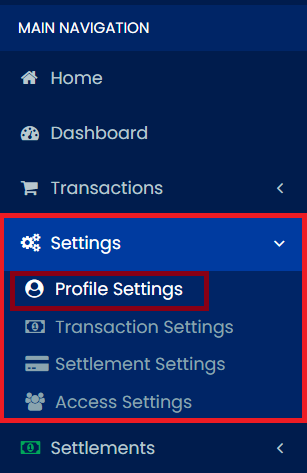
4) Enter the domain name (payment-engine.antlysis.com) and click Register button
─────────────────────────────
Config Setup
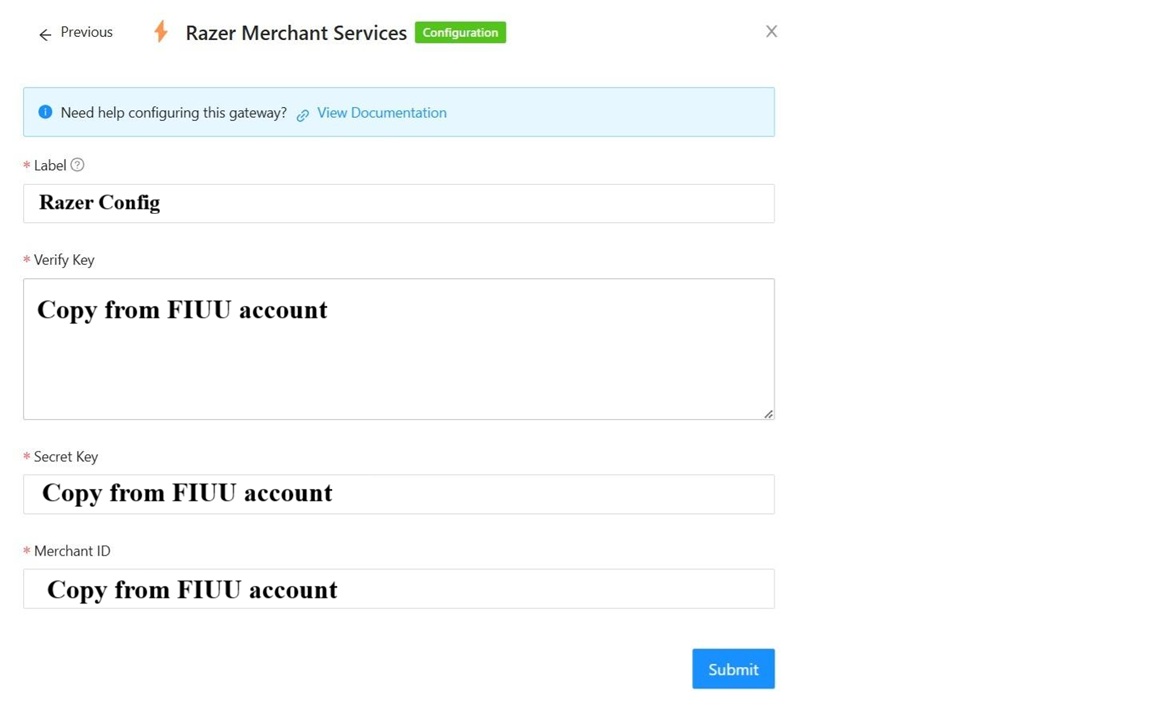
2) In Laundro Portal, go to Settings Page, under Payment Gateway Config, select Add Razer Config
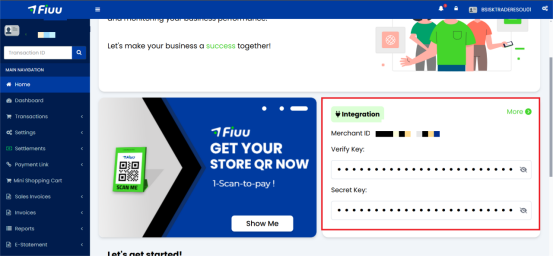
3) Enter the Label, paste the Merchant ID, Verify Key and Secret Key, then click Submit button

4) Enter the Label, paste the Merchant ID, Verify Key and Secret Key, then click Submit button.
5) To enable Fiuu in machine payment (static DuitNow and ewallet), in outlet settings page, under Payment Gateway Config, select the token config.
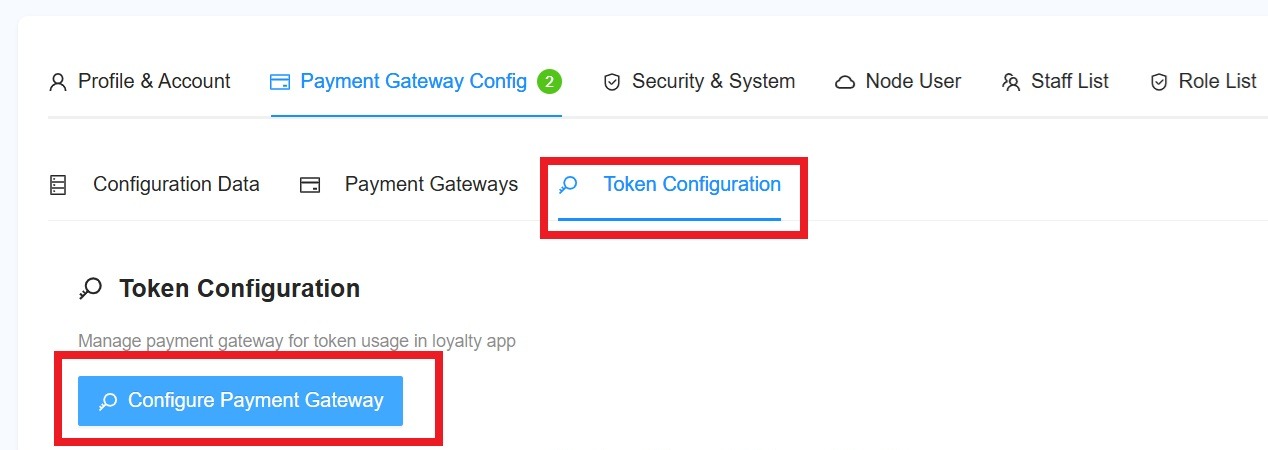
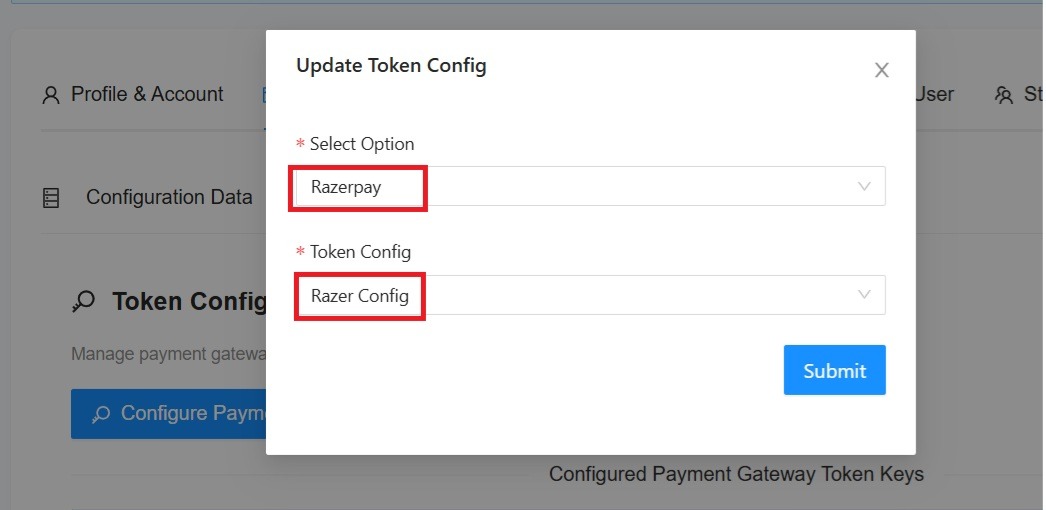
6) Payment Gateway select Razerpay, and select the Razer Config, then click Submit button.
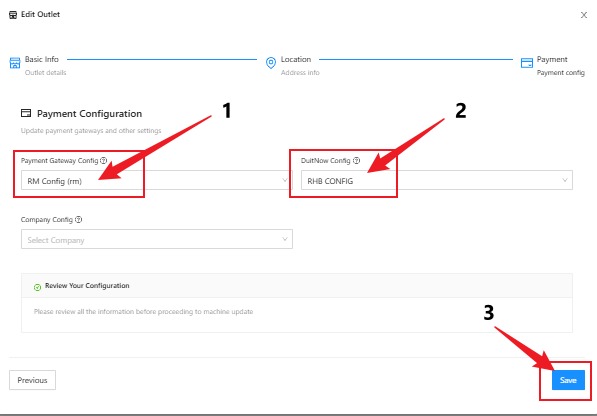
7) To complete this process, the outlet details need to be updated in the payment configuration.
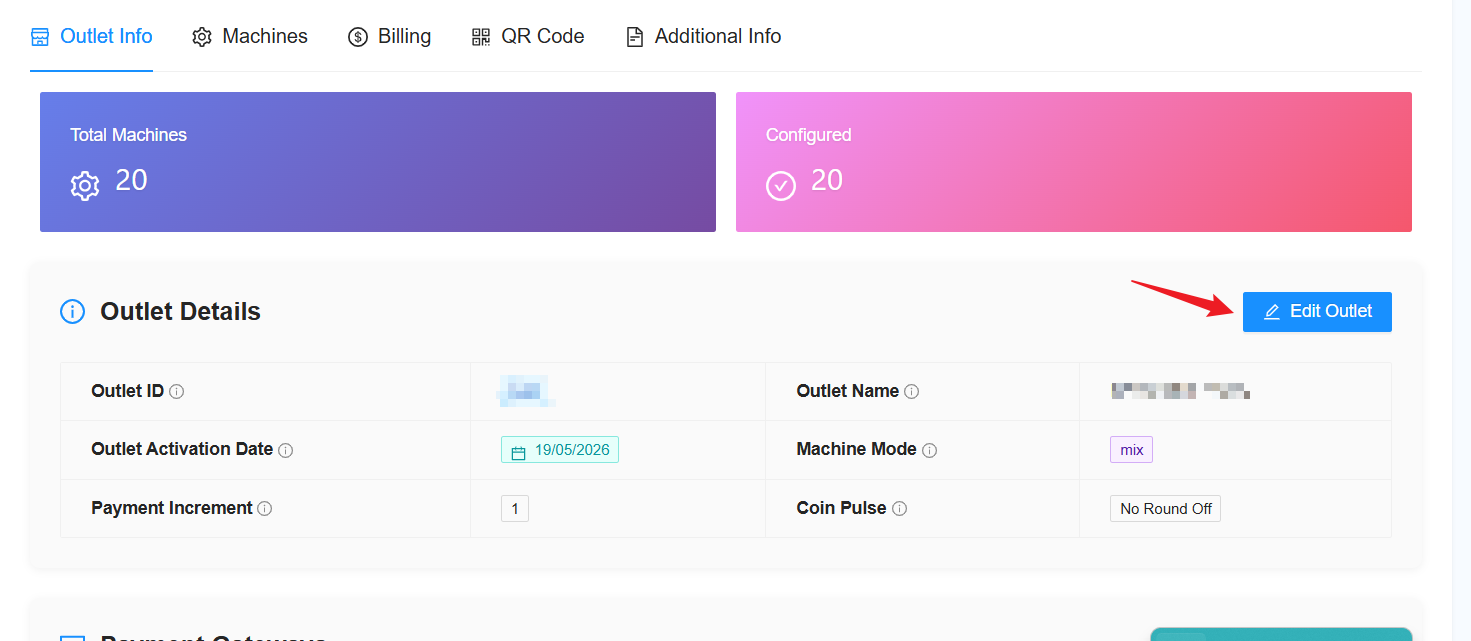
8) Go to ''My Outlet''

9) Select the outlet for which you want to update the payment configuration.
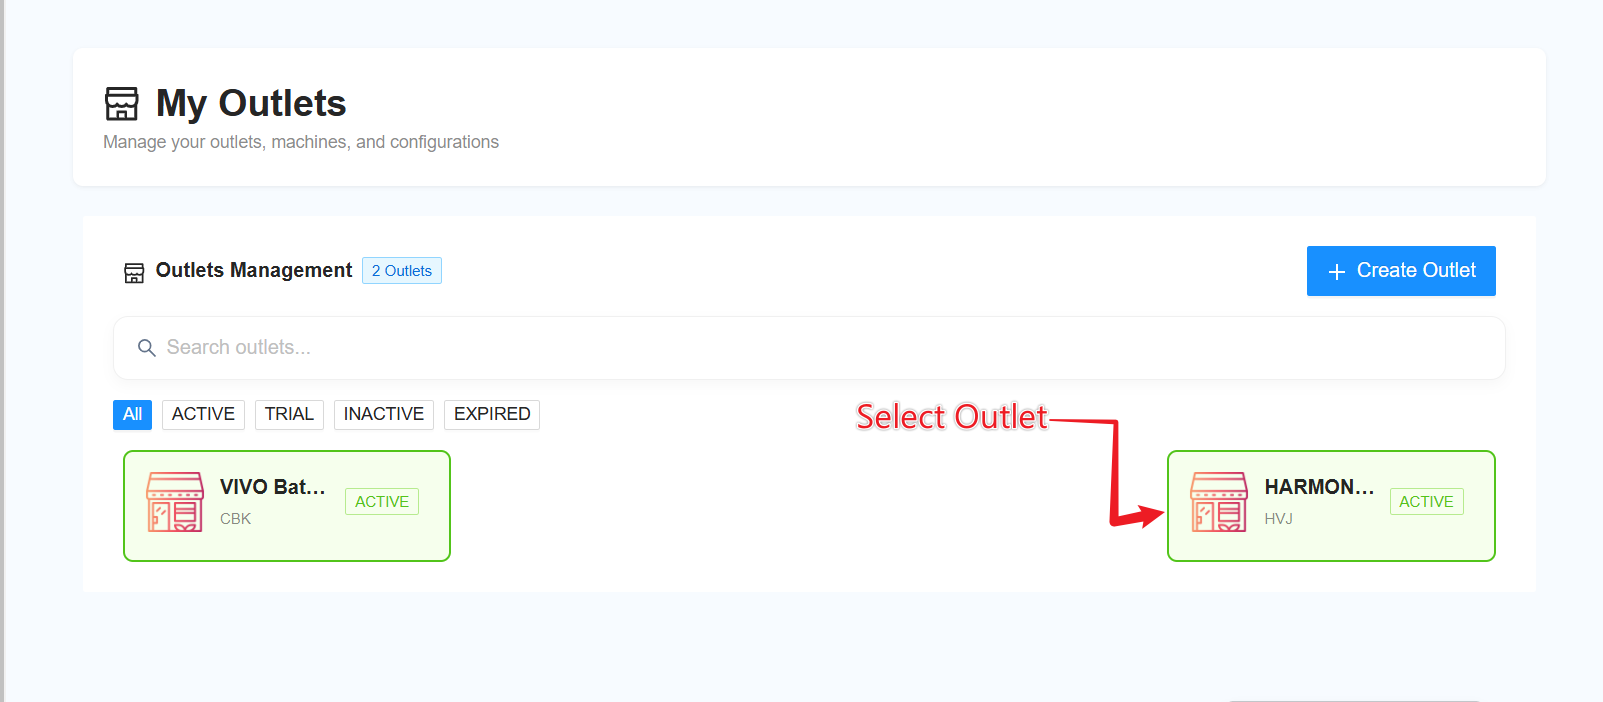
10) Click on “Edit Outlet”.
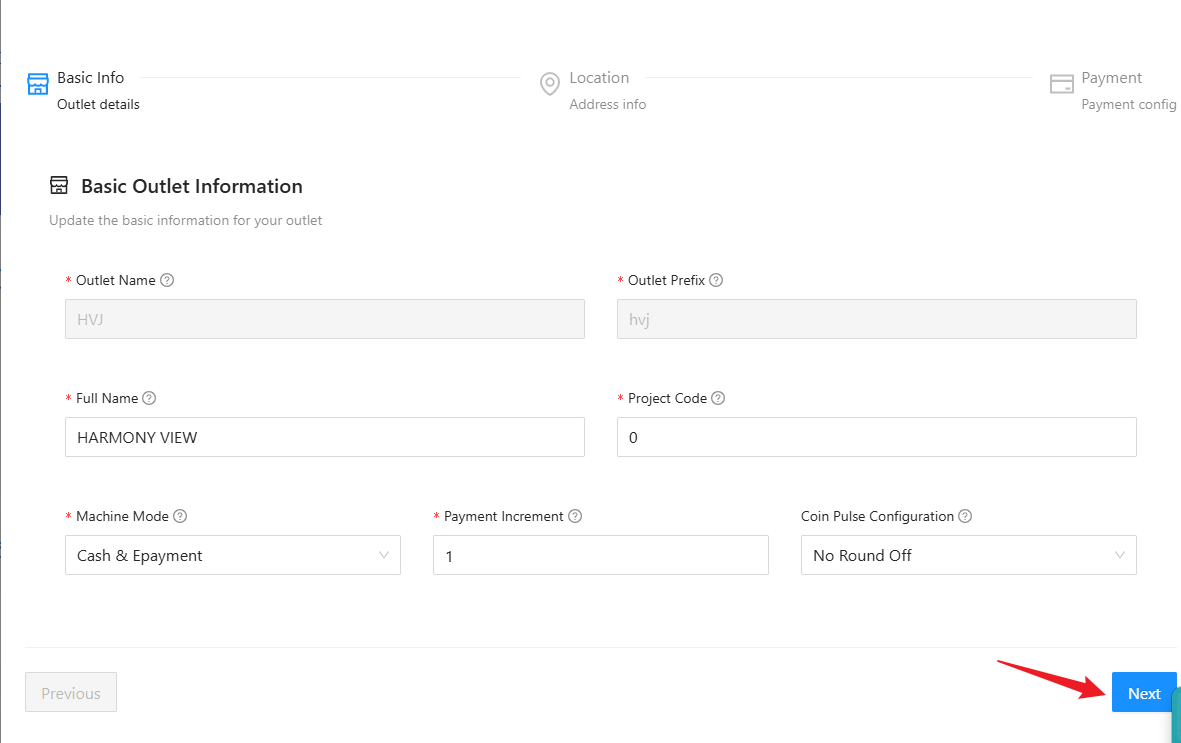
11) Click “Next” until you reach the Payment Configuration section.
12) In the Payment Configuration section, click on “Payment Gateway Config” and select “Razer Config (Razer)”.
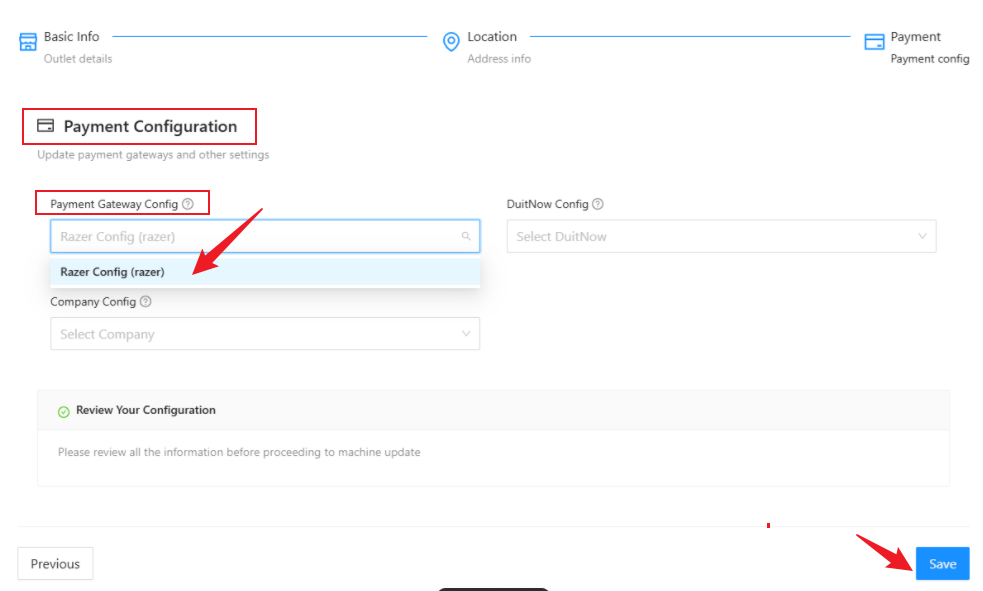
13) Click ''Save'' and its done.
FIUU Static QR Download
Login
1) Open Fiuu Portal URL: https://portal.fiuu.com/index.php?mod=authentication&opt=login . Enter Merchant ID, email and password to Login
2) Select Yes, I want to login!
─────────────────────────────
Static DuitNow QR Code
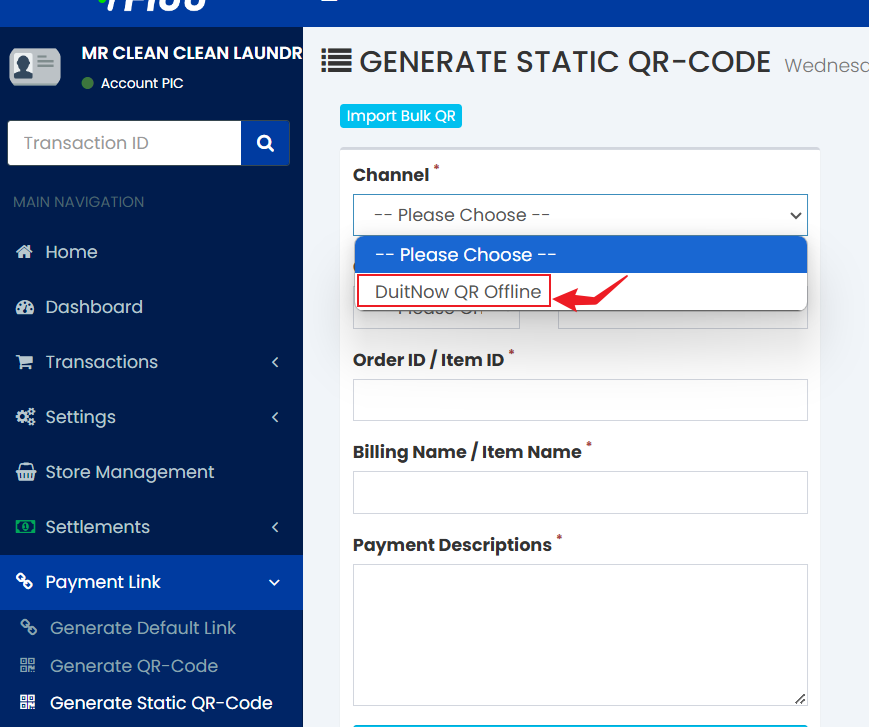
1) In Fiuu Portal, from sidebar, under Payment Link, select Generate Static QR-Code.
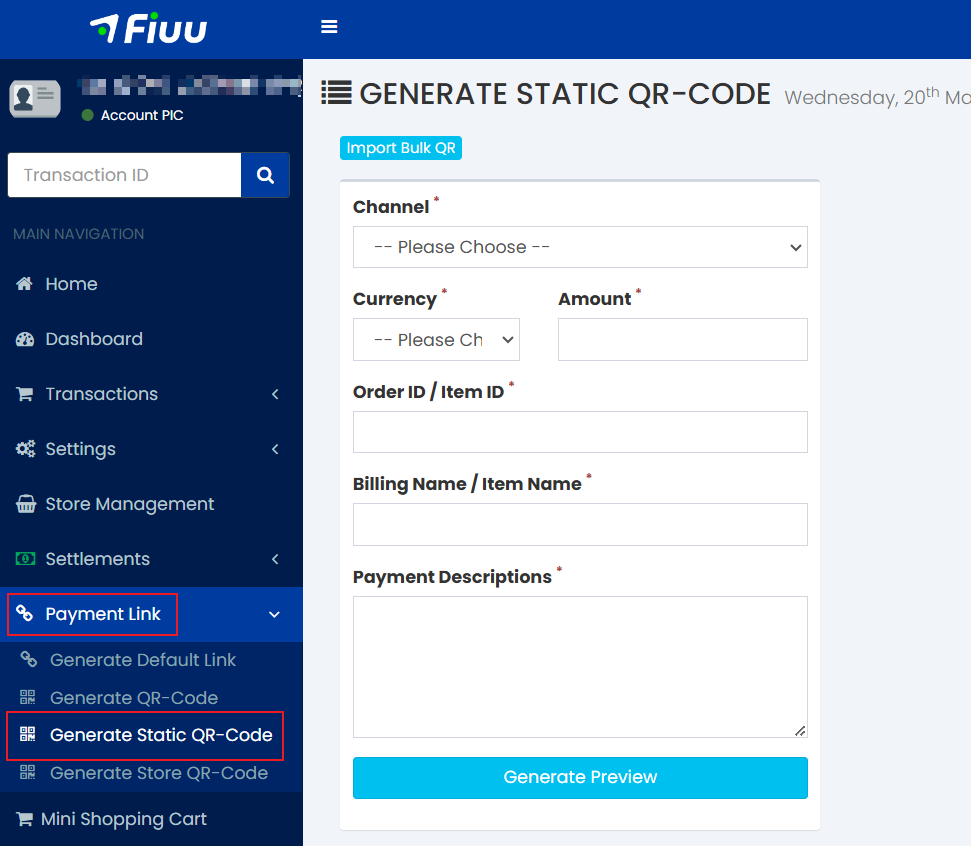
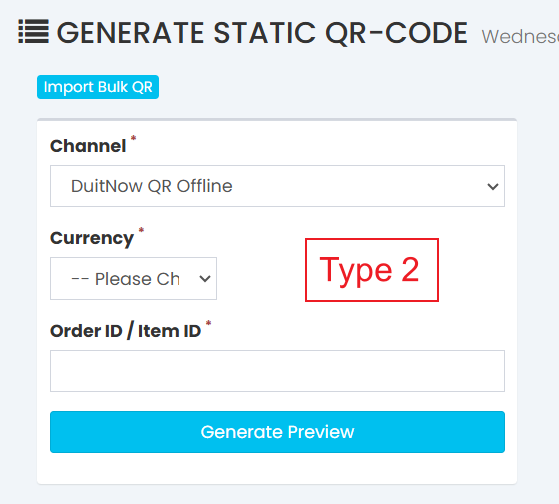
2) Click on “Channel” and select “DuitNow QR Offline”. After selecting it, the configuration will change to “Type2”.
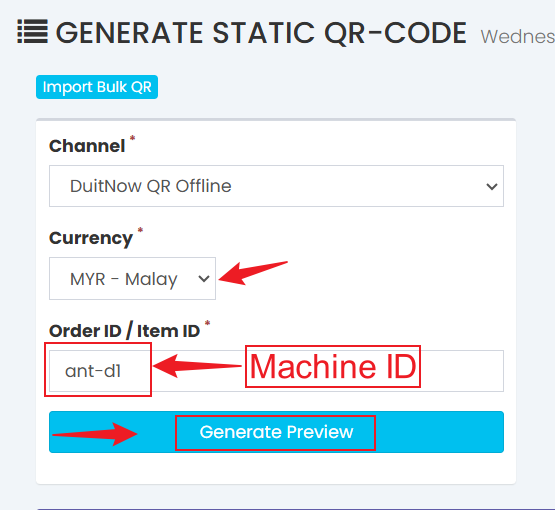
3) Select the currency and enter the Machine ID in the “Order ID / Item ID” column, then click on “Generate Preview”.
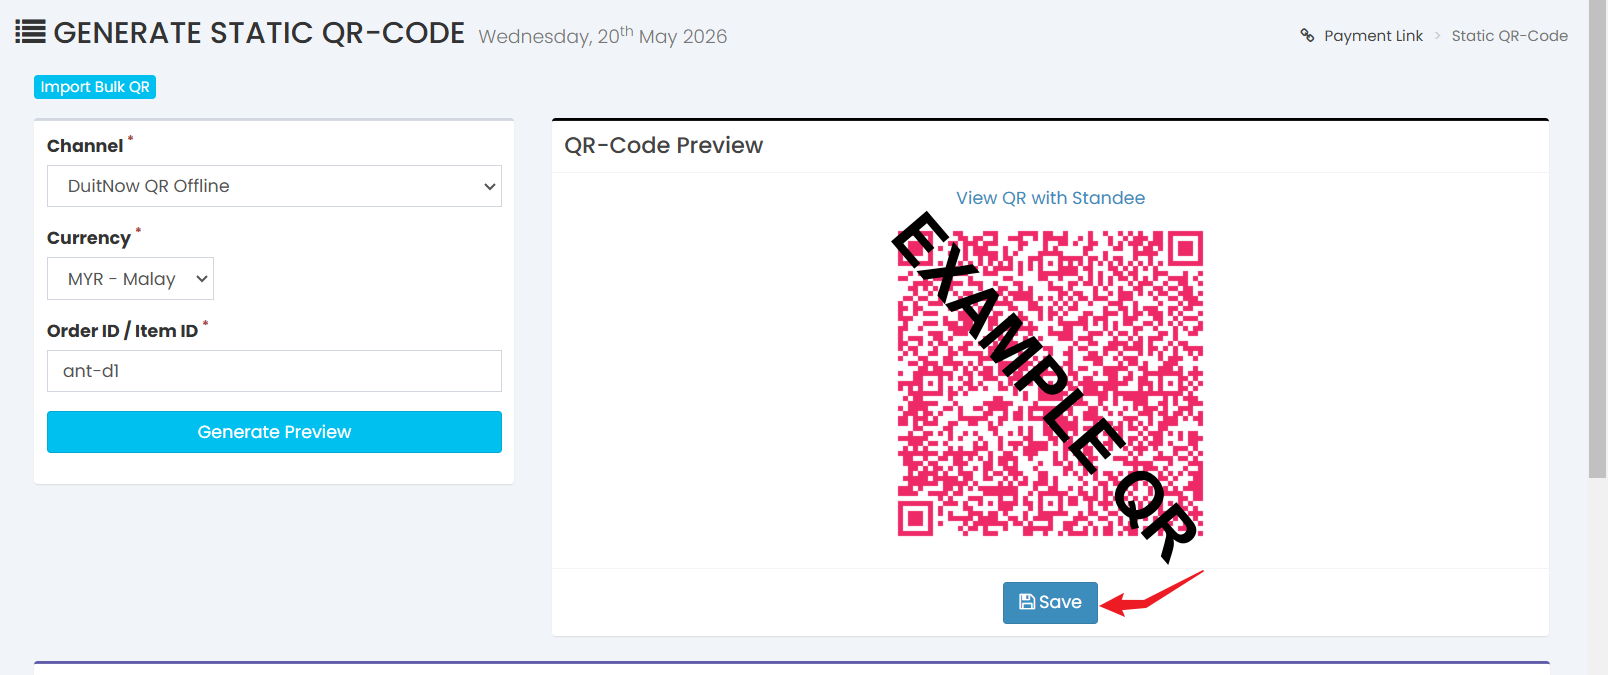
4) After clicking “Generate Preview”, a QR code will be generated. Below the QR code, click “Save”.
5) After clicking “Save”, scroll down and you will see three icons on the right. Click on the middle icon to preview and download the QR code.
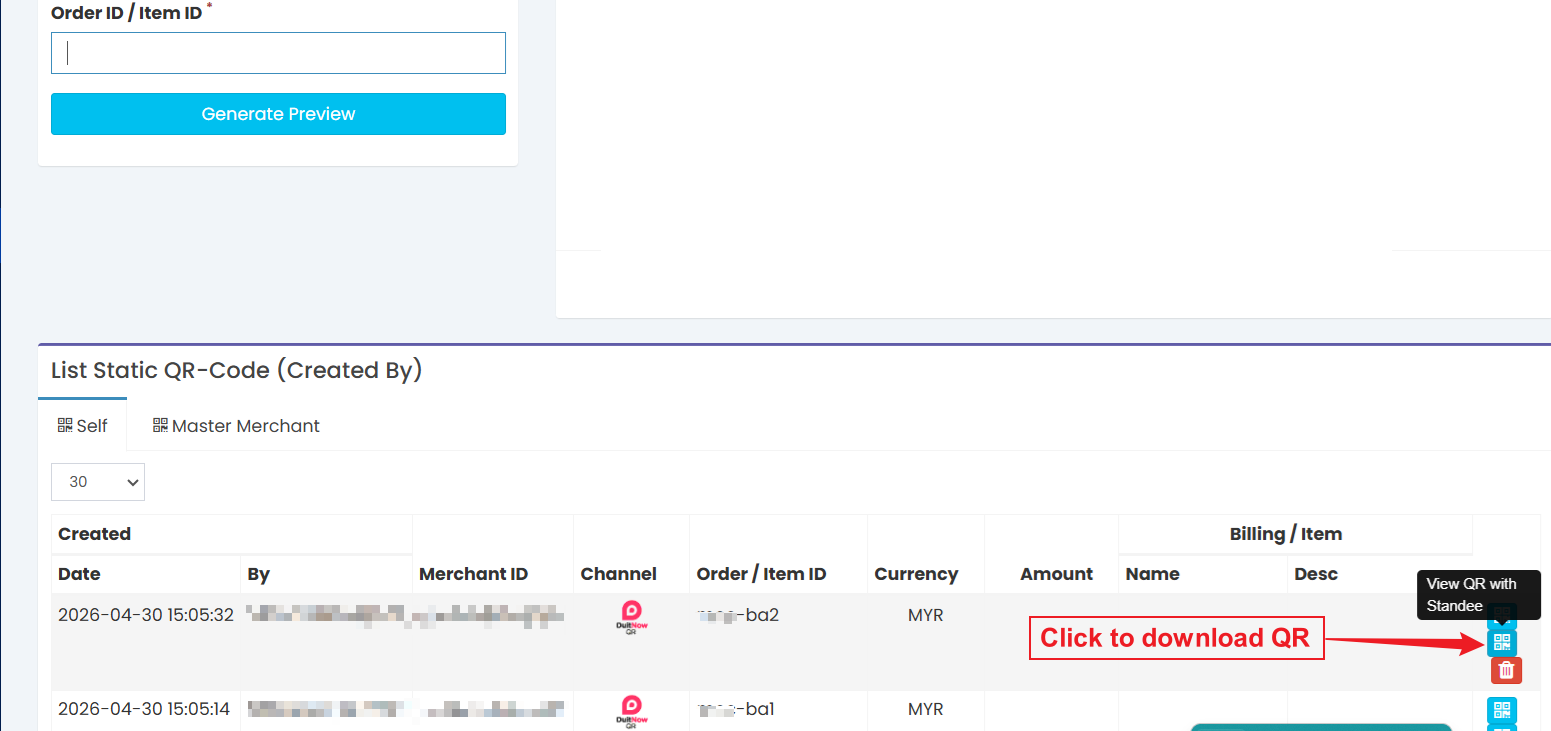
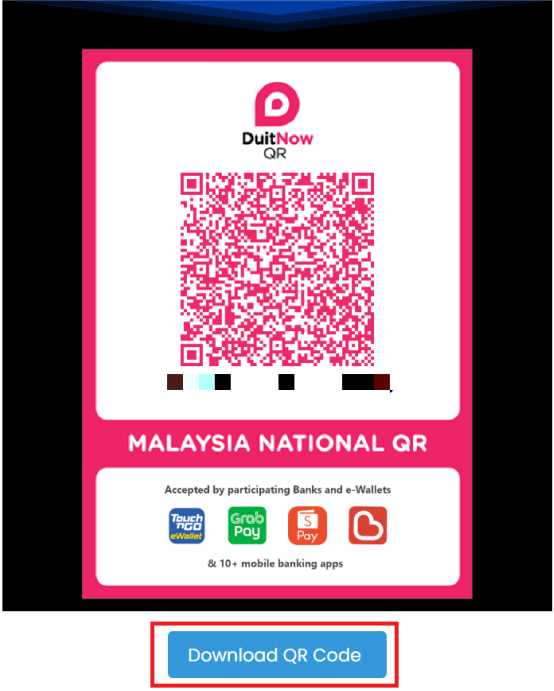
6) Click the Download QR Code button to donwload the QR code
─────────────────────────────
Machine ID
1) You can get the ''Machine ID'' from Laundro Portal in the machine settings page.
Step 1: Go to “My Outlets”.
Step 2: Select the specific outlet.
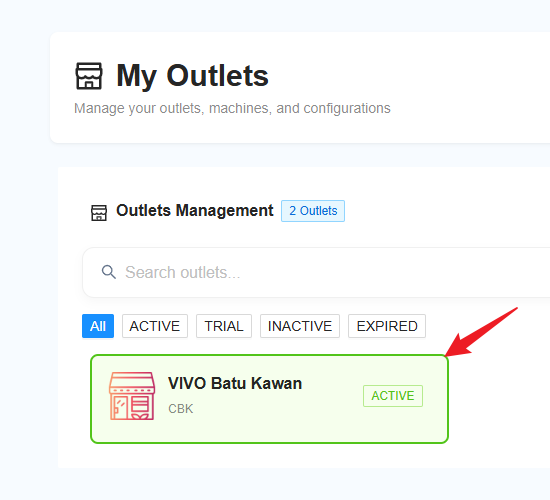
Step 3: Click on “Machine” and copy the ID highlighted in the circle.

RHB Duitnow
RHB Duitnow
RHB Duitnow Setup Guide
Login
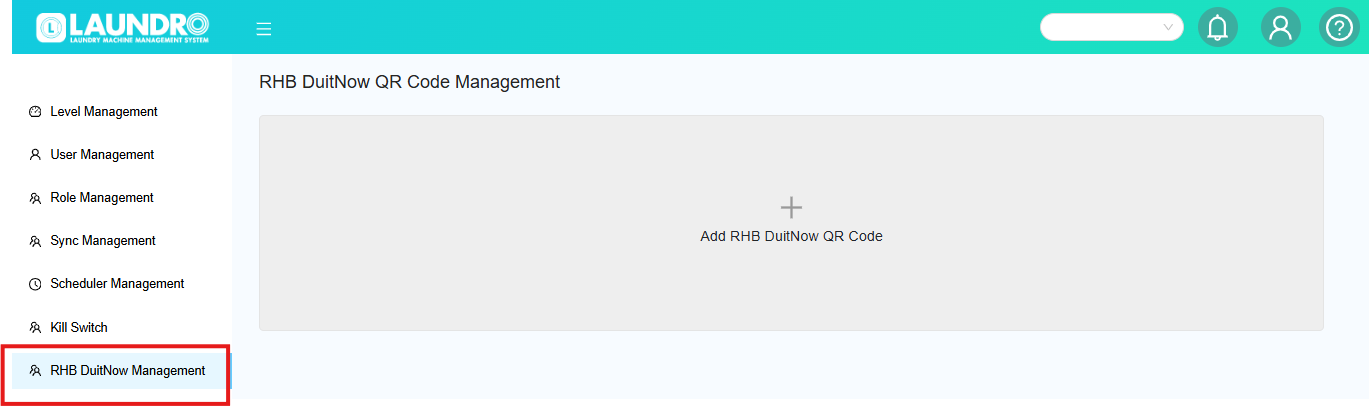
1. Open URL laundro v2 admin : https://v2.thelaundro.com/admin_login
2. Click to RHB Duitnow management & Click at Add RHB DuitNow QR Code
4. Please select the required details paste into the box.
- Copy the Machine ID from the Laundro account (name) and paste it.

- Update too the laundro (RHB DATA)


- PLEASE FILL UP 4 TEM'S MENTIONED
- MERCHANT ID
- USER ID
- DESC
- RHBD ID
ICA MODEL : RHBD214215GTBMAKER2RHBCIC08
- After complete fill RHB DATA
- PLEASE ADD ON TOKEN CONFIG


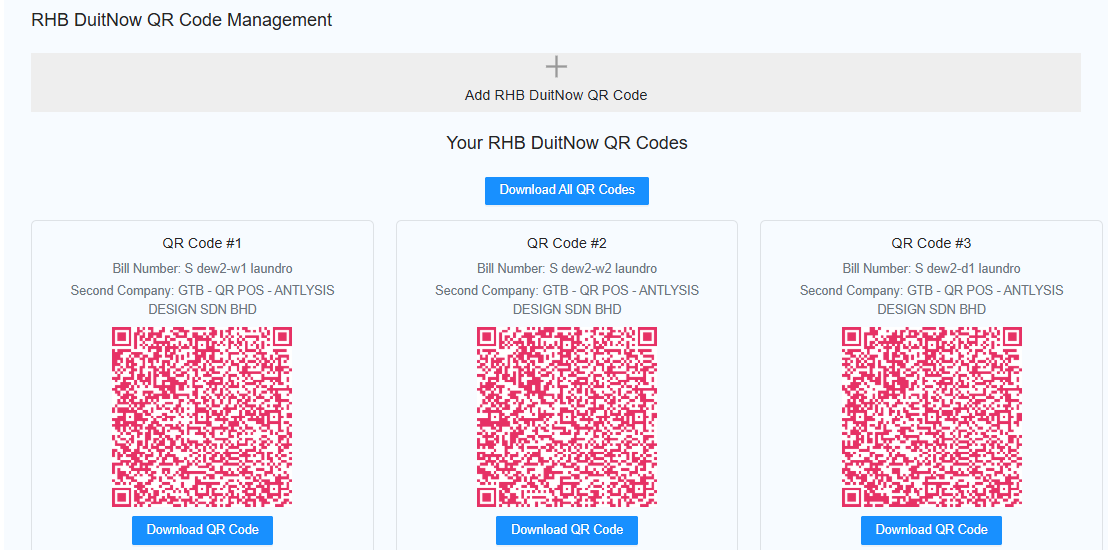
5. Please obtain the information listed below from the client/customer. - Bill Number : copy & paste ID from laundro
- Merchant code : copy details from client
- User ID : copy details from client
- Company name : Please enter the outlet name to make it easier to locate.
- Second Company name : GTB - QR POS - ANTLYSIS DESIGN SDN BHD
- To add more QR codes, click the “Add More QR Code” button.
- Submit after done
- IF u need create new QR Please click "REFRESH"

- Please refresh if needed, then proceed with generating the next QR code for the following outlet or machine (washer/dryer).
Static QR Code Generation
Revenue Monster
Revenue Monster Setup
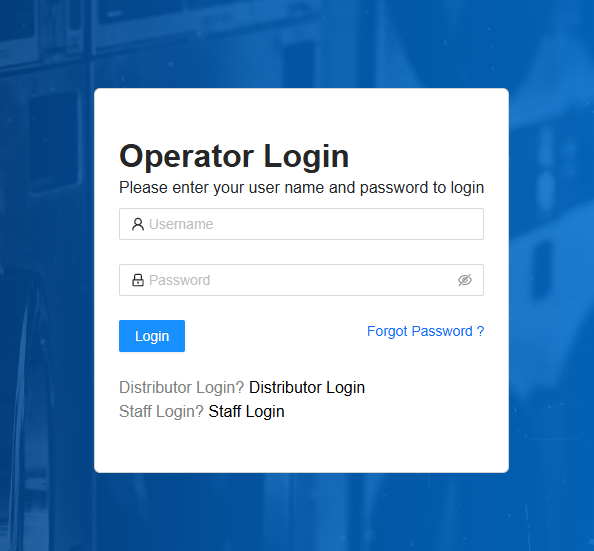
“First, open the LAUNDRO Operator link page.” - https://v2.thelaundro.com/operator_login

Operator Login
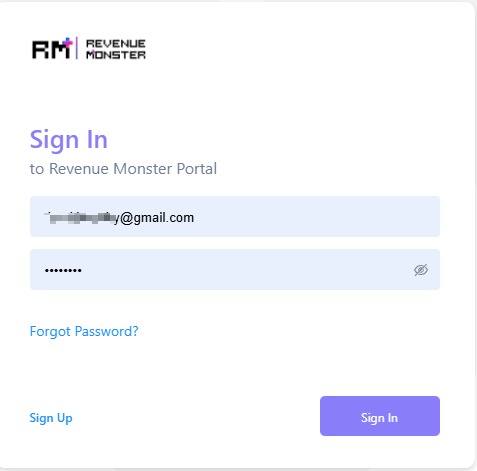
“Next, open the Revenue Monster link page as well.” - https://merchant.revenuemonster.my/
Revenue Monster Portal
tes1
test2
test4
tesrt5
1) Open both links, then log in to the Revenue Monster portal using the details provided.
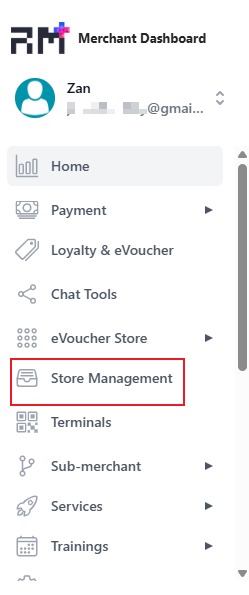
2) Click on ‘Store Management’ on the left sidebar.
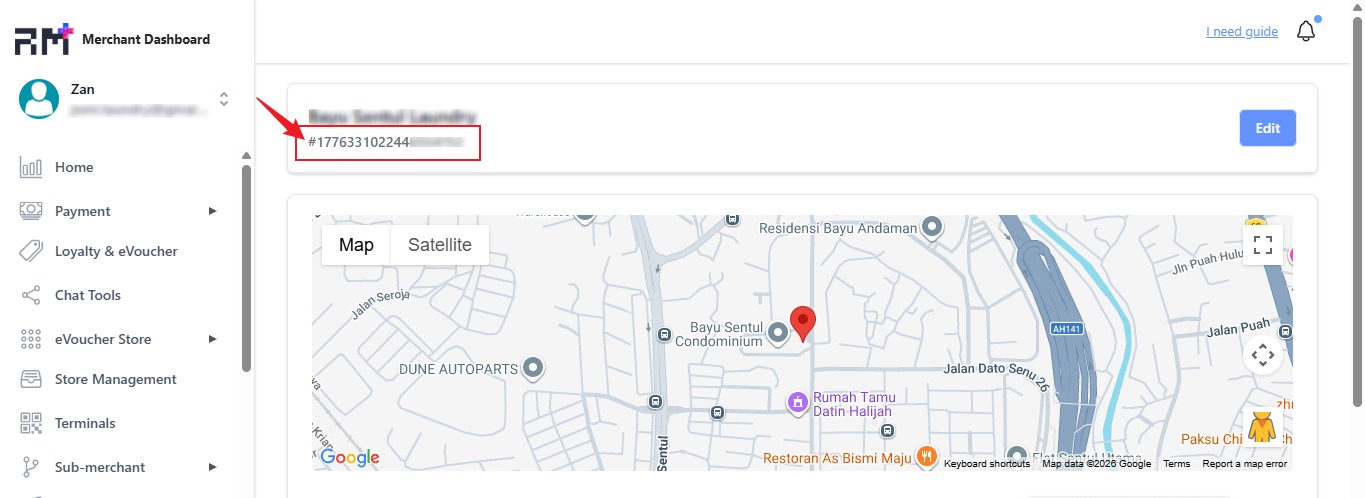
3) Below the Store ID, you will see a number. Click on it.
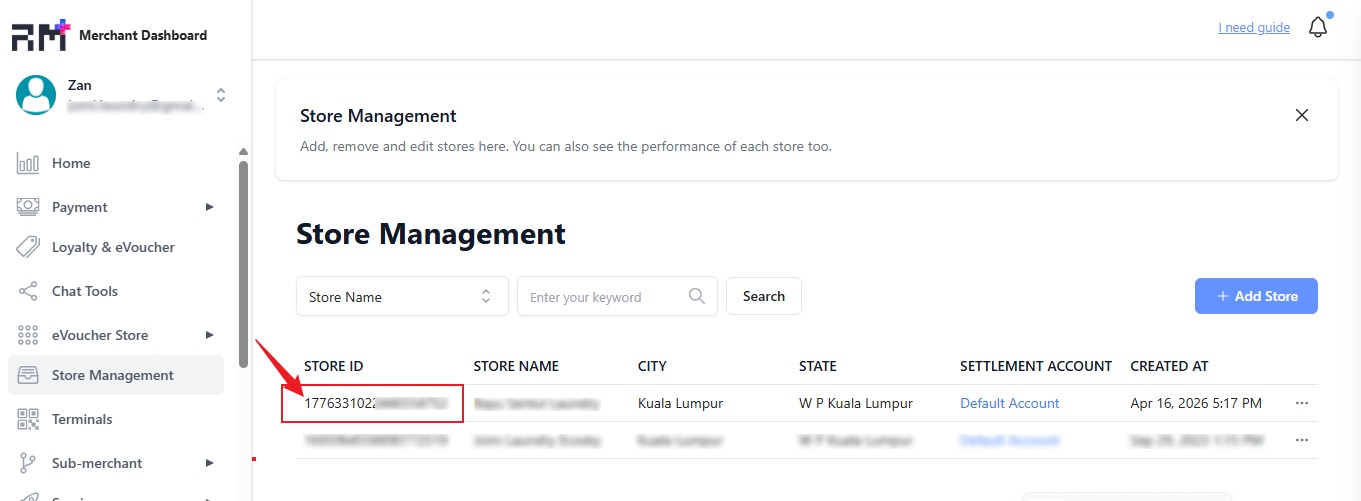
4) Copy the Store ID number without the ‘#’ symbol—numbers only.
5) Before copying the Store ID number, go to the LAUNDRO ''operator login'' page and log in to the portal using the provided ID and PASSWORD.
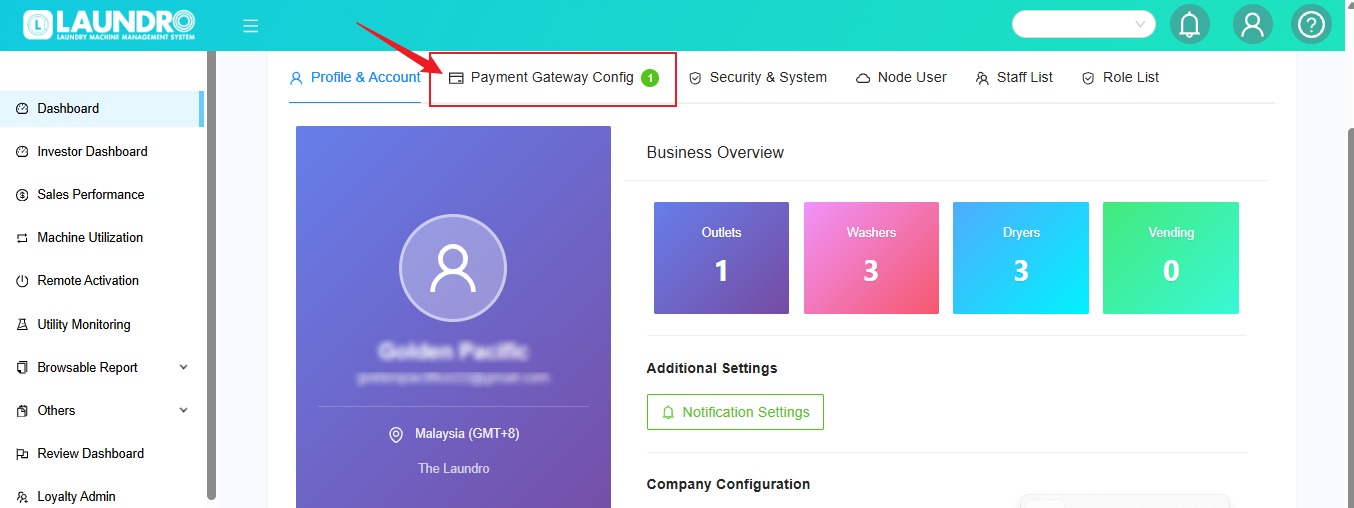
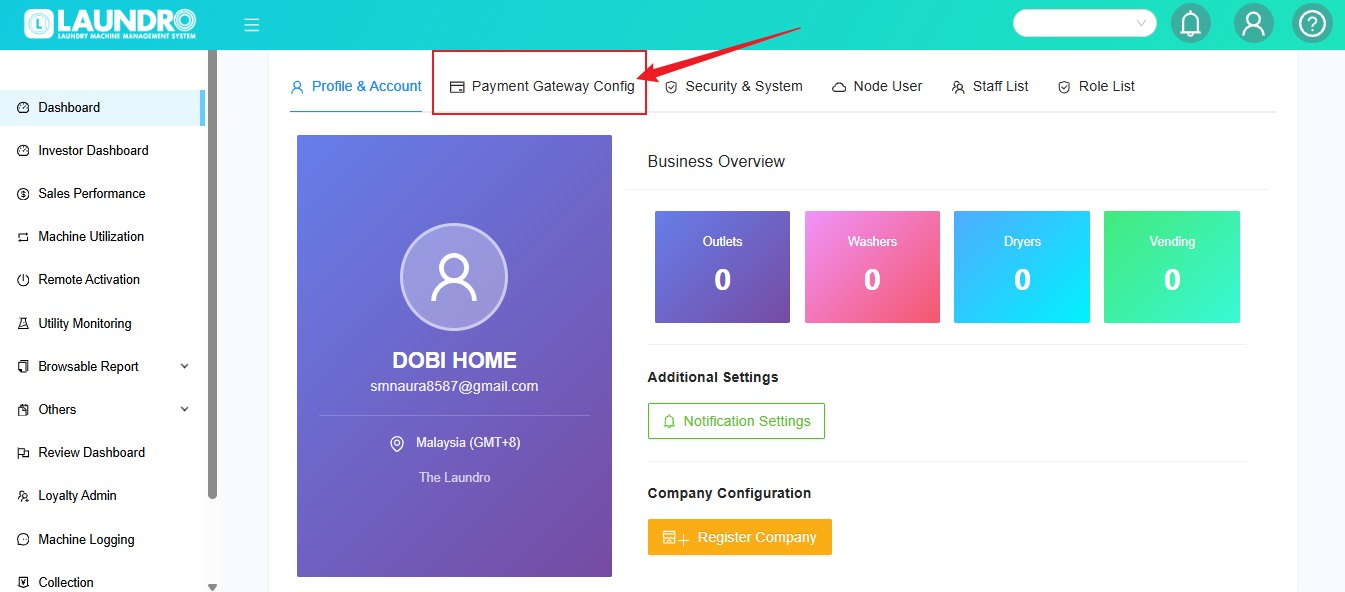
6) On the top right, click on the user bar, then select ‘Setting.

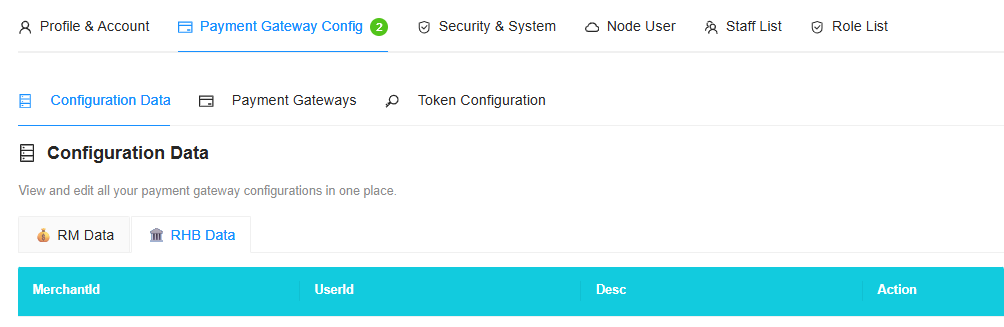
7) Now, you are on the Settings page. 'Select Payment Gateway Config.
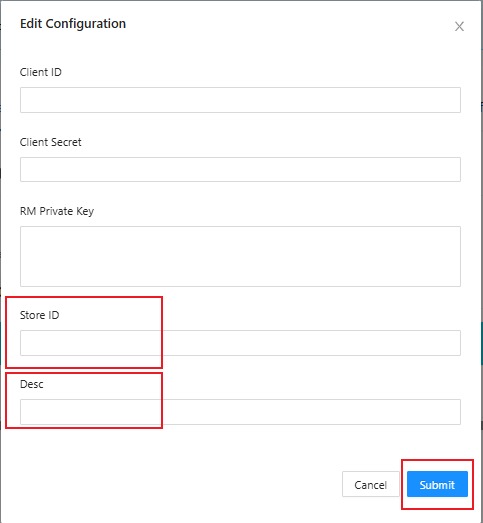
8) Scroll down until you see ‘RM DATA.’ Under ‘Action,’ click the pencil icon ( Edit ).
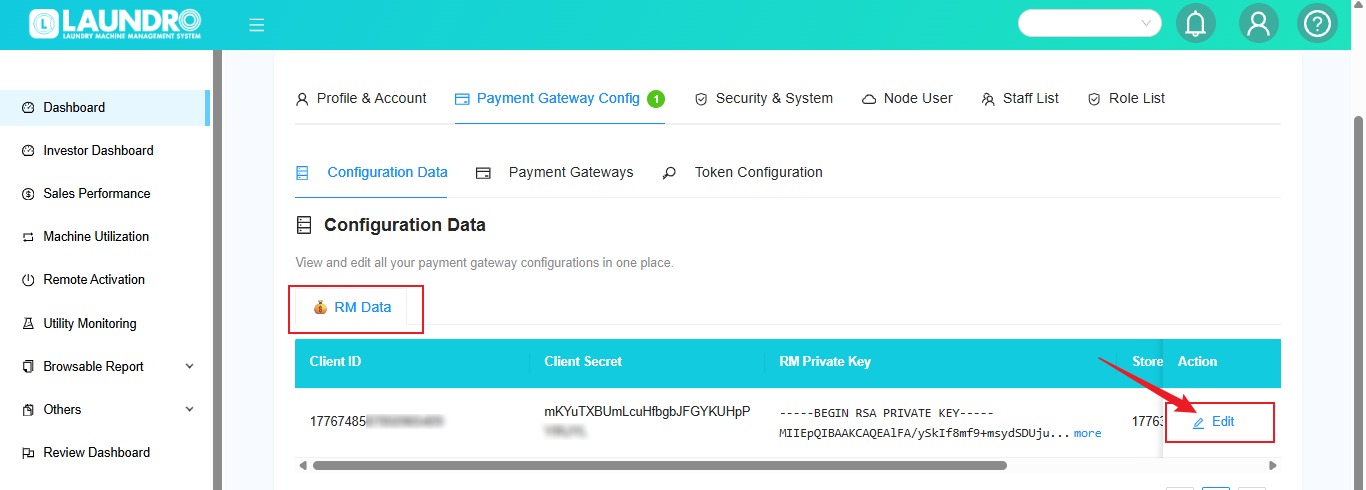
9) The Edit Configuration page will pop up.

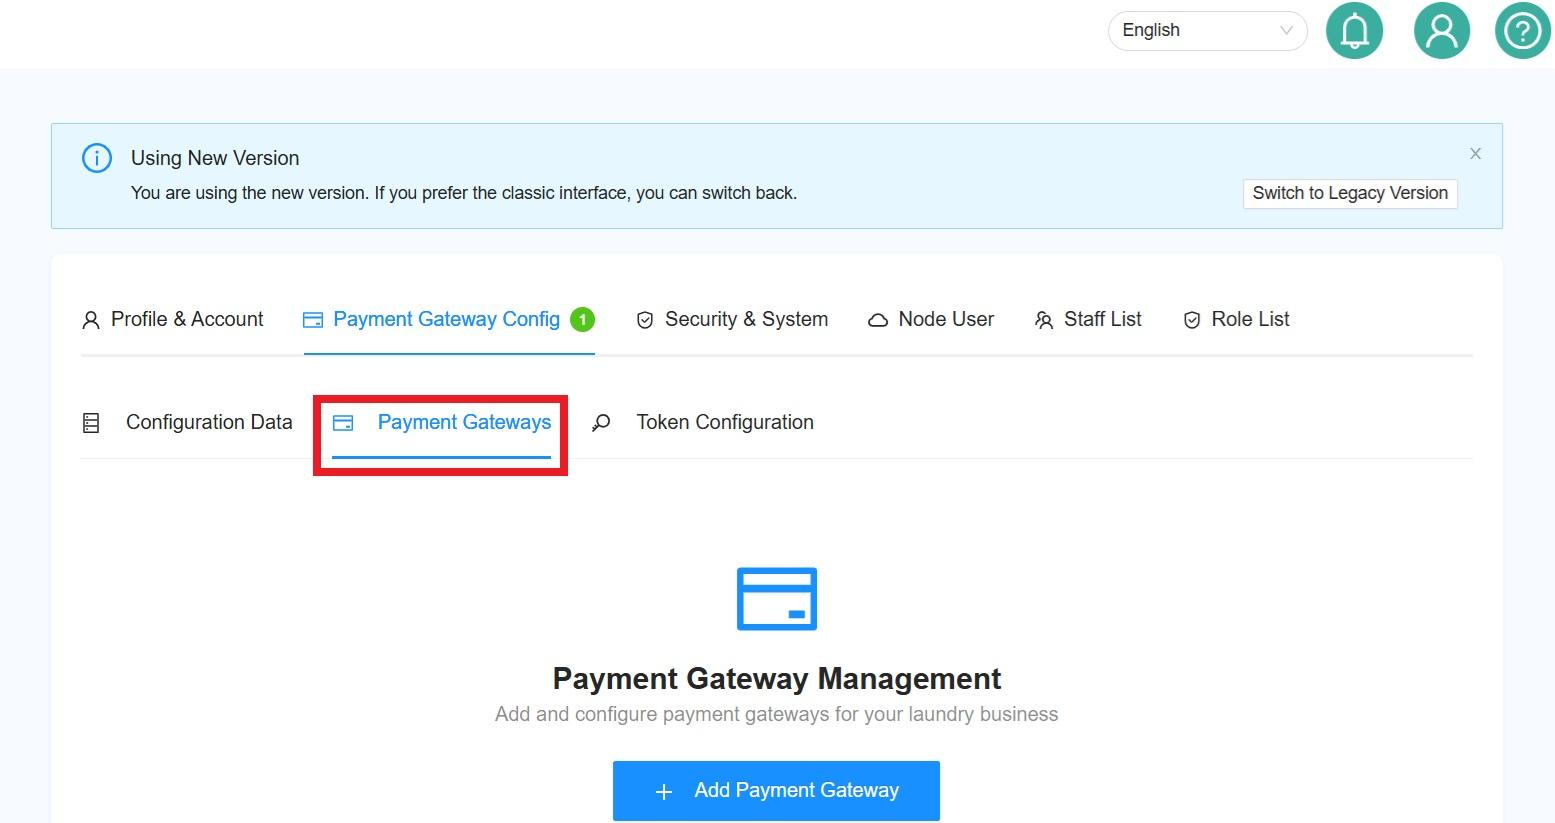
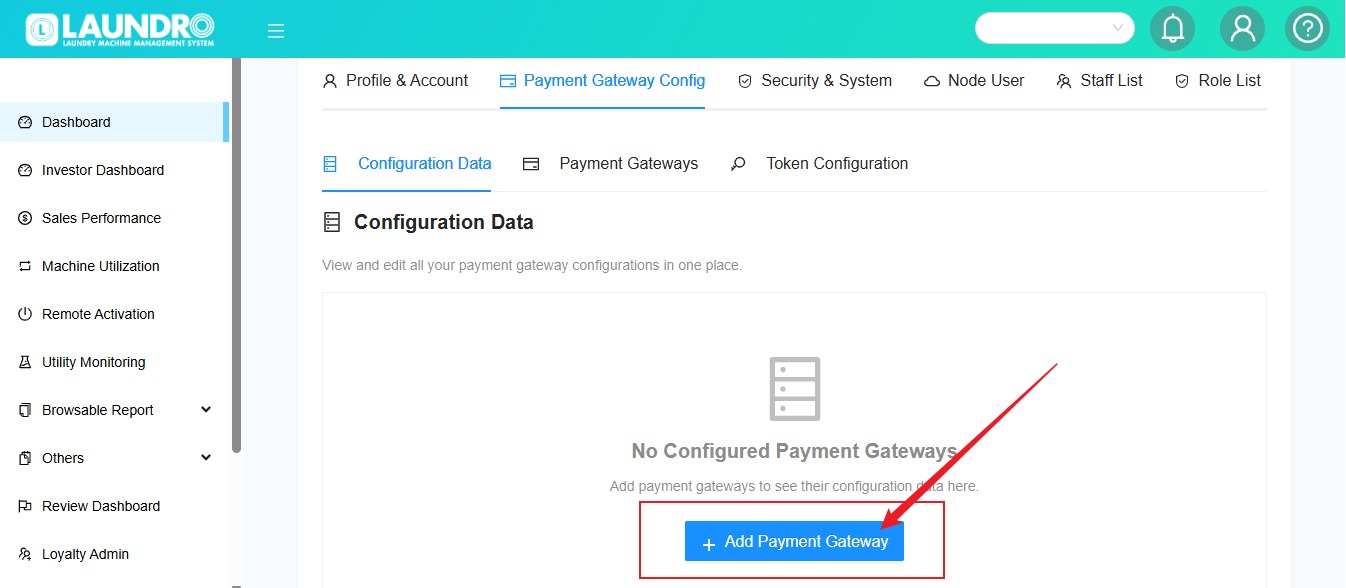
10) For New / 1st time Set-up Payment Gateway. Click Payment Gateway Config Tab.
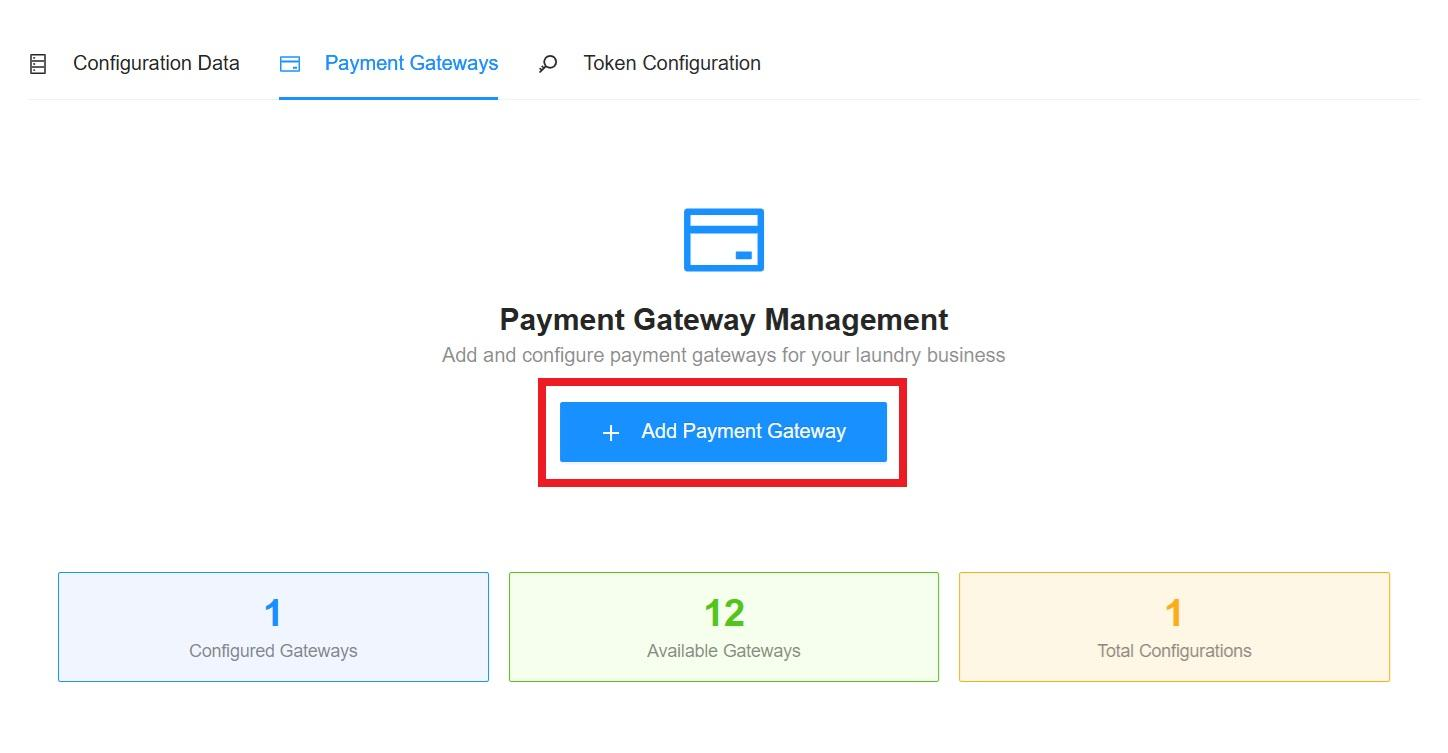
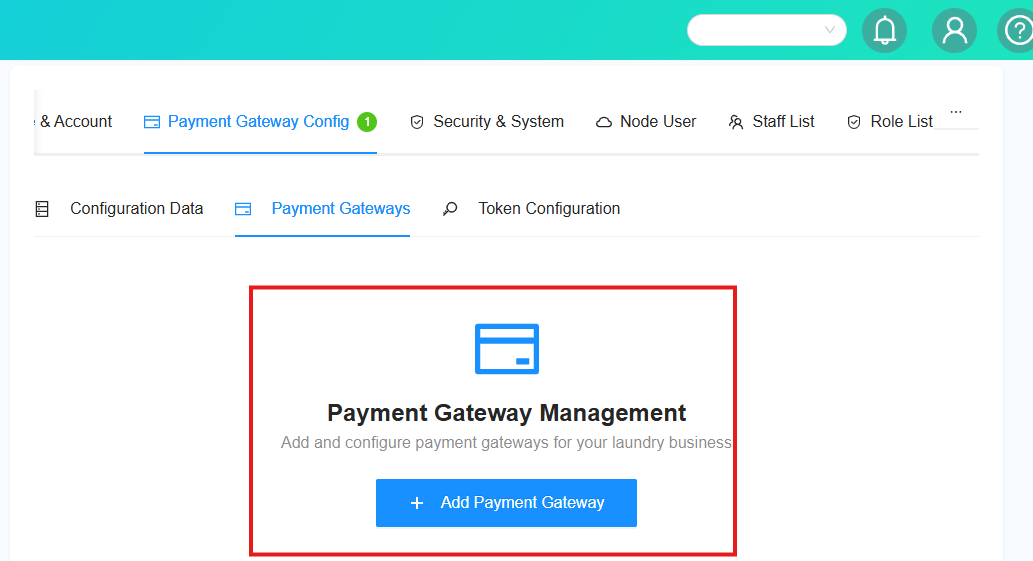
11) Click into + Add Payment Gateway.
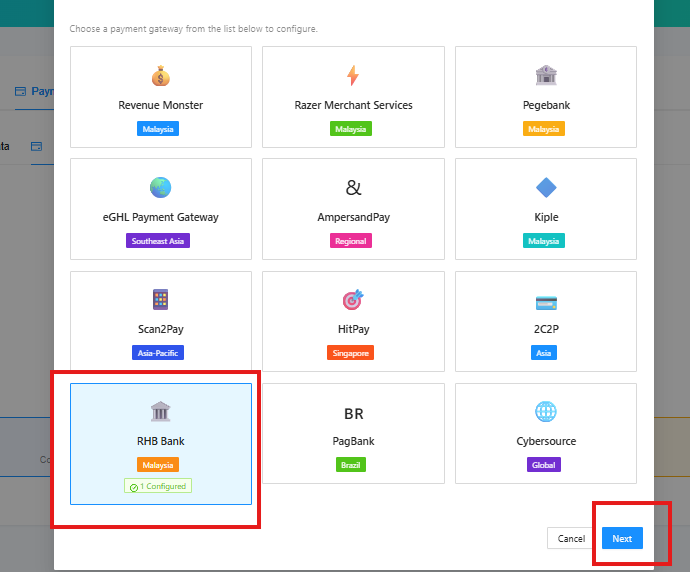
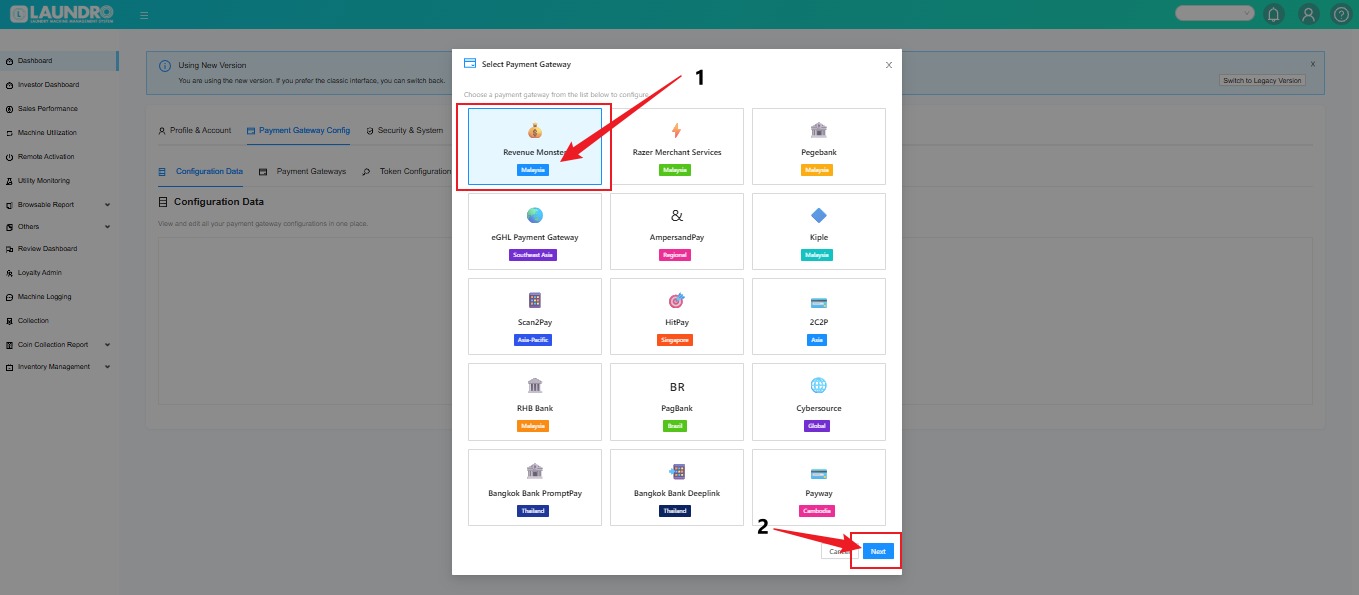
12)
- Click Into Revenue Monster Tab.
- Click Next.
13) Continue fill-up from section 1 - 5 then click "Submit".
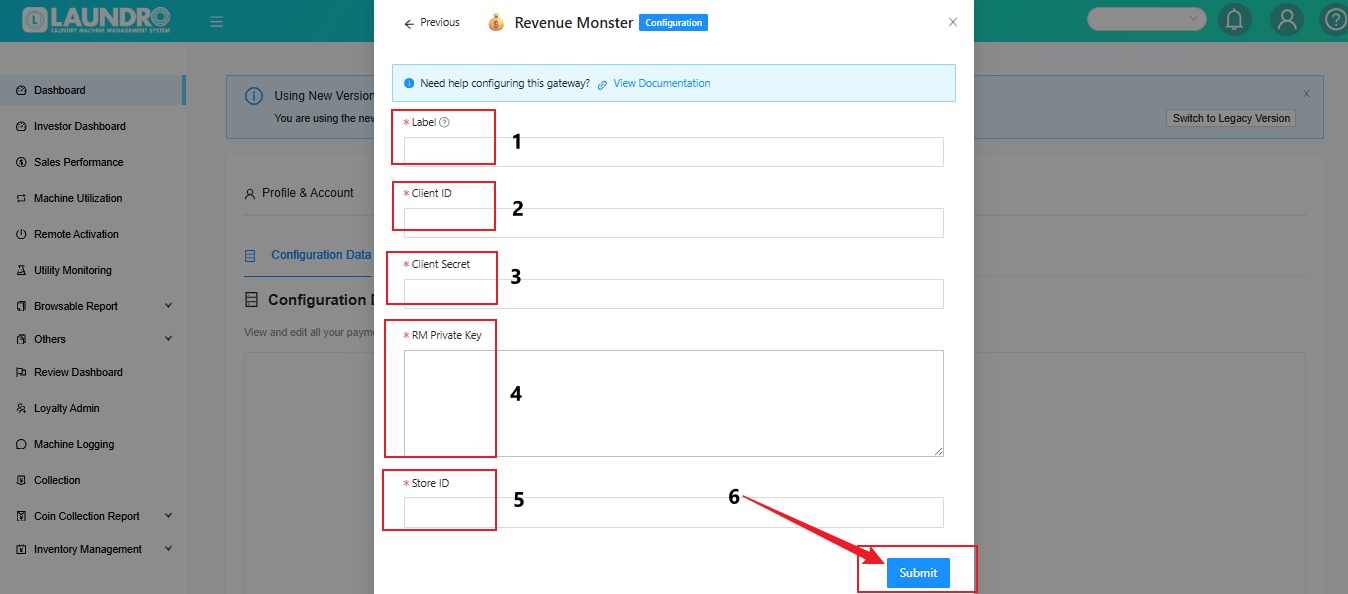
14) From step (4), copy the Store ID and paste it into the Laundro ‘Store ID’ field.
15) Update the description (DESC) to ‘RM Config'.
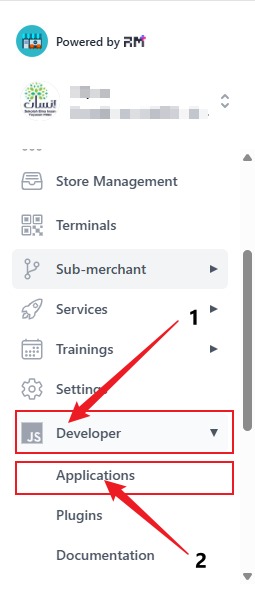
16) Leave it on the Laundro page. Now go back to the Revenue Monster page, click on ‘Developer,’ and select ‘Application.
17) On the Application page, below the Client ID, click on the number.
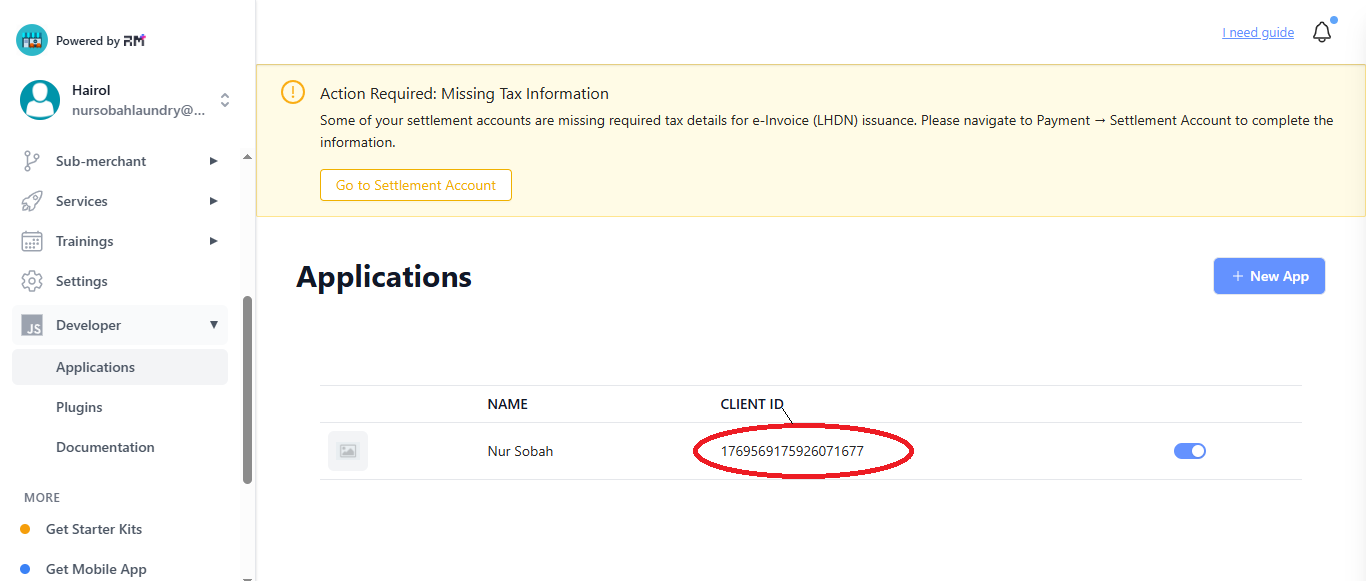
For New Application
18) For New Application -

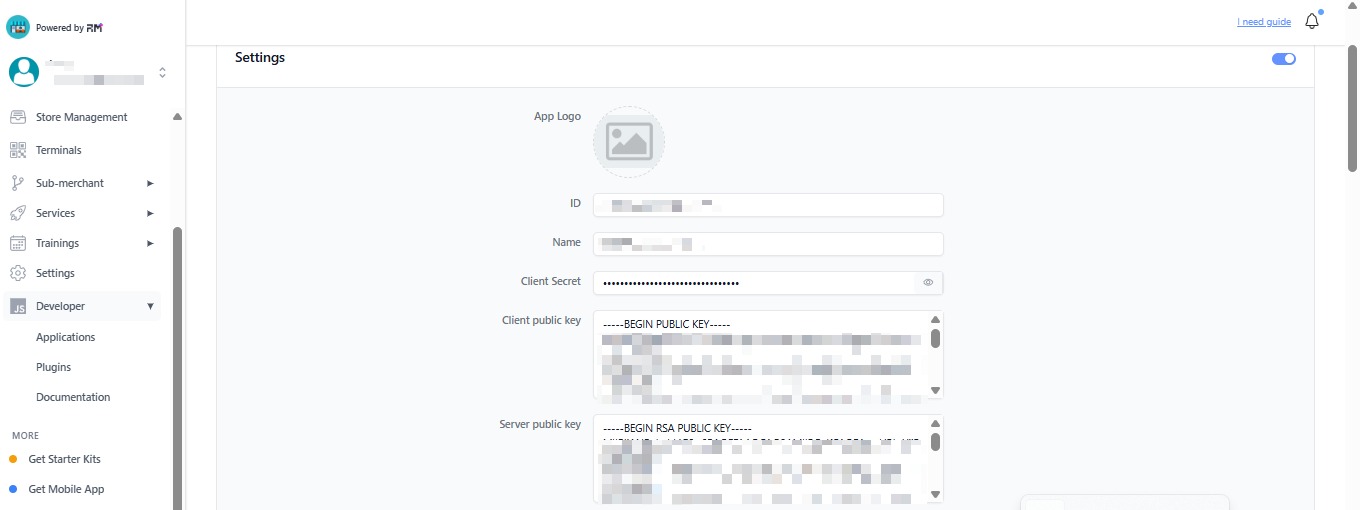
19) The page will appear like this.
20) Scroll down until find 'Generate'. Click on Generate. Then will appear key word at Private key & Public key. Copy the Public key & Paste into Client Public Key @Page 21 #4. Copy Private Key & Paste into RM Private Key @Page 13 #4.
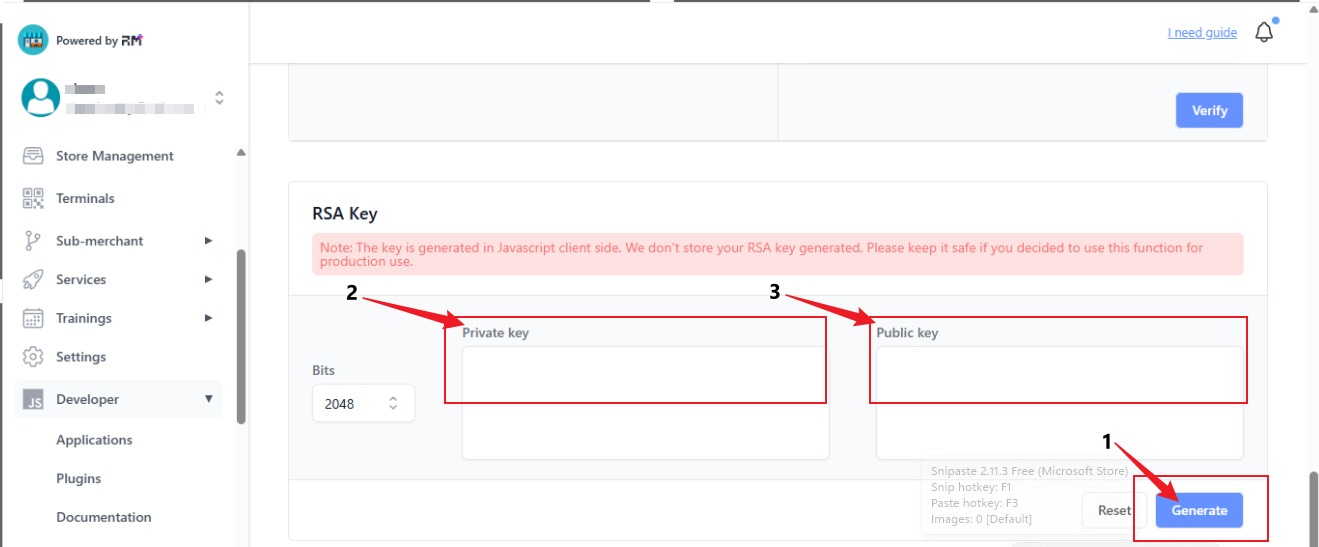
21)
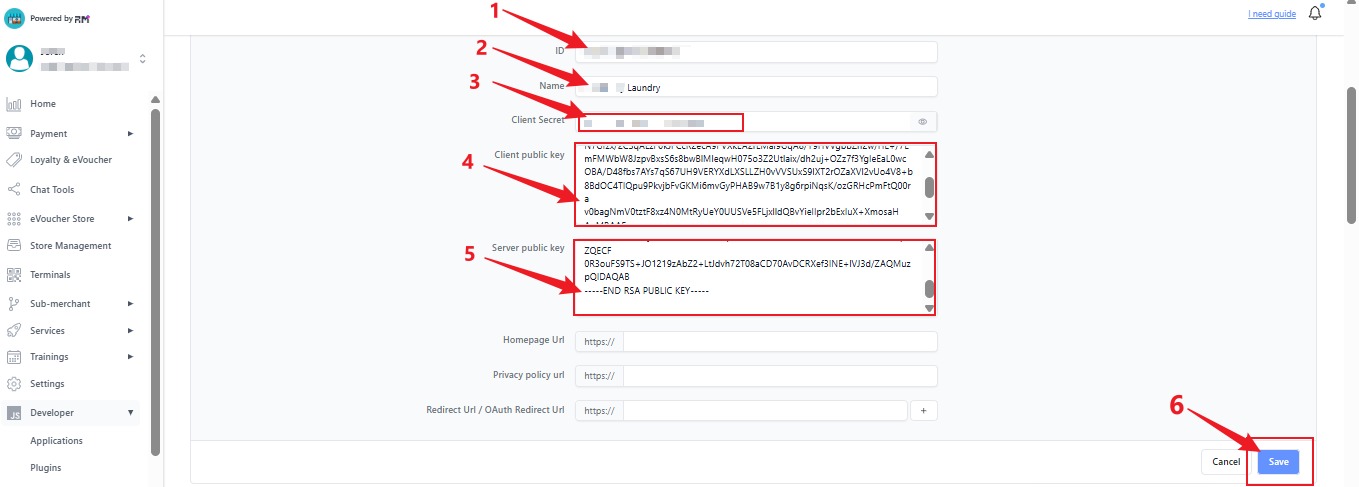
22) Update payment gateways and other settings
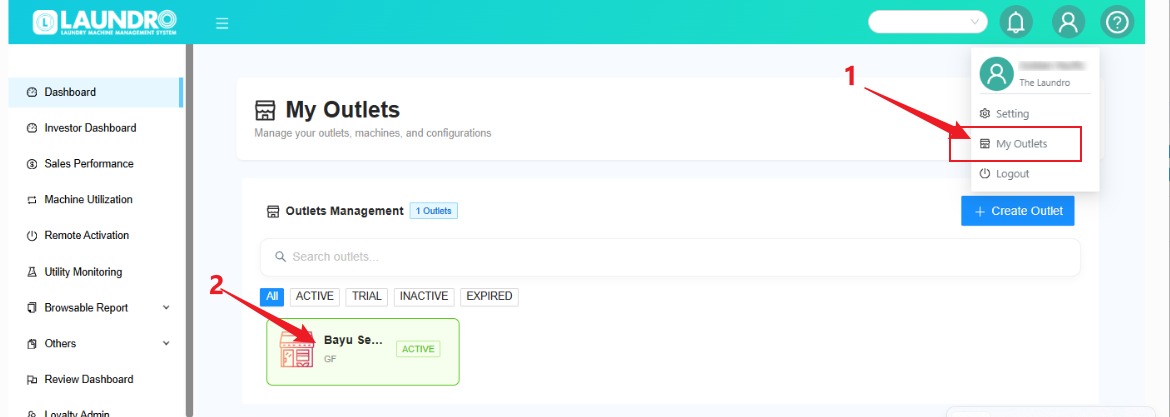
- Click the profile icon and select “My Outlets.”
- Click the outlet box to open the outlet details.
23)
- Click into Payment Gateway Config - Choose Payment Gateway.
- Click into Duitnow Config - Choose Duitnow Config
- After complete Click Save
24) To load QR Code.
- Click the profile icon and select “My Outlets.”
- Click the outlet box to open the outlet details.
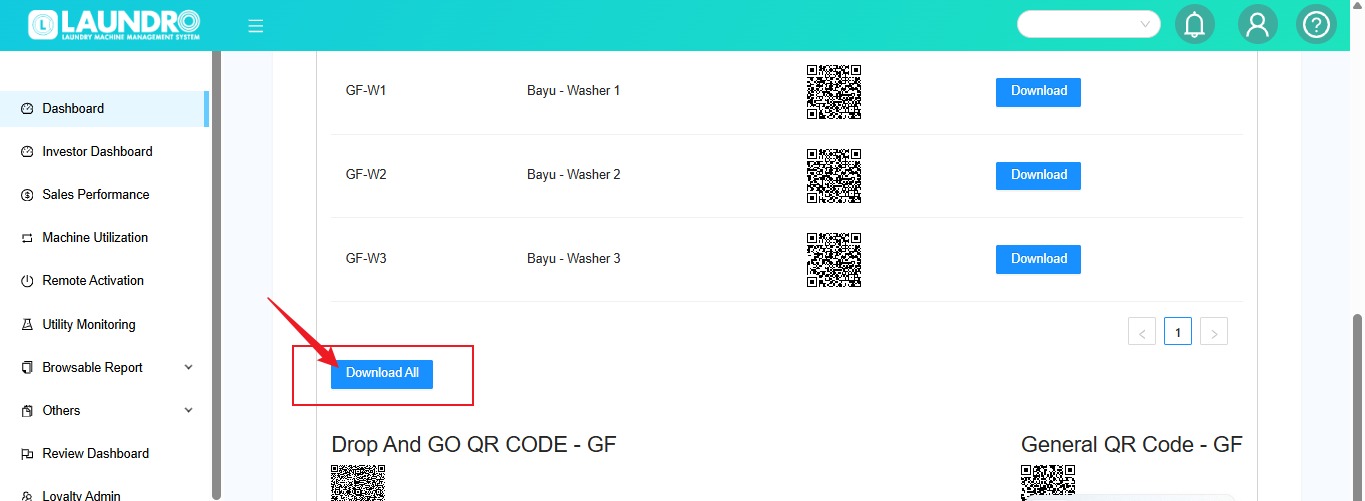
25) Click QR Codes.
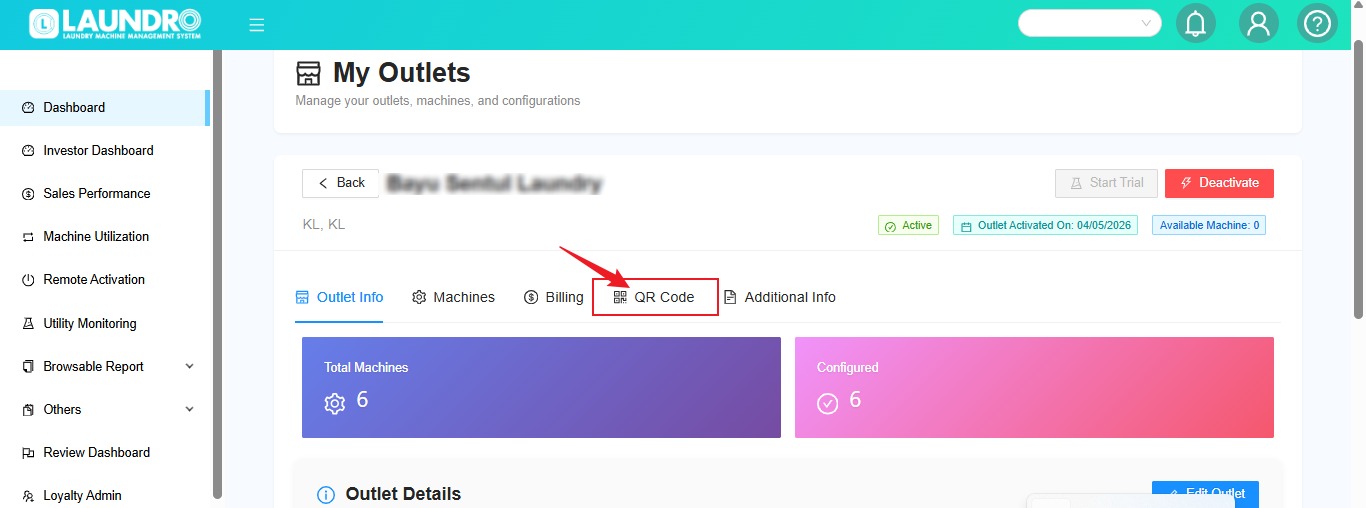
26) Click Download All.
Duitnow Setup
Login operator -> click paymnent gateway -> click add duitnow
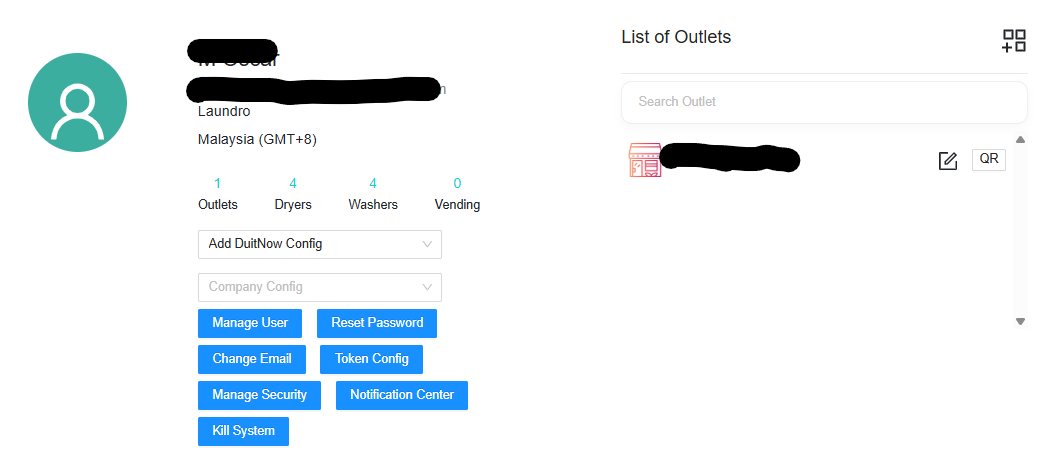
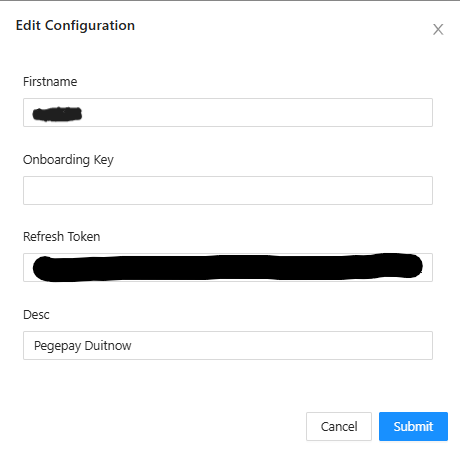
Add credentials
ONBOARDING KEY Just click (space)
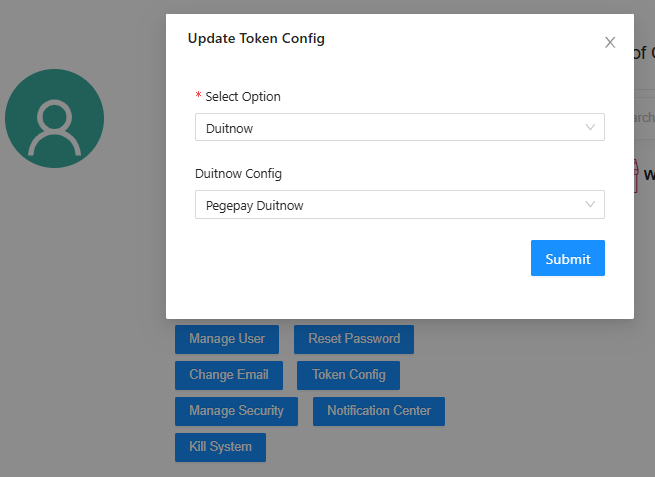
After submit please click token config Select option - Duitnow
Duitnow Config - Pegepay Duitnow
EGHL
Eghl Setup Guide
Document will be updated soon!
Ampersand
Ampersand Setup Guide
Document will be updated soon!!!
Kiple
Kiple Setup Guide
Document will be updated soon!!!
Scan2pay
Scan2pay Setup Guide
Document will be updated soon!!!
2C2P
2C2P Setup Guide
Document will be updated soon!!!
Pagbank
Pagbank Setup Guide
Document will be updated soon!!!
Cybersource
Cybersource Setup Guide
Document will be updated soon!!!