Network Troubleshooting
Router Guidelines
Our Alpha series devices are low level internet data devices operating at 2.4GHz. The device can only operate using an IPv4 address.
When setting up the WiFi access point, it is recommended to set a secure password, and also advised do not share the same WiFi access to public. Needed a individual 2.4GHz WiFi should be set up and can be share with example (CCTV ,Machine wifi and other related) only. Do not share with unwanted guests can able to access our devices and attempt any attack.
Router/AP Recommendations
When selecting a router ensure that the router has the suitable range and supports the number of devices of the specific outlet. It is always advised to select a router that can handle a higher number of devices to ensure proper stability.
Here are a few list of recommended Router/AP:
-
Fiber Optic
-
TP-Link Archer C24
-
TP-Link Archer C80
-
TP-Link Archer AX12
-
TP-Link Archer AX73
-
4G
-
TP-Link MR6400
-
TP-Link MR200
Access Point Recommendations
For bigger space outlet with a higher number of devices example (20>25) ,recommended a separate access point should be added from router to improve weak WiFi coverage and able to support devices.
Here are a few list of recommended Access Point:
-
TP-Link EAP110
-
TP-Link EAP115
Troubleshooting Routers
- If using 4G Modem, ensure device is located in an area with a good signal. (Mostly in an open space or the front of the outlet)
- Ensure access points *WiFi router* are installed roughly in the center of all the devices with minimal blockage between the device and access point.
- Ensure router is up to date with the latest firmware from the manufacturer.
- Occasionally factory resetting the WiFi router helps to stabilize the router and delete any unwanted settings previously set.
- If the router supports, set an auto reboot function for the router to reboot at low peak usage times.
- If router is old and outdated, please consider replacing with a new router.
- Ensure selected network provider has good stable network at location. (Try different providers if using 4G Modem
Use the network testing page, to act as a benchmark to verify the network stability. If network connectivity issues persist, use a network logging device to monitor the network stability of the network provider.
Network Testing
Network Testing
1. Download the Fing app on IOS or Google Play Store
https://www.fing.com/fing-app/
2. Connect your mobile device to the outlet network and turn off mobile data.
3. Complete the initial setup (you can skip unnecessary steps) and go to the homepage.

4. Tap "Tools" at the bottom of the screen.
5. Select "Run speed test" and wait for the test to complete.

6. Take a screenshot of the result example below.

-
- Return to the Tools page.
- Scroll down to find the Ping tool.

-
- Tap the Ping tool.
- Enter "mqtt.antlysis.com" in the text box.
- Tap Ping to start the test.

-
Take a screenshot of the result.

-
- Return to the Ping tool page.
- Under Popular Targets, select google.com to run a baseline test.
-
Take a screenshot of the result.

Minimum Network Requirements
- Download Speed: 10 Mbps
- Upload Speed: 10 Mbps
- Average Server Ping: 150ms
- Server Packet Loss: 10%
Network Logging Device
If connectivity issues persist, a network logging device may be needed to monitor the network. This device:
- Connects to a LAN port on the router.
- Requires a separate power supply.
- Continuously measures speed, latency, and bandwidth.
- Uploads data to our server for monitoring.
Installing additional Access Point (AP)
When an outlet has a large number of devices, adding an additional stand-alone access point (AP) can help reduce the load on the router and improve connectivity. This guide explains the process of adding an additional AP and how how to migrate the WIFI settings from the original router to the new AP.
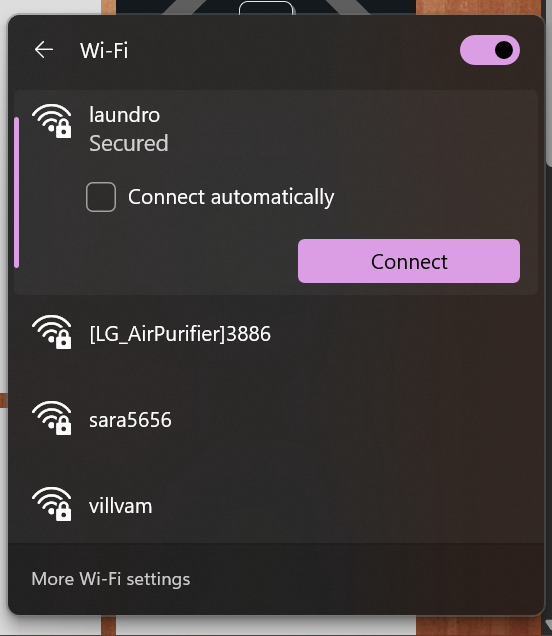
1. Connect to the Existing Wi-Fi Network
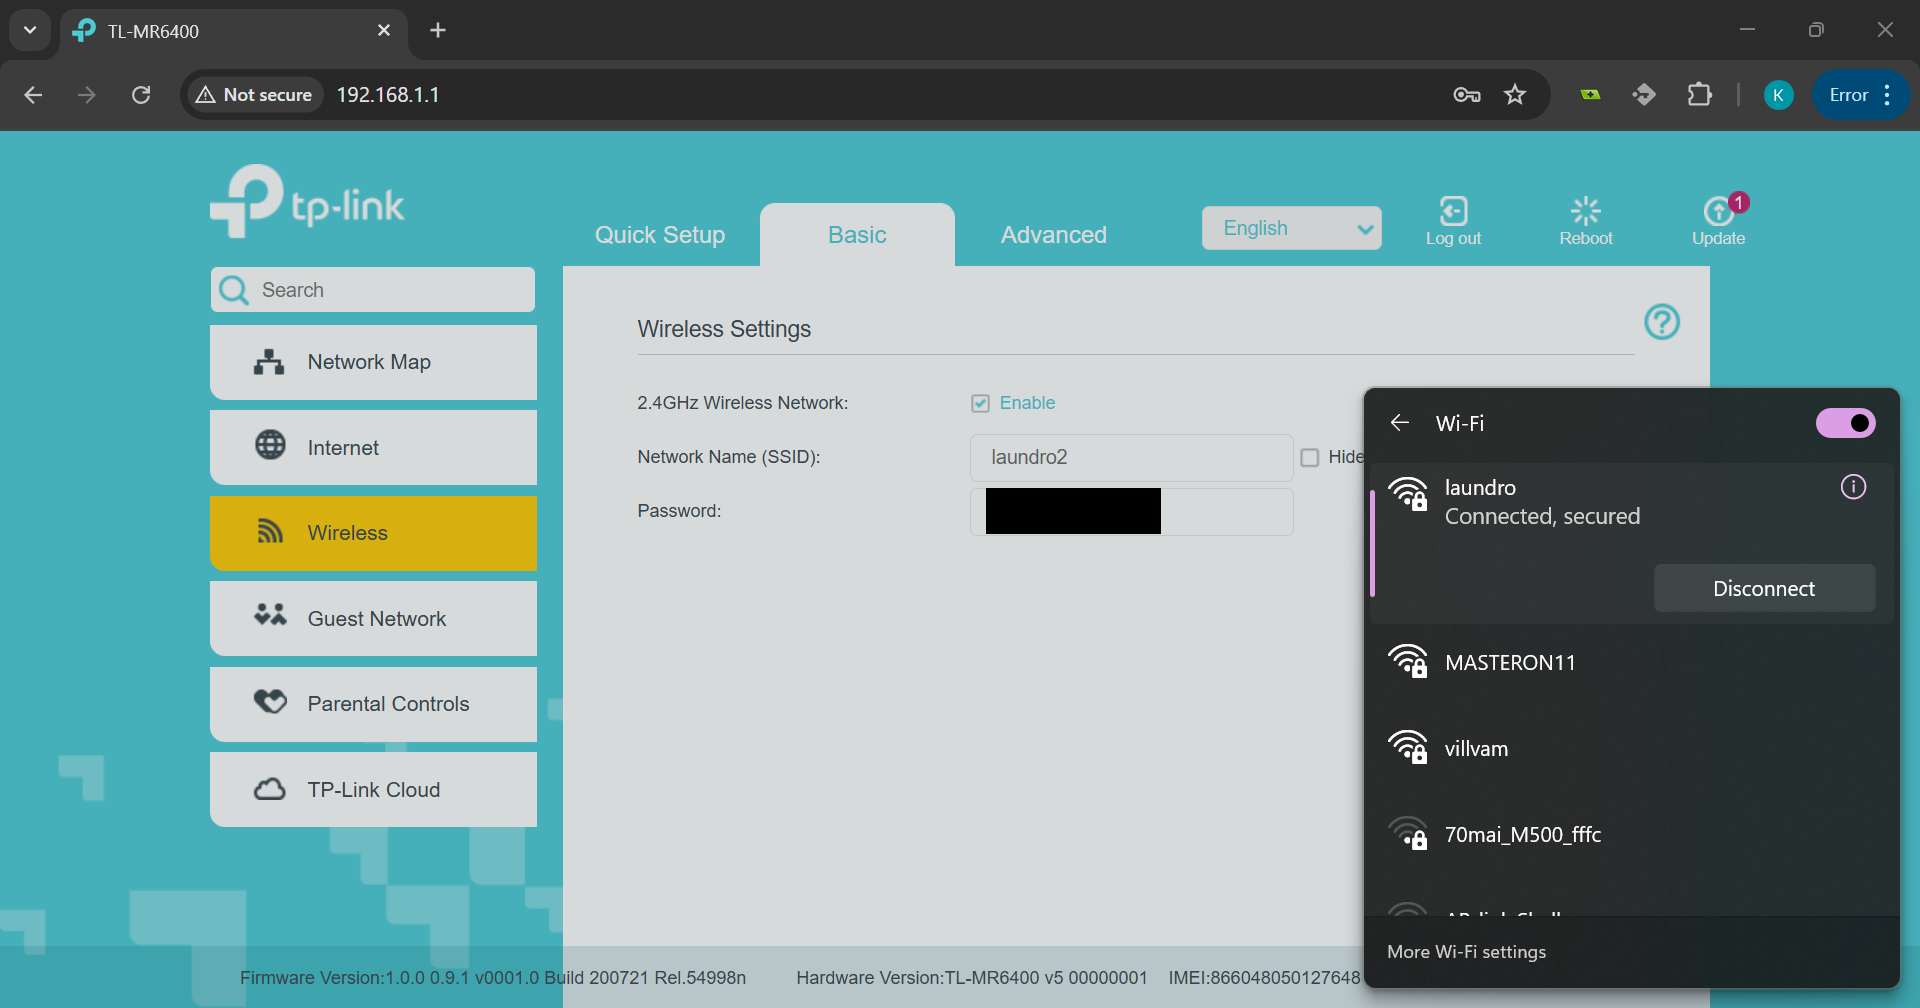
Connect to your existing Wi-Fi network (e.g., laundro) using a mobile device such as a laptop or smartphone.
2. Access the Router's Web Interface
Open a web browser (e.g., Chrome) and enter the IP address of the router. Common router IP addresses include:
-
192.168.0.1 -
192.168.1.1 -
192.168.100.1

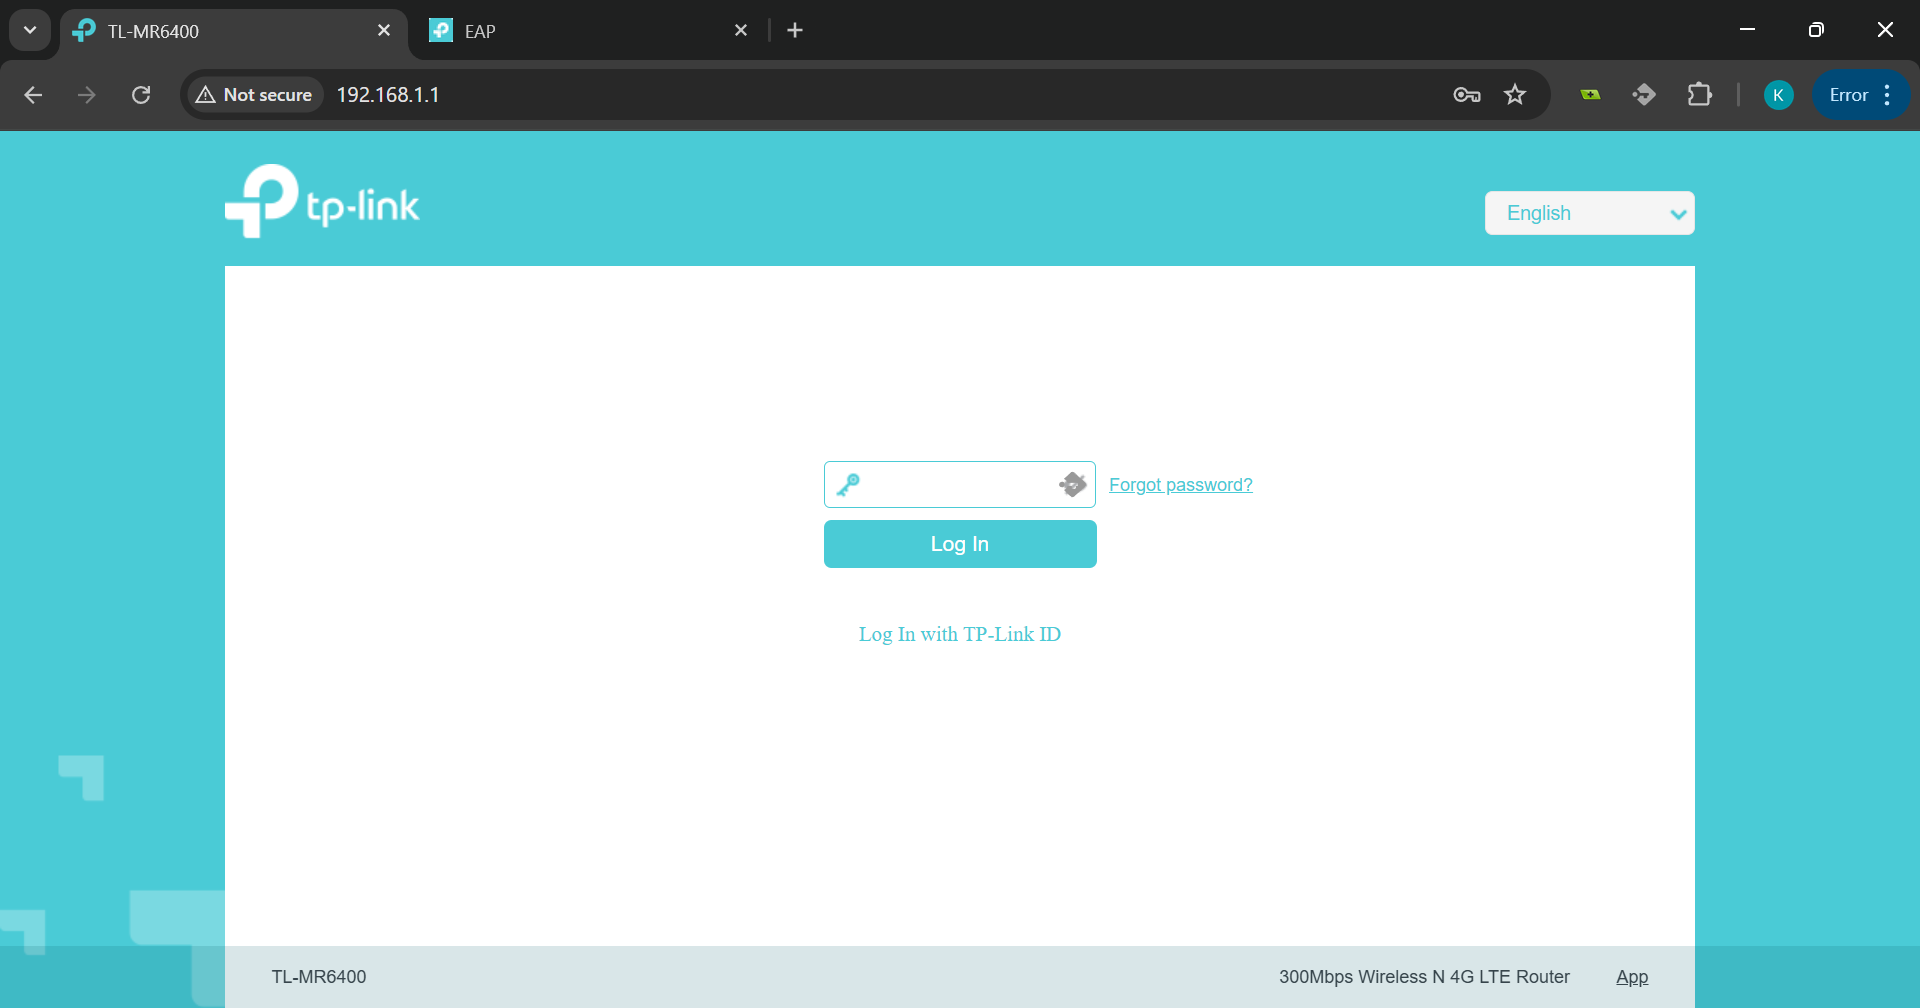
3. Log In to the Router
Enter the router's login credentials. These may have been set previously or can often be found on a label at the bottom of the router. This will take you to the router's home page.
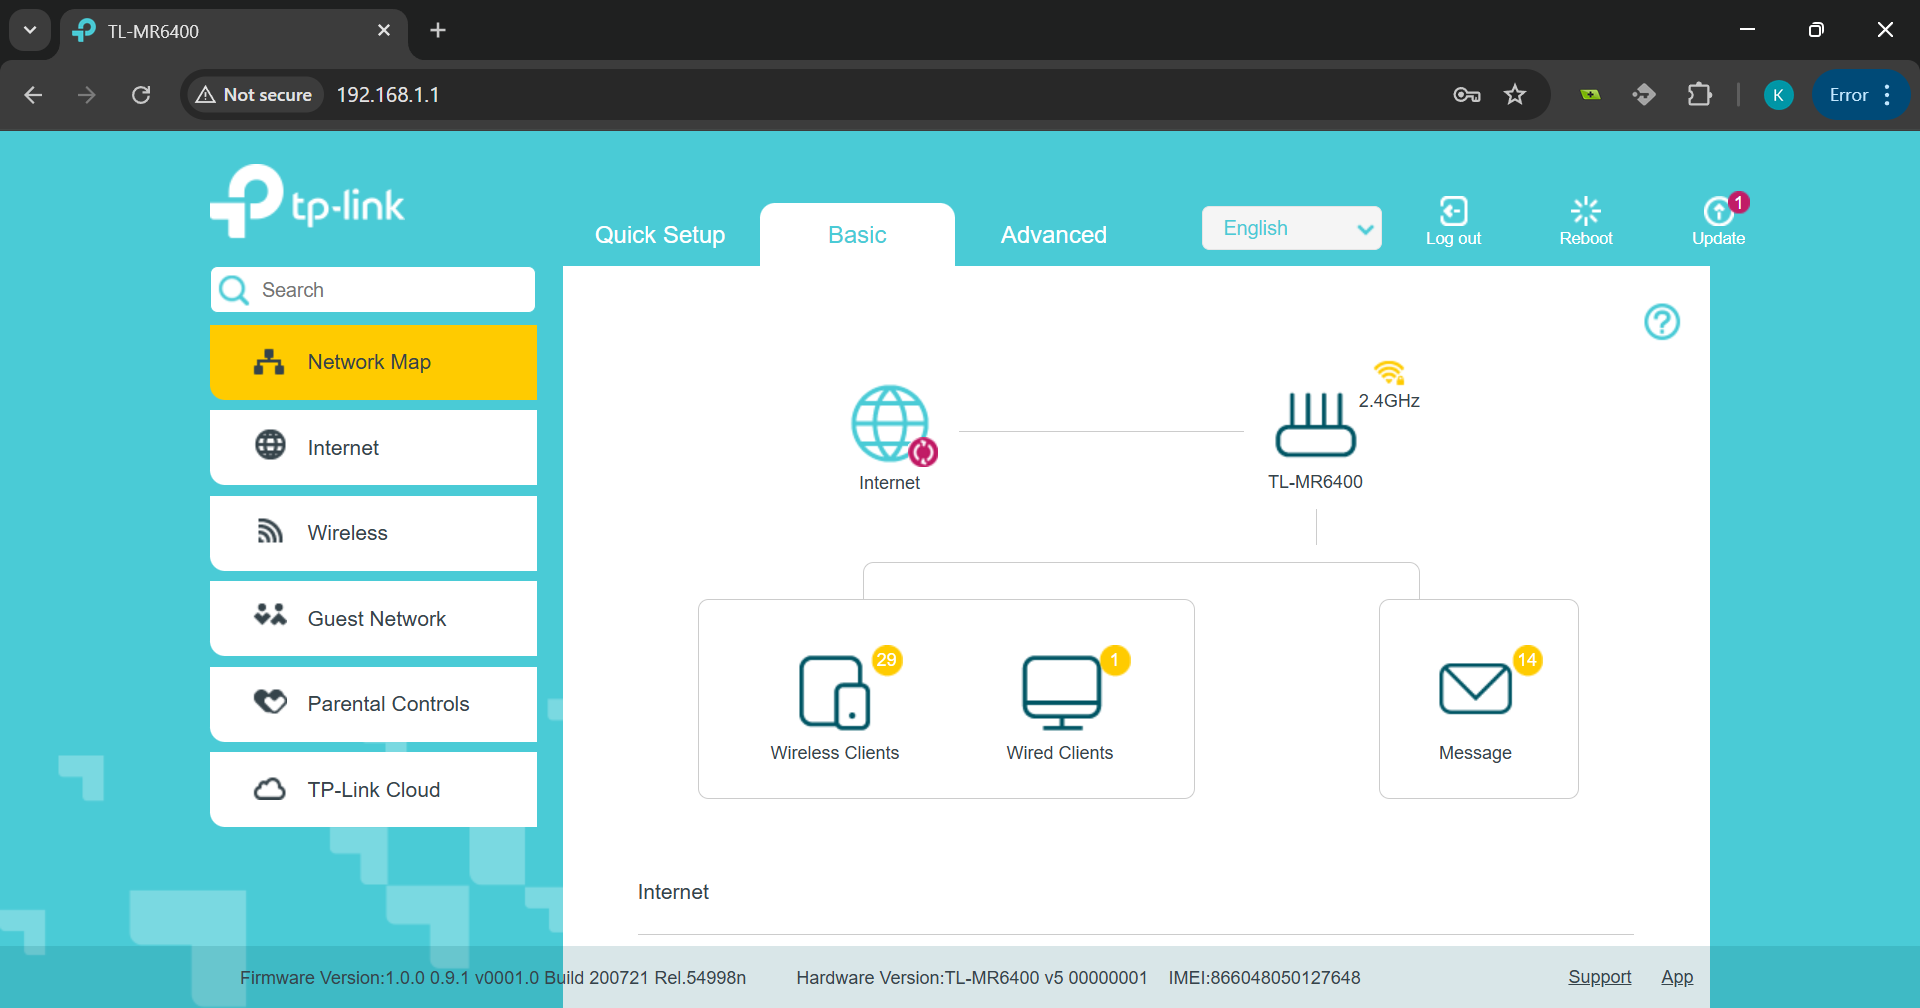
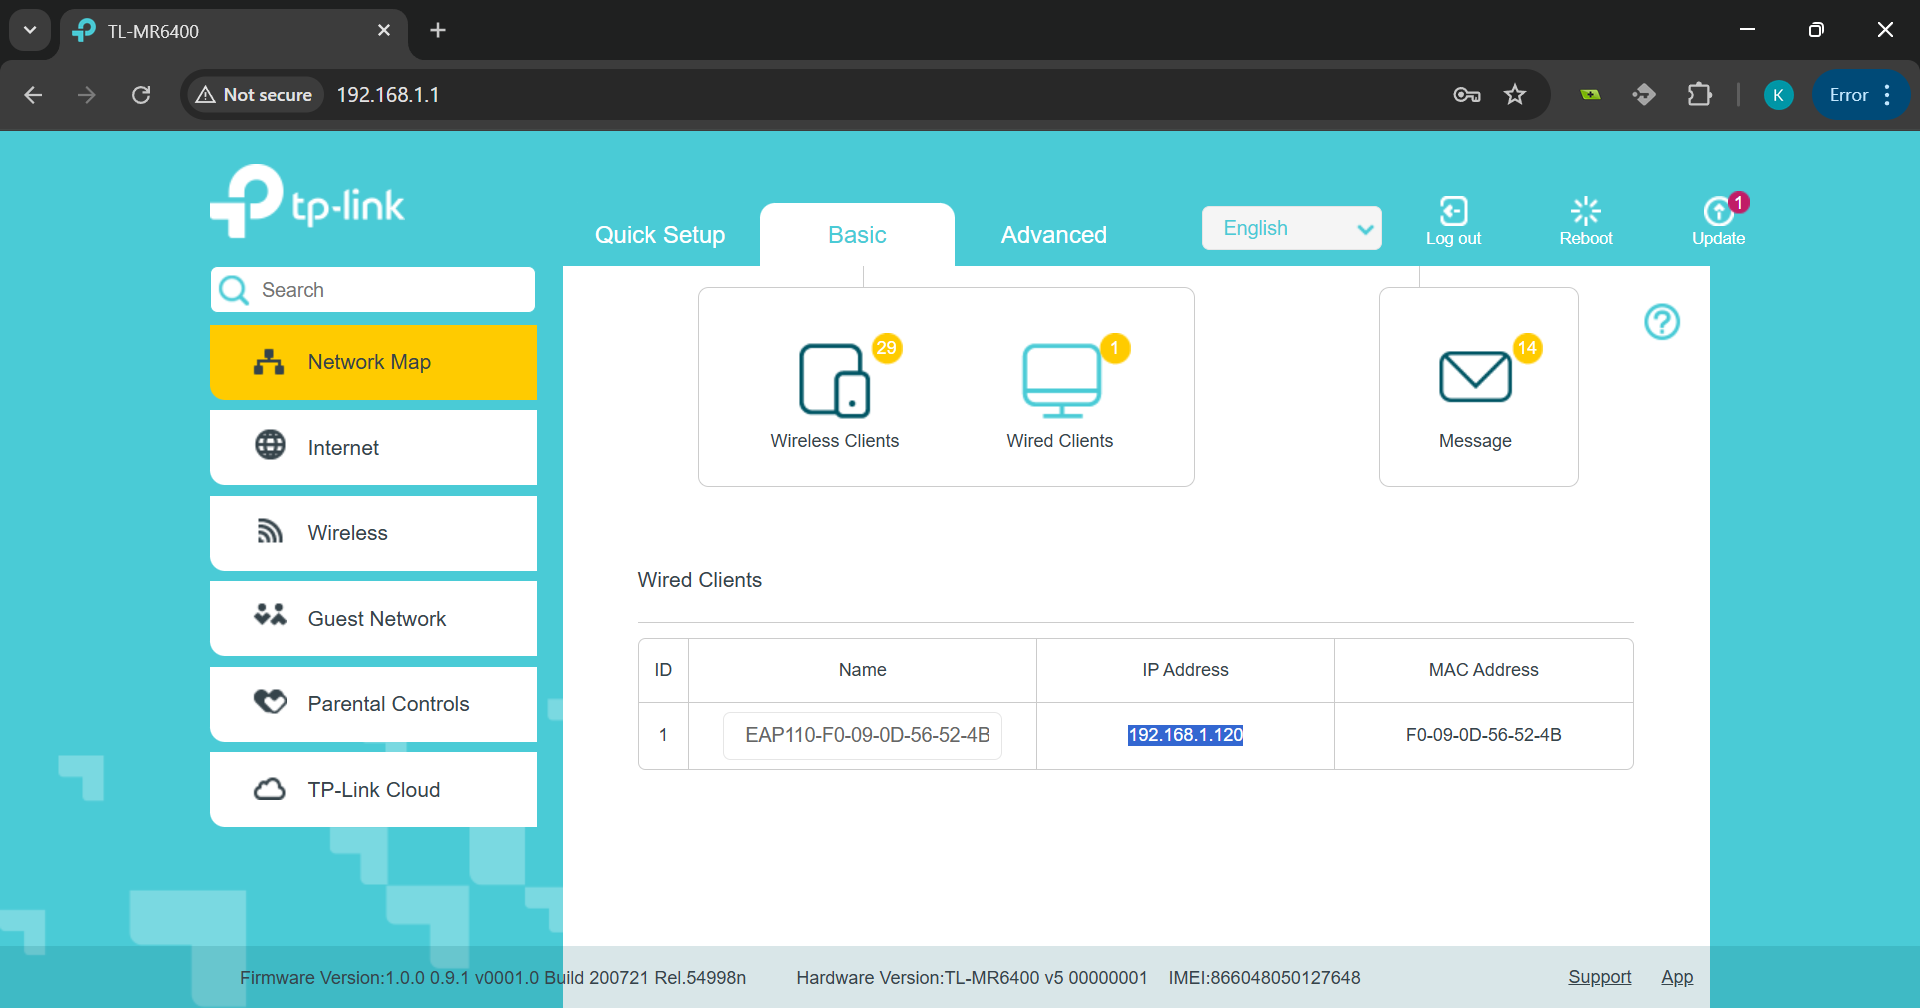
4. Identify the Access Point (AP)
Click on the Wired Clients icon. You should see a device listed—this is the access point (AP). Take note of its IP address (e.g., 192.168.1.120).
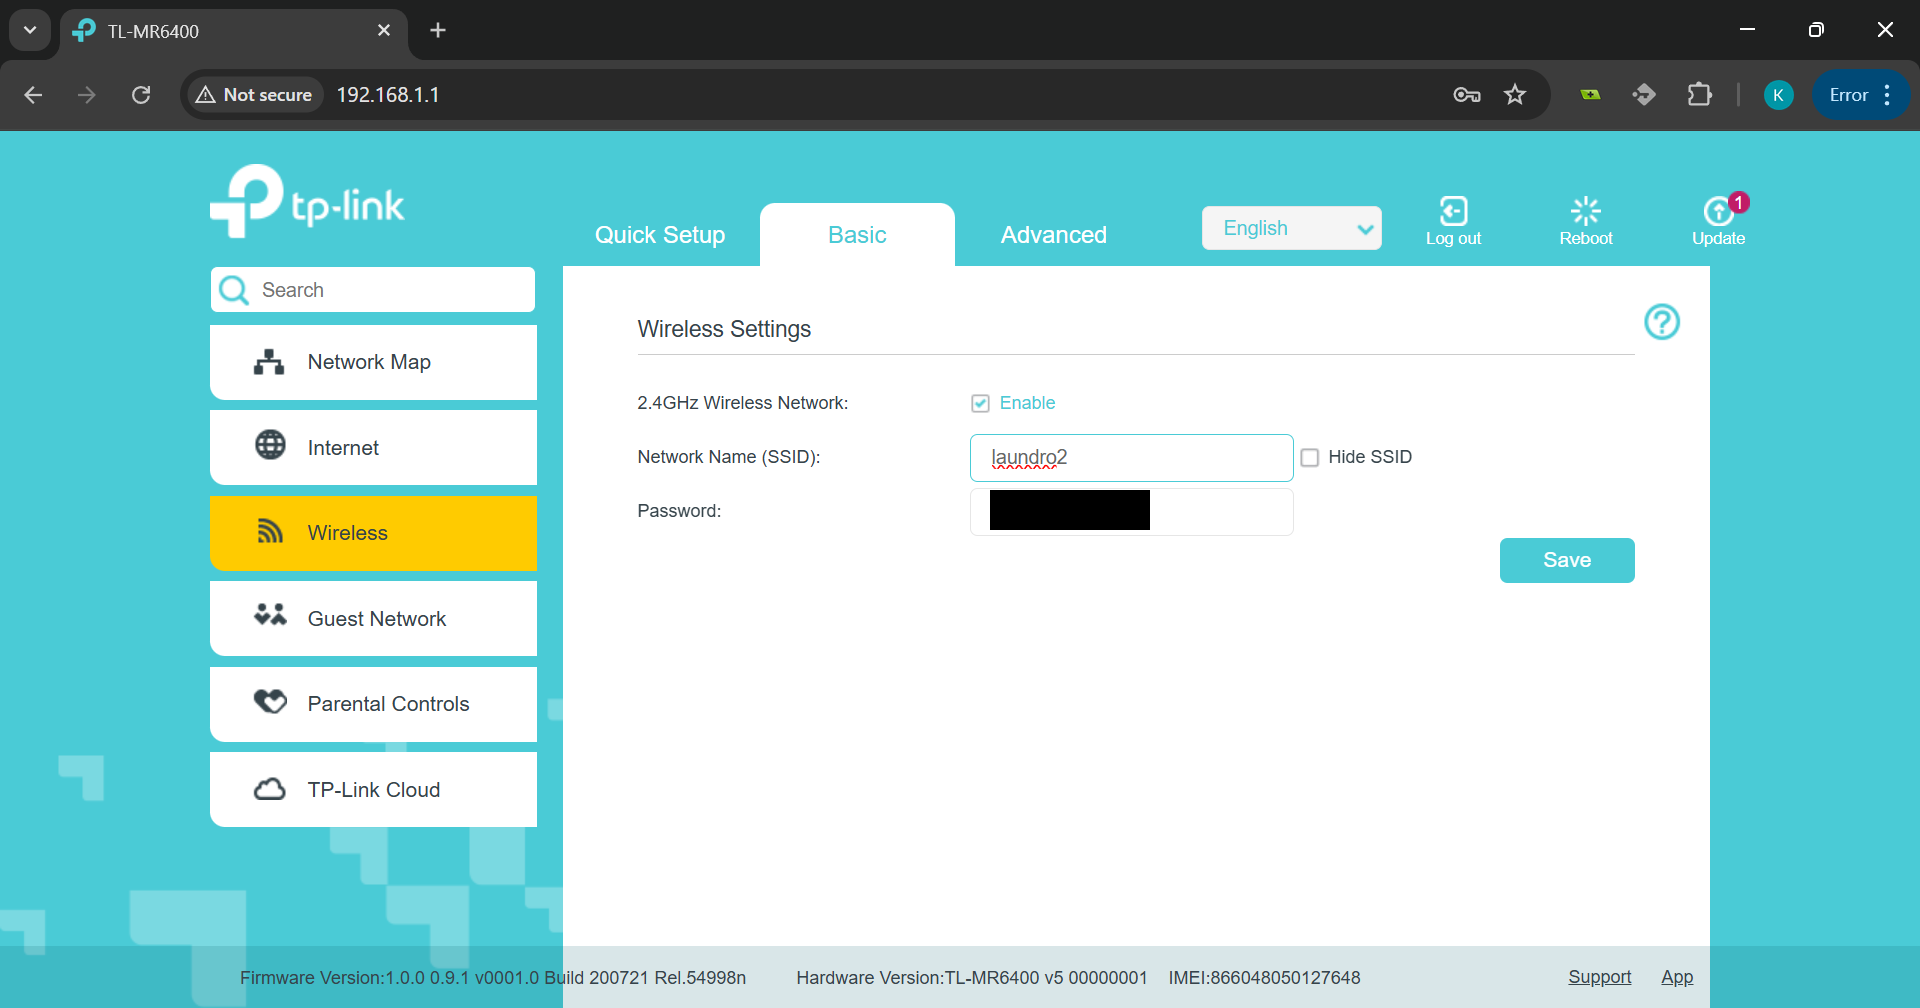
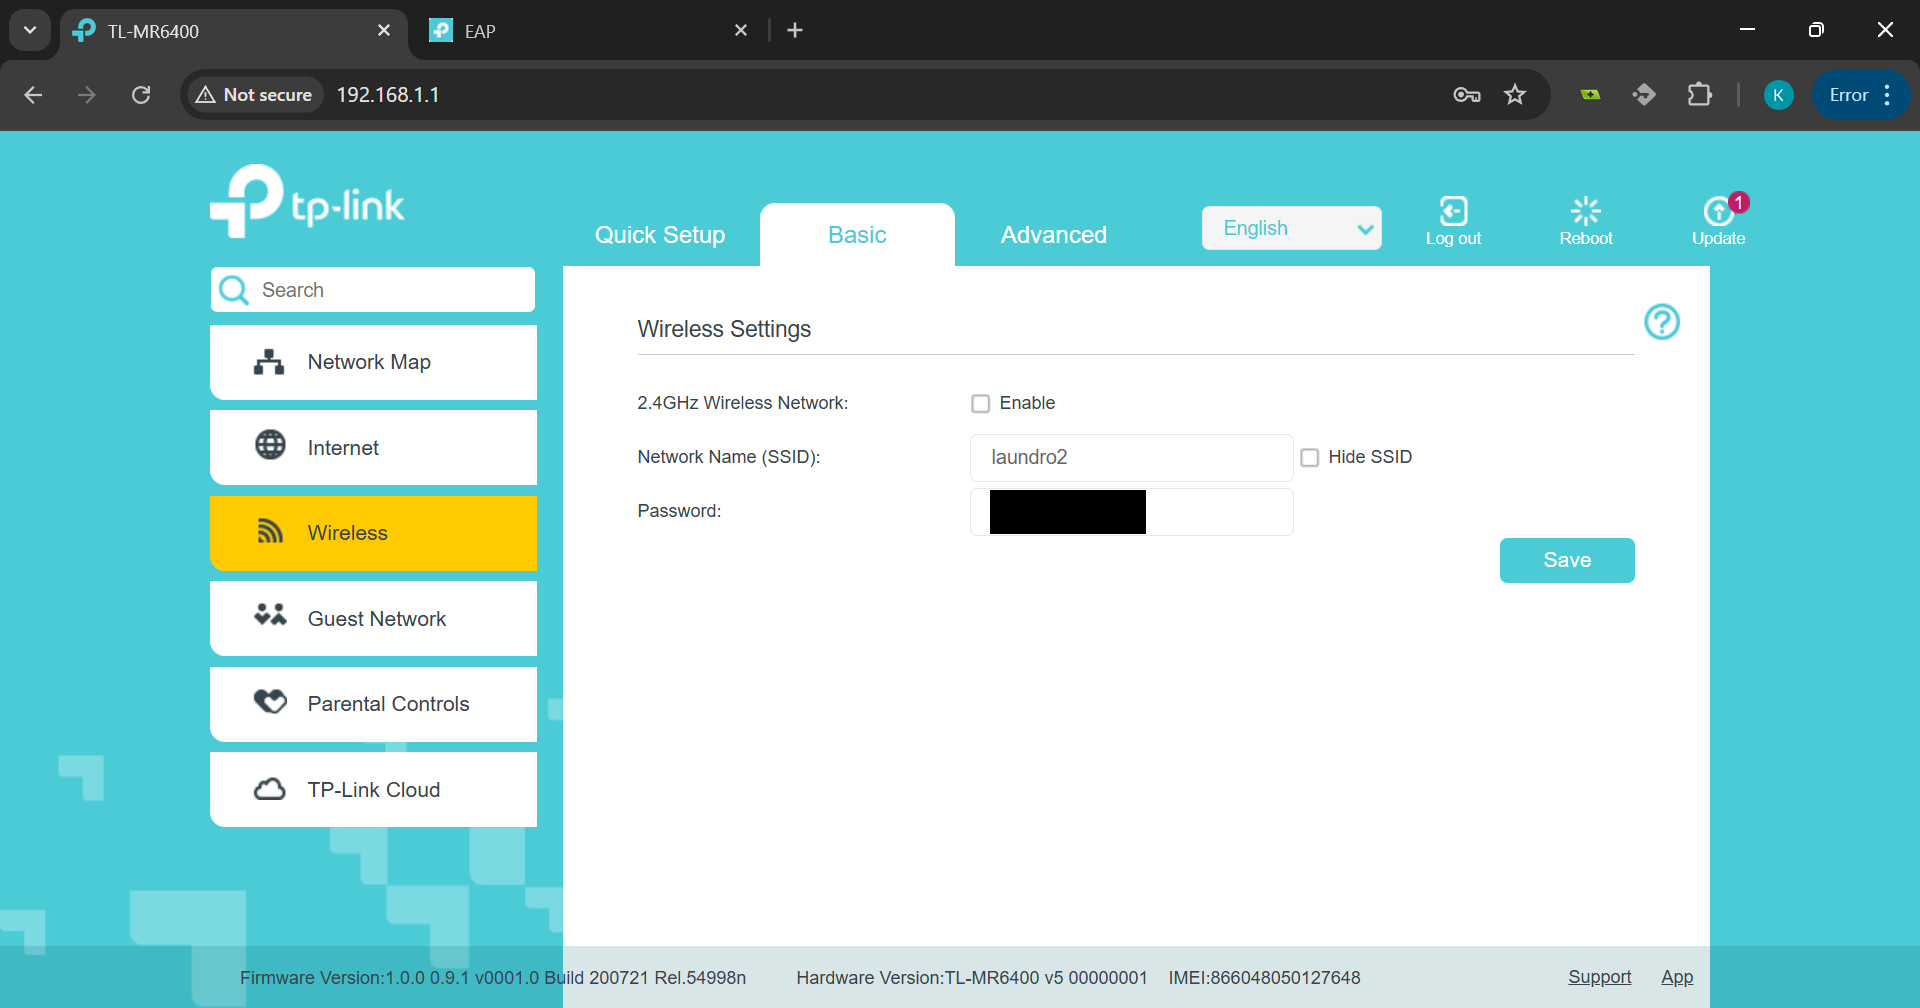
5. Rename the Router’s SSID
Click on the Wireless tab in the left navigation menu. Change the name of the current SSID (Wi-Fi network name) to something different, then click Save.
6. Disconnect from the Router
Changing the SSID will disconnect you from the Wi-Fi network. If the device does not disconnect automatically, you can manually do so.
7. Connect to the Access Point
Now connect to the AP's default Wi-Fi network. This is usually named after the AP model.

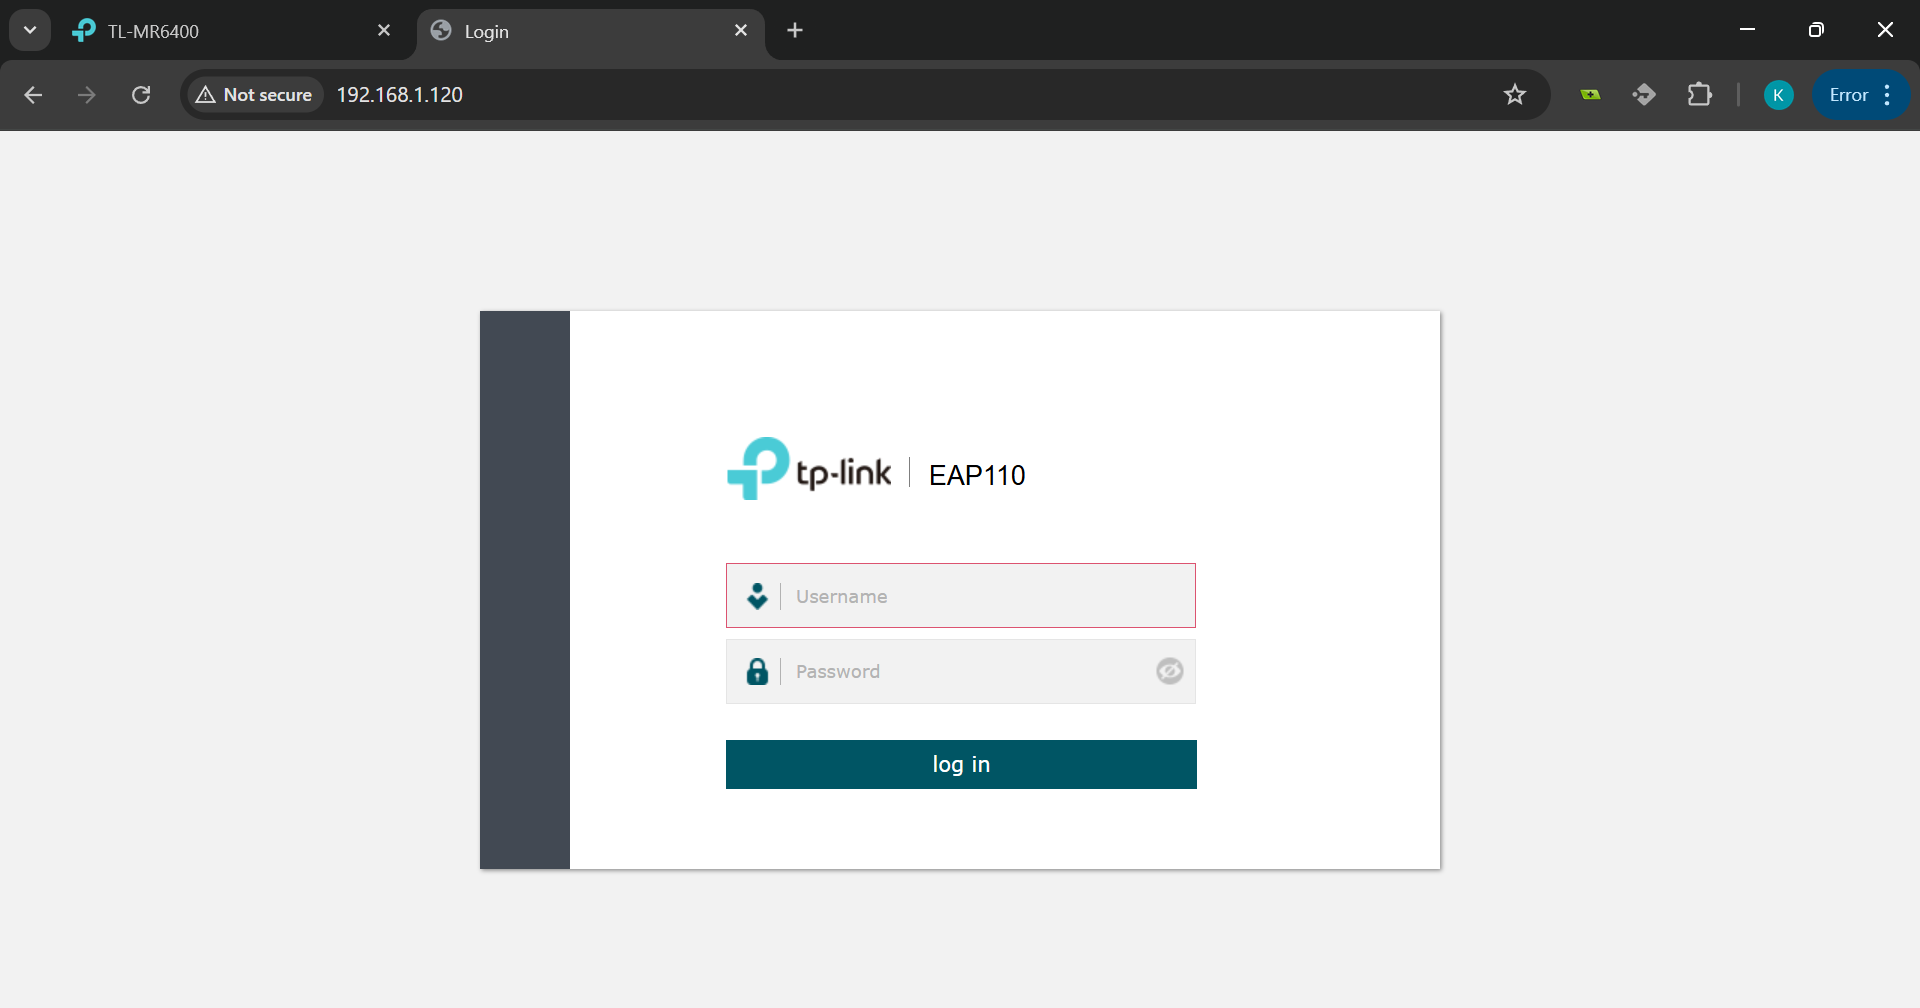
8. Log In to the Access Point
Open a new tab in your browser and enter the IP address you noted earlier. This will bring you to the AP’s login page. Log in using the default credentials provided by the manufacturer (e.g.,
Username: admin
Password: admin).
9. Change Default Credentials
You will be prompted to change the default username and password. Choose secure credentials and make sure to remember them. Click Next to proceed.

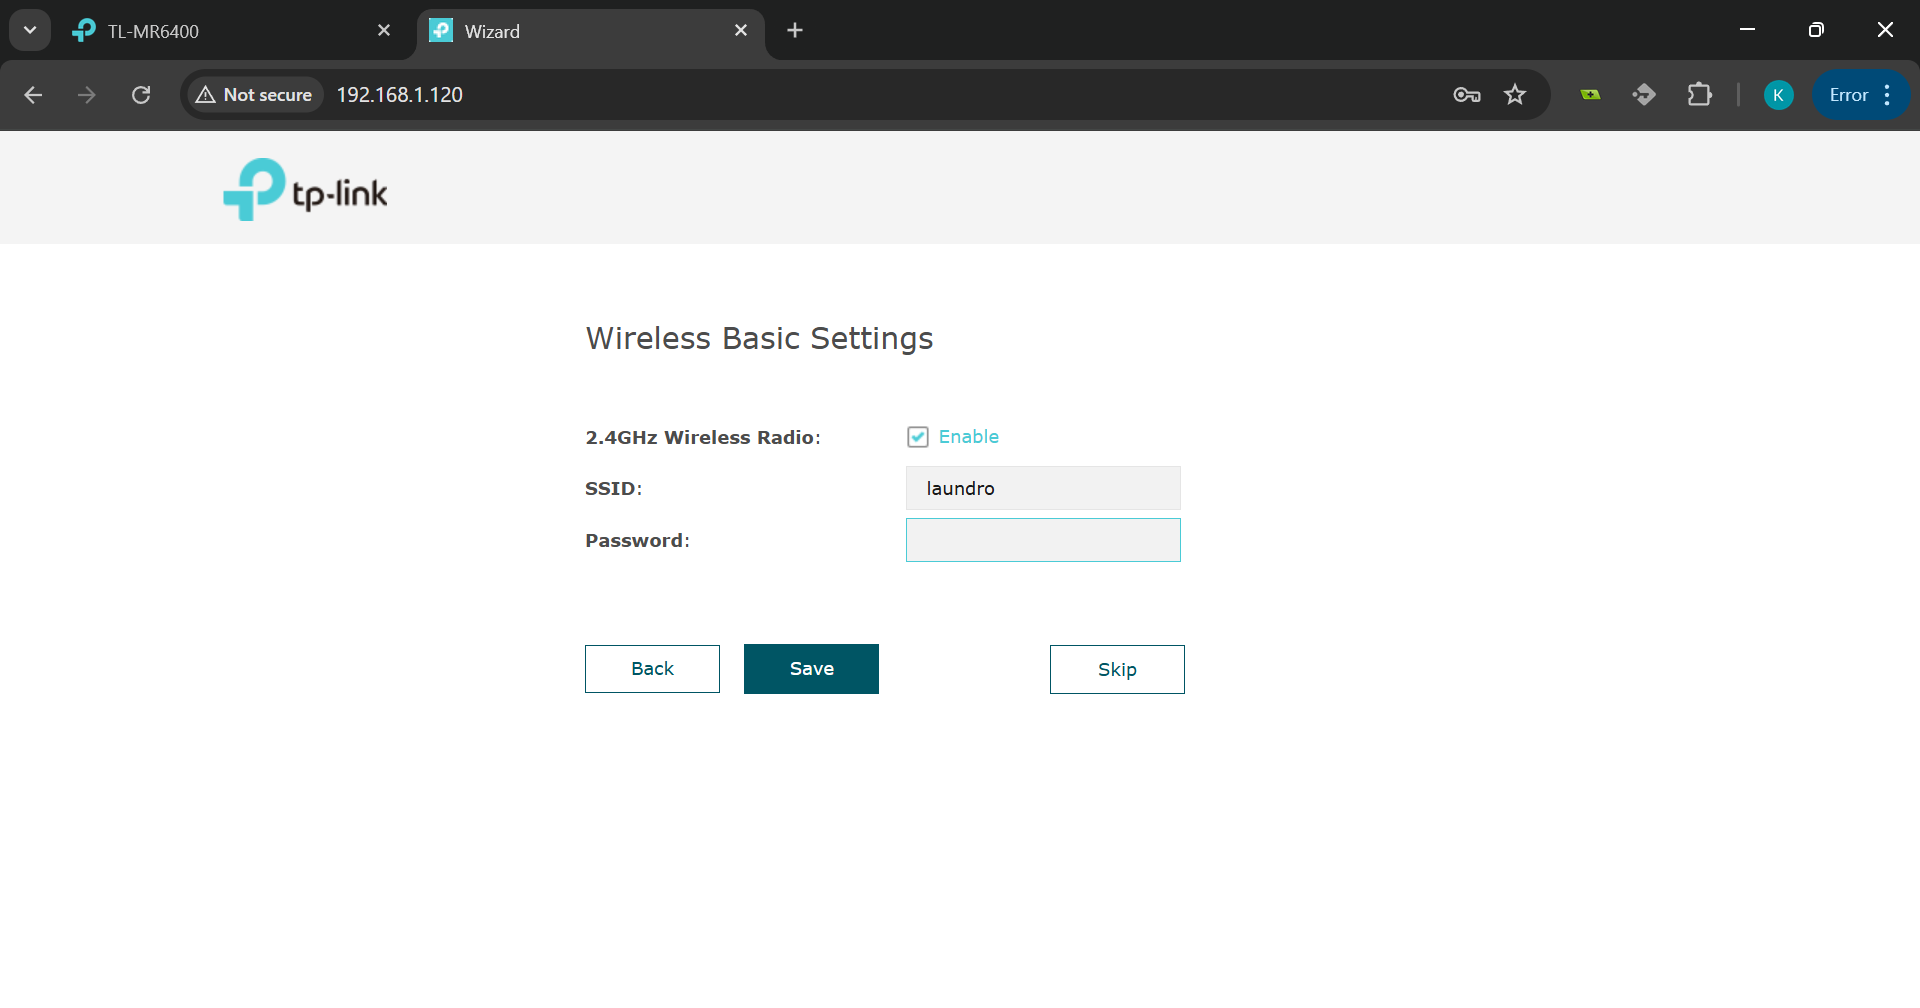
10. Configure Wi-Fi Settings on the AP
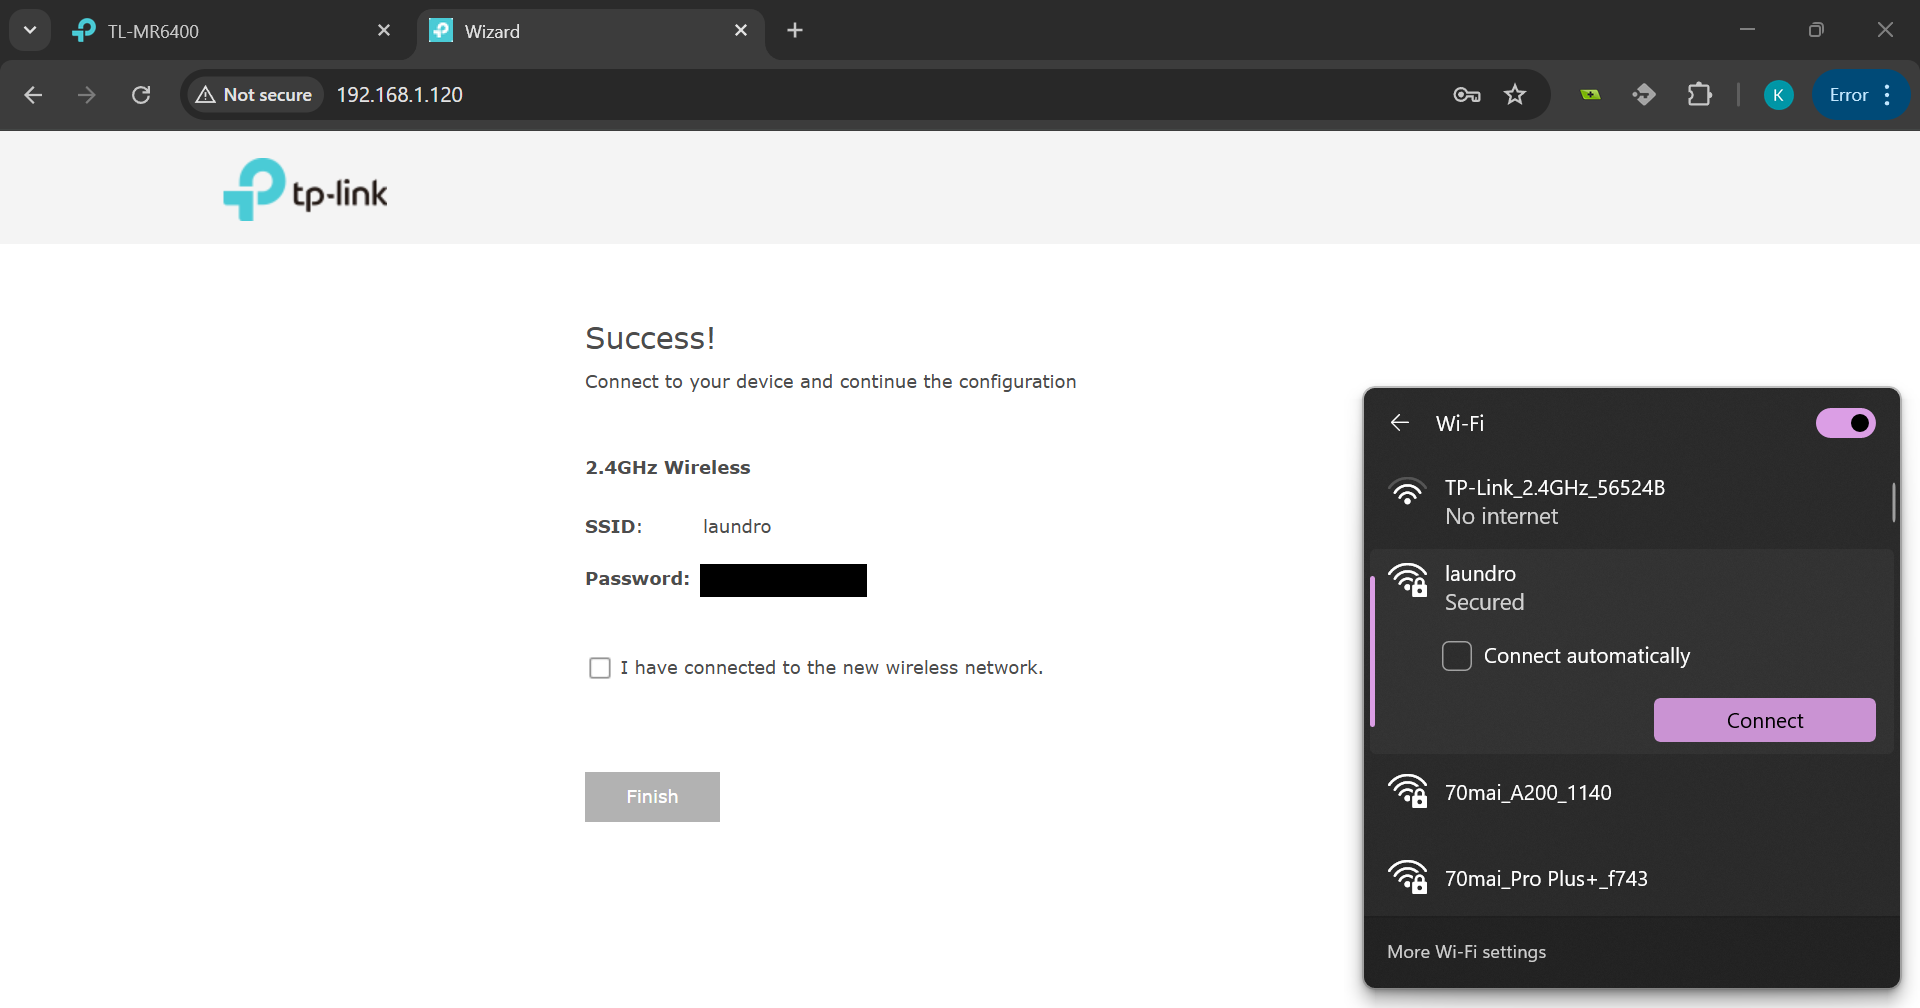
Set the SSID and password to match the original network name and credentials (e.g., laundro). Click Save.
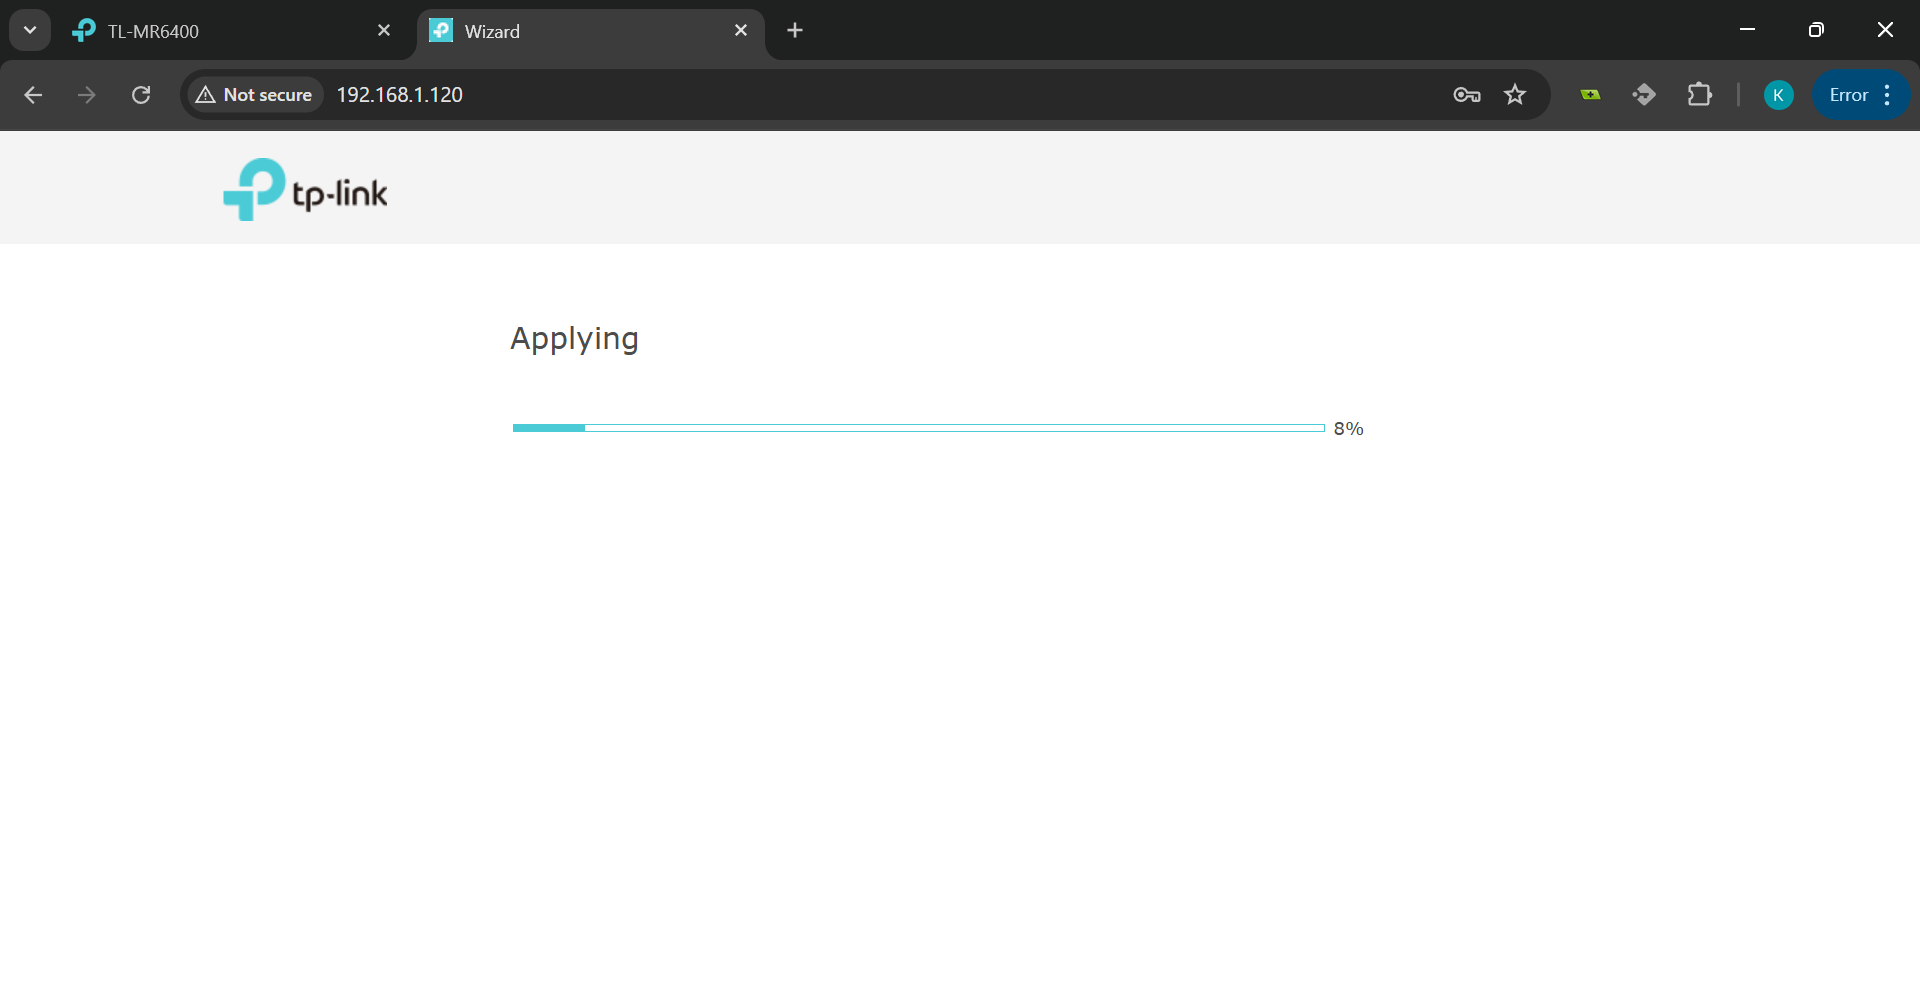
11. Wait for Settings to Apply
The AP will apply the new settings. A loading bar will be displayed during this process.
12. Confirmation Page
Once the settings are saved, a success page will appear prompting you to reconnect to the updated network.
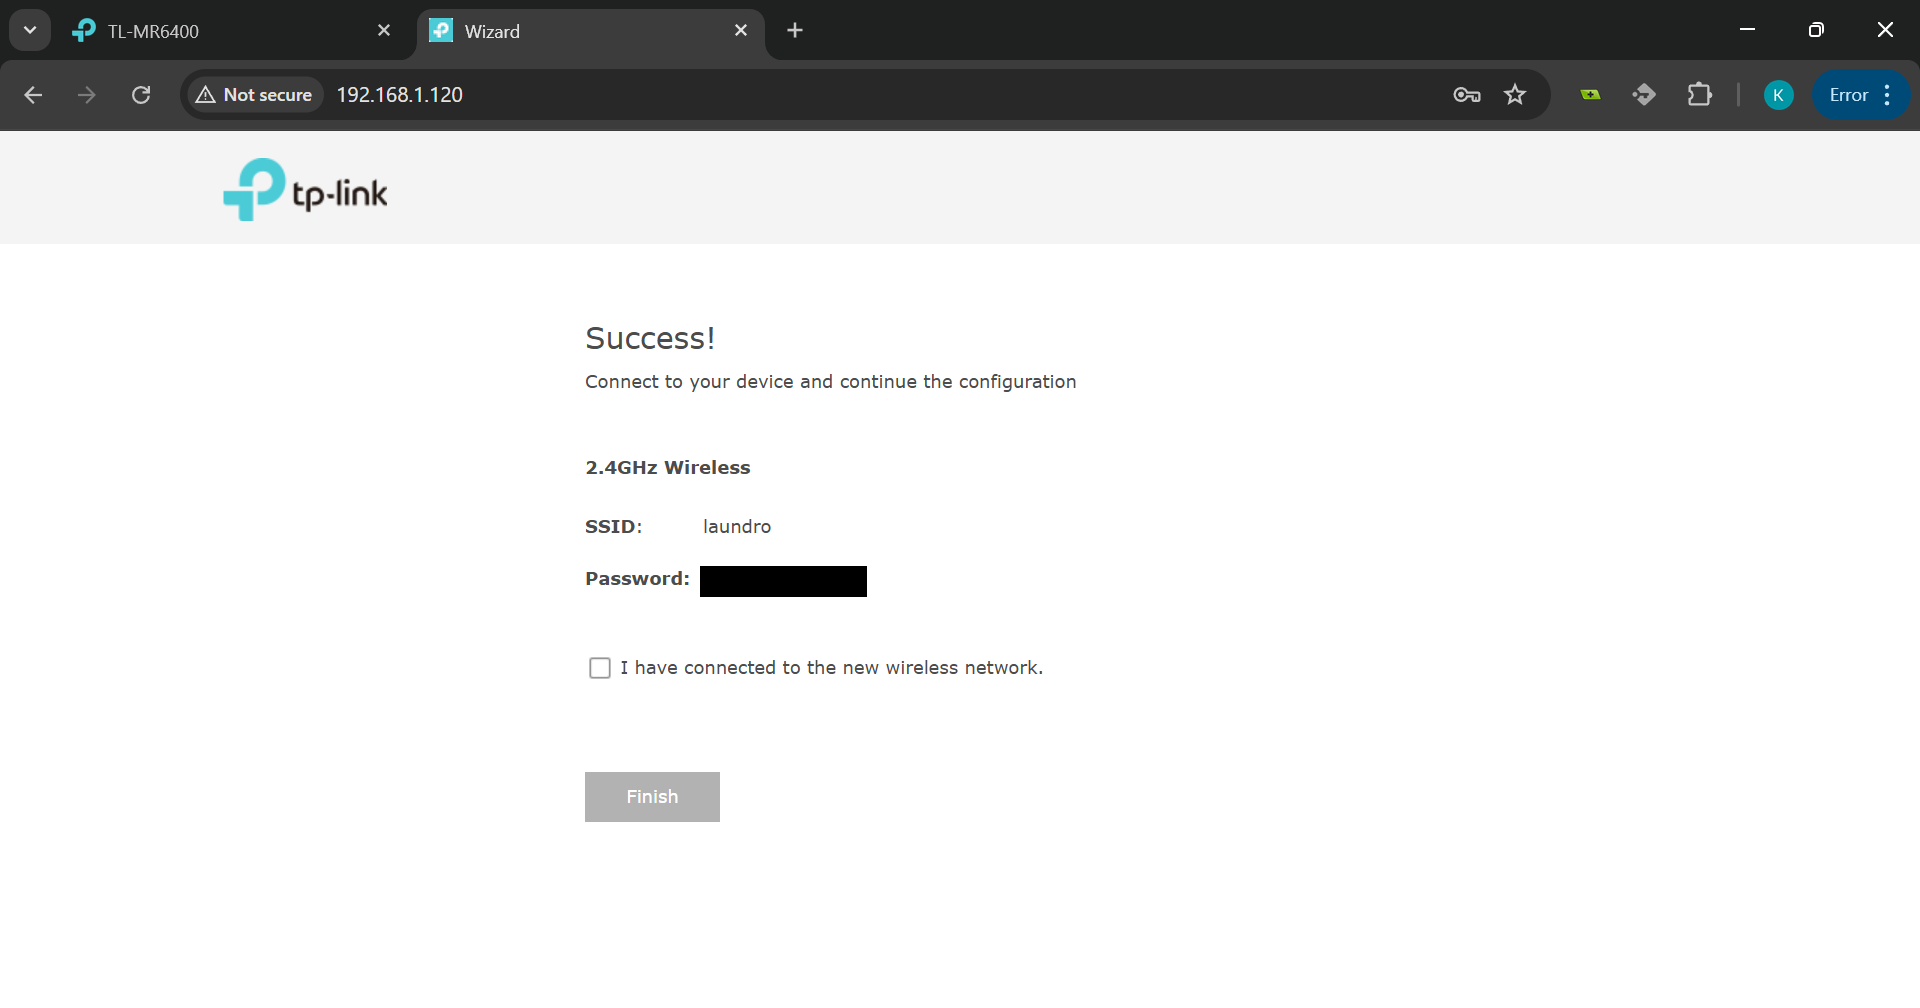
13. Reconnect to the Original SSID
Reconnect to the original SSID (e.g., laundro), check the box that says "I have connected to the new wireless network", and click Finish.
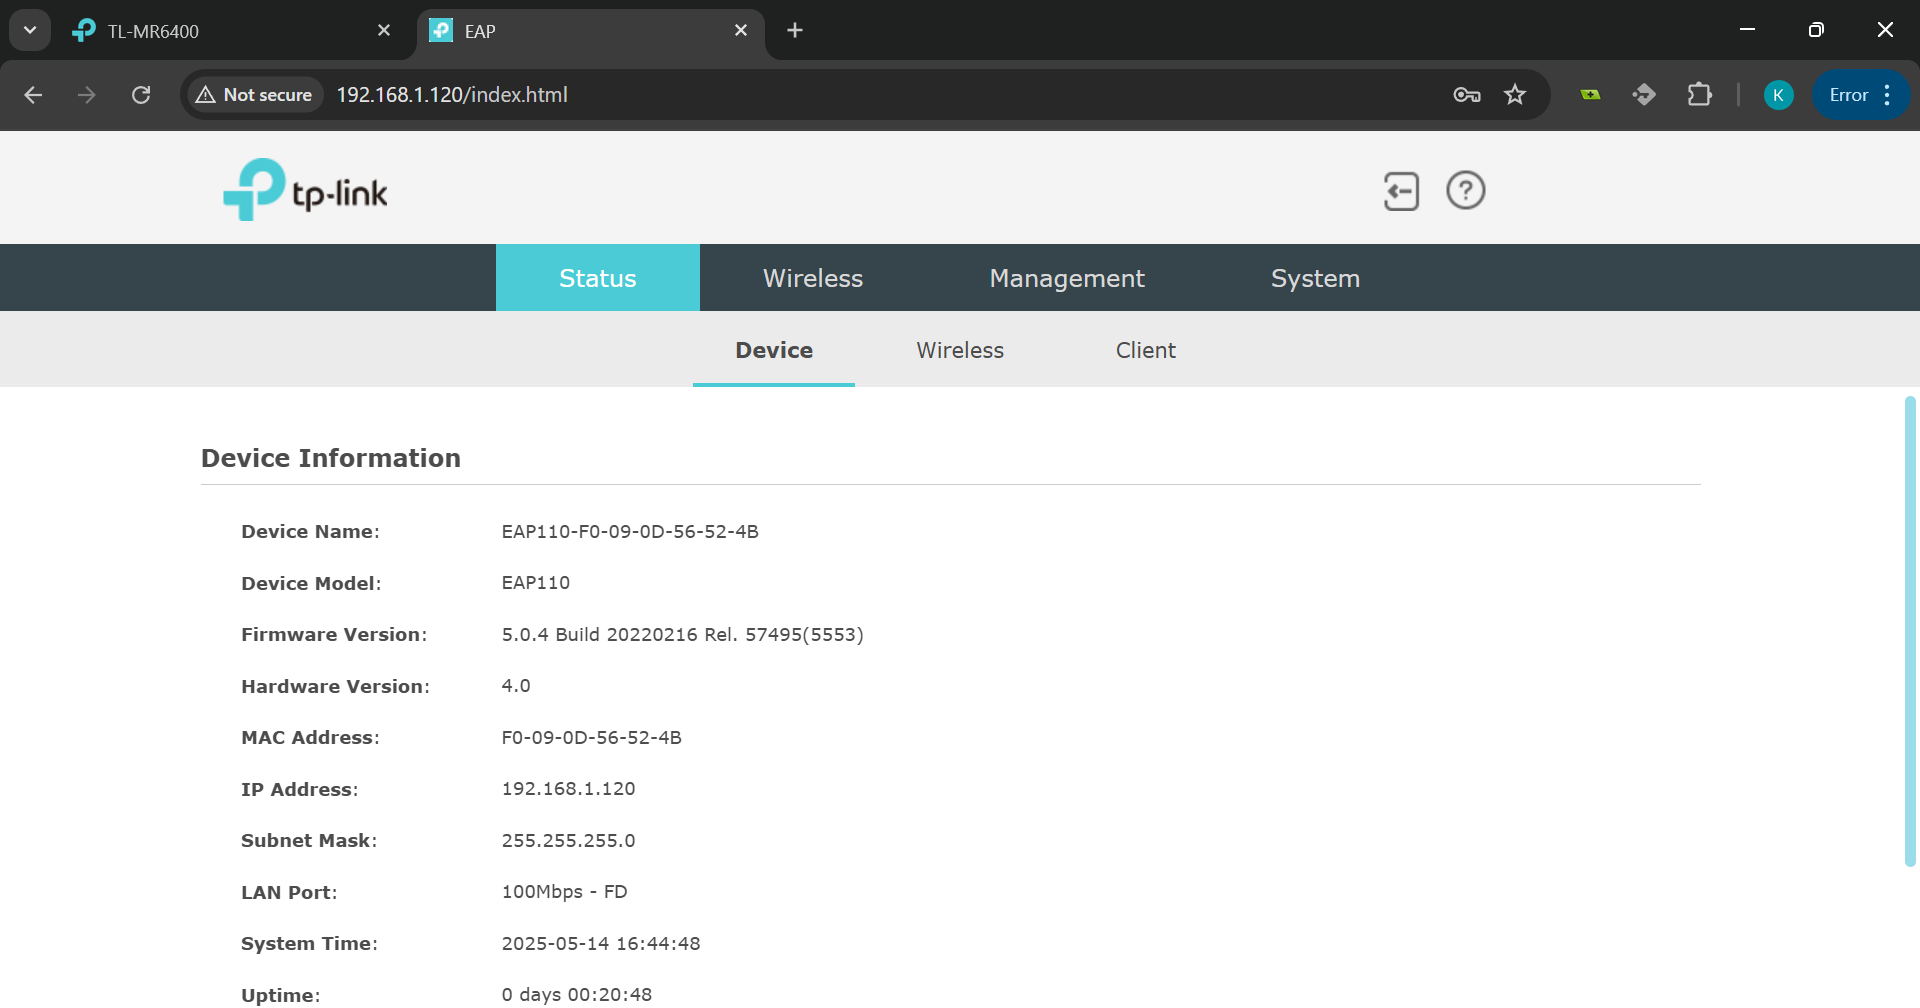
14. Verify AP Setup
You will now be directed to the AP’s home page. Confirm that the setup has been completed successfully.
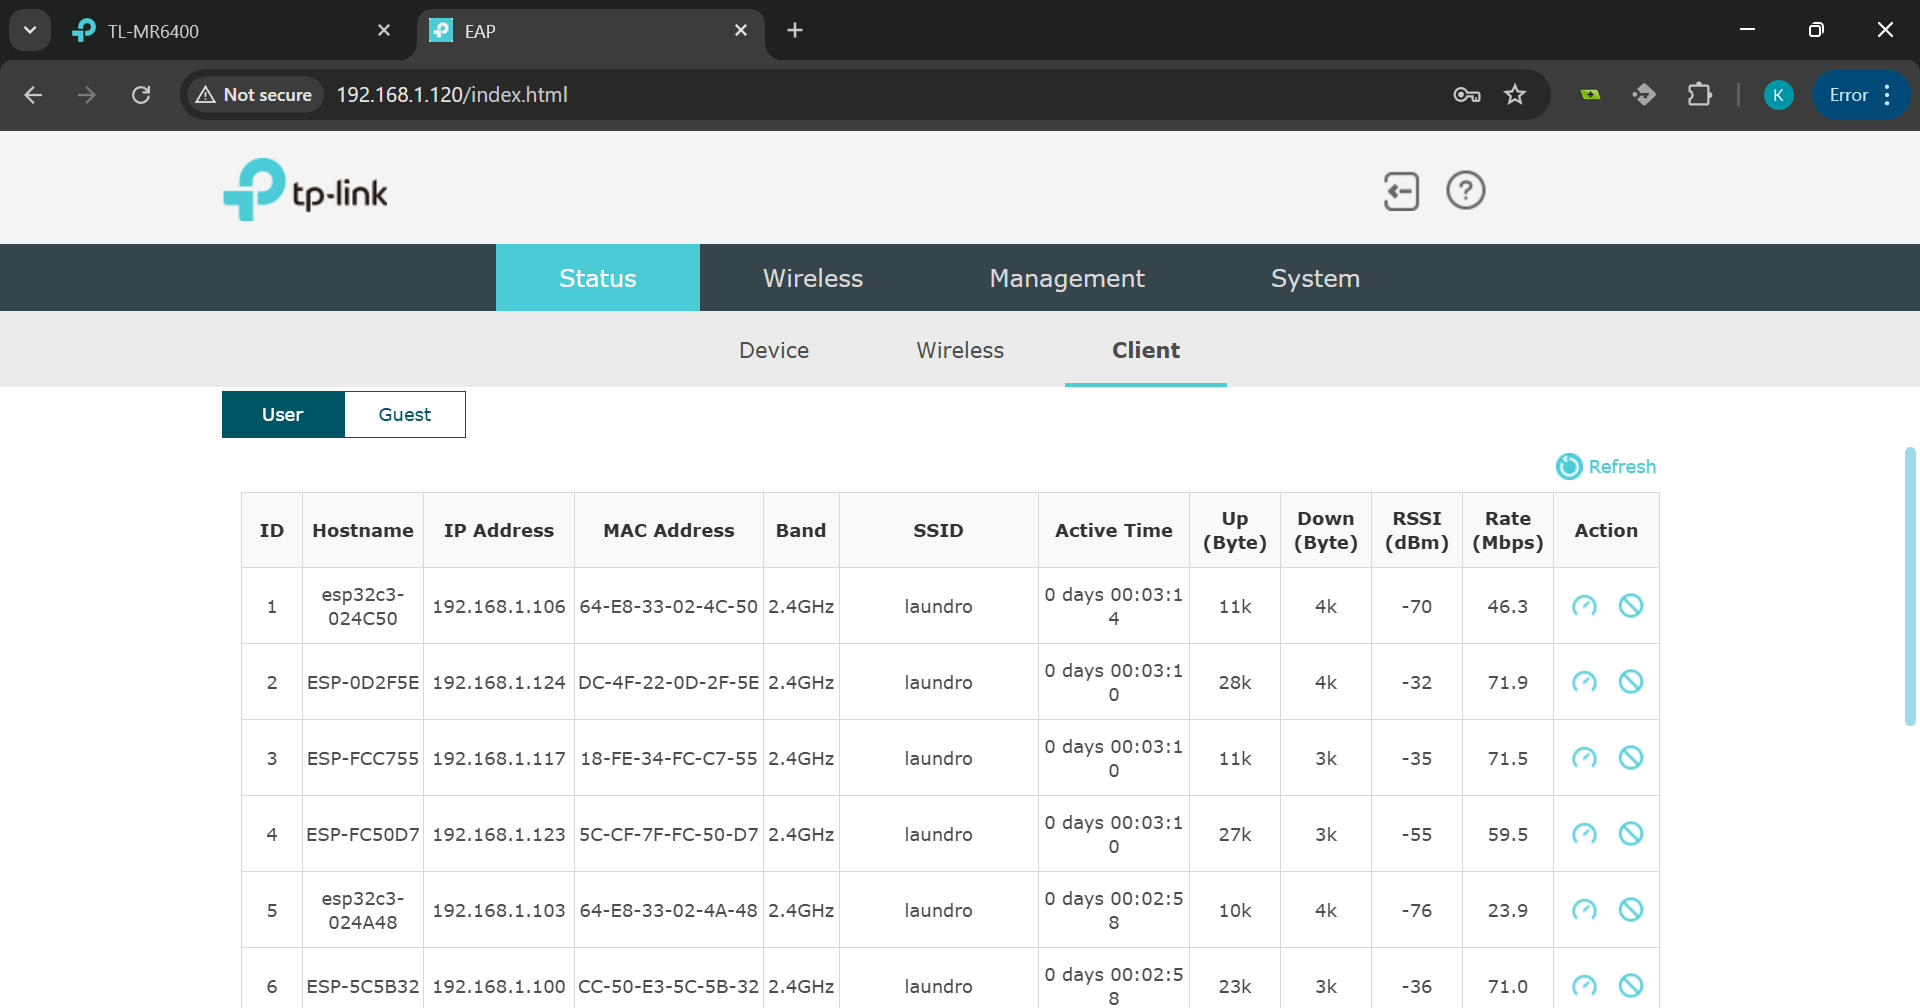
15. Check Connected Devices
16. Reopen the Router Settings
In your browser, go back to the router's IP address (e.g., 192.168.1.1) and log in again.
17. Disable the Router’s SSID
Go to the Wireless tab in the router settings. Uncheck the Enable SSID checkbox to disable the router's own wireless network. Click Save.
18. Final Verification
Verify that all devices are online via NodeCloud, and confirm that only the original SSID (now being broadcast by the AP) is active.