Device support only 2.4gh.
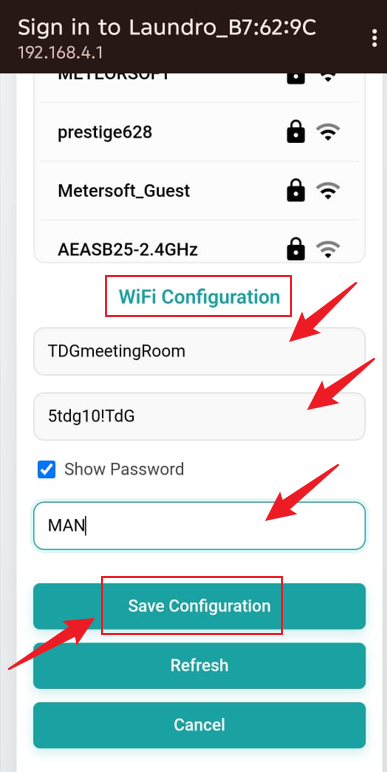
Step 1- To connect the device to a new Wi-Fi network, first ensure the device is in **Configuration Mode**. The blue LED indicator should be blinking. [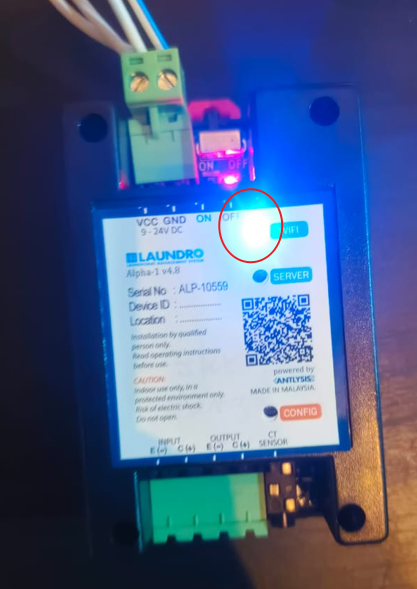](https://docs.antlysis.com/uploads/images/gallery/2026-05/NAIjdBl50p1jX2uL-image.png) Step 2- Open the **Wi-Fi Settings** page on your mobile phone and search for available Wi-Fi name **Example:**'' **Laundro\_##:##:##**''. [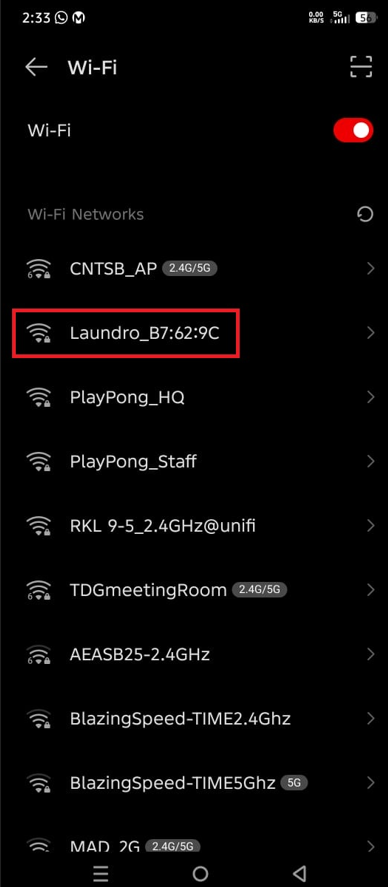](https://docs.antlysis.com/uploads/images/gallery/2026-05/AfgJBq3XCDoCW8oA-image.png) **Step 3:** Select the **Laundro** Wi-Fi network from the list of available networks. When prompted, enter the password: Step4 - Once the correct password has been entered, tap **Connect** to proceed. **Password:** `123456789` [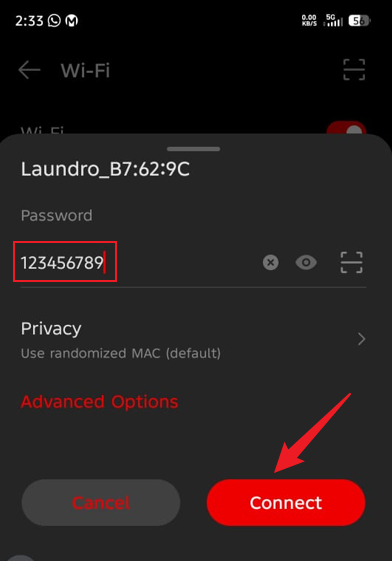](https://docs.antlysis.com/uploads/images/gallery/2026-05/x8wOJVpTgNdeH90s-image.png) **Step 5:** After connecting to the Wi-Fi network, you will be redirected to the **Configuration Page**. **Step 6:** Click **Configure Wi-Fi** to open the **Wi-Fi Configuration** page. [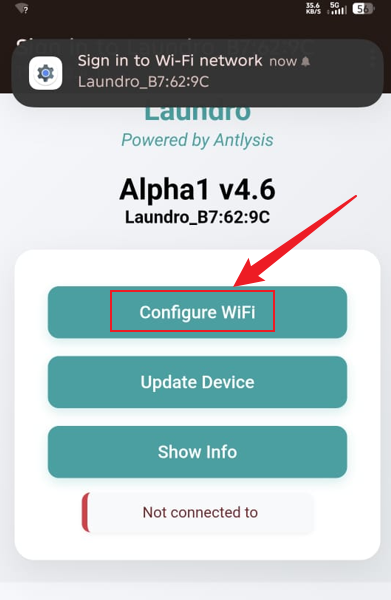](https://docs.antlysis.com/uploads/images/gallery/2026-05/cyAAkB0l7Ym3R3BX-image.png) **Step 7:** From the list of available networks, choose the Wi-Fi network you want to connect to, then scroll down the page. [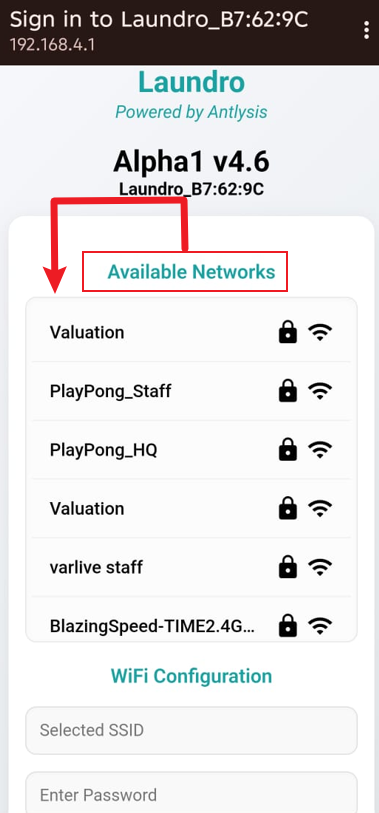](https://docs.antlysis.com/uploads/images/gallery/2026-05/x0Lrv4pe1rKD4nYR-image.png) **Step 8:** Under **Wi-Fi Configuration**, confirm the selected **SSID (Wi-Fi Name)**, enter the Wi-Fi password, and then enter the provided **Outlet ID**. Ensure all information is correct click on **Save Configuration** .Before selecting **Save Configuration**, double-check the **Wi-Fi password** and **Outlet ID**. Ensure all information is correct and that no hidden spaces have been entered.
[](https://docs.antlysis.com/uploads/images/gallery/2026-05/K1dbm18Td6GNxTlV-image.png) **Step 9:**The **Wi-Fi Status** page will be displayed, and the device will start configuring automatically. Please wait until the status message reads **"Device Ready for Configuration"**. [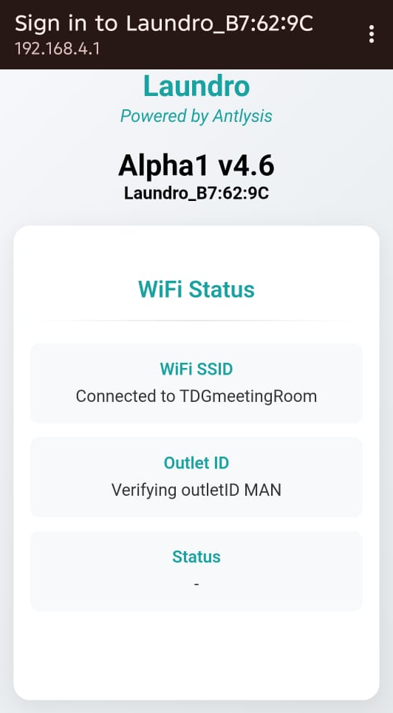](https://docs.antlysis.com/uploads/images/gallery/2026-05/HvoCN9NBYRp8PYuS-image.png) [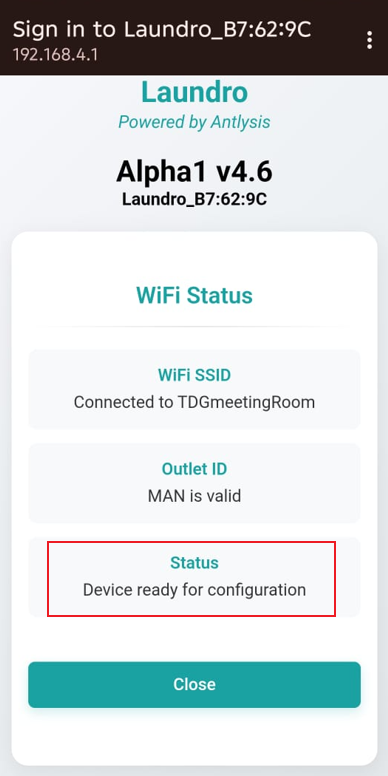](https://docs.antlysis.com/uploads/images/gallery/2026-05/f2S9kbQWUbAOk3tA-image.png) **Step10:** Once the configuration process has been completed successfully, the **Wi-Fi (Blue)** and **Internet (Green)** indicator lights on the device will turn on. [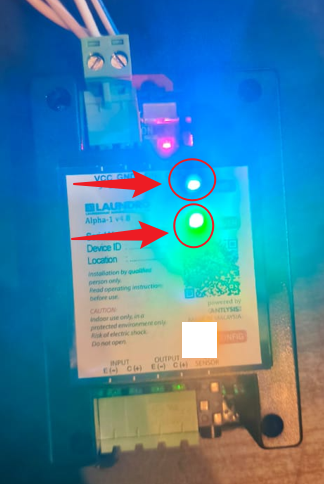](https://docs.antlysis.com/uploads/images/gallery/2026-05/ZSdhaXsc2GRN8bQn-image.png) **2)** It is all done now. You can check the dashboard page to ensure the machine shows as **Online**. For confirmation, you can also try testing a remote activation on the machine.