# Alpha-3 Manual
# Alpha-3 Device
Alpha-1 version 4.3 is an upgrade which aims to ease the installation process. The diagram below shows an overview of what its wire connection looks like. There’s primarily 2 major update in this version:
1. Device is connected directly to cloud
2. Smaller in size to allow easier handling
[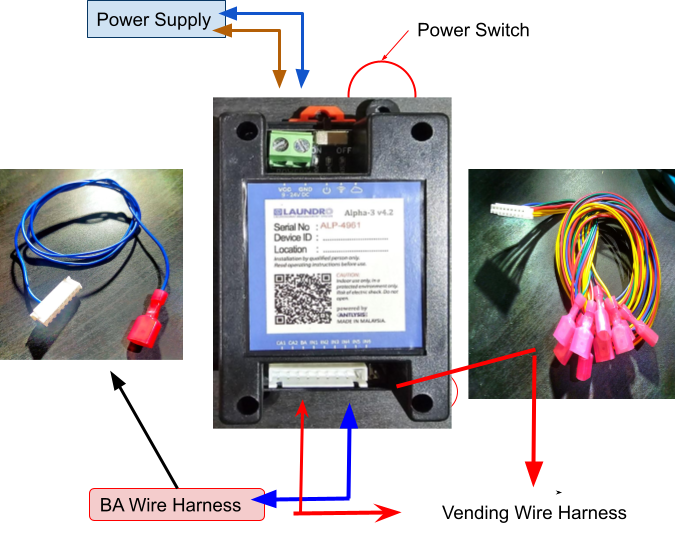](https://docs.antlysis.com/uploads/images/gallery/2025-09/yzhtuhIEinvt4pVL-image39.png)
**[Figure 1](https://docs.google.com/document/d/1BYXssGBL3nDtDQT2ki2MWP1VMaJ8K9C_fPZBFVv5Fhs/edit#figur_alpha1-v4.3): Alpha-1 version 4.3 Connection Overview**
# Vending Machine Type A (Vending A)
### Vending Machine Type A (VendingA)
1\) Vending machines that have up to 2 normally open pulse based coin acceptors, up to 6 item slots and a built-in normally open pulse based bill acceptor.
1. You will require the Vending A wire harness that has 9 wires on it.
2. Open up the vending machine and controller box.
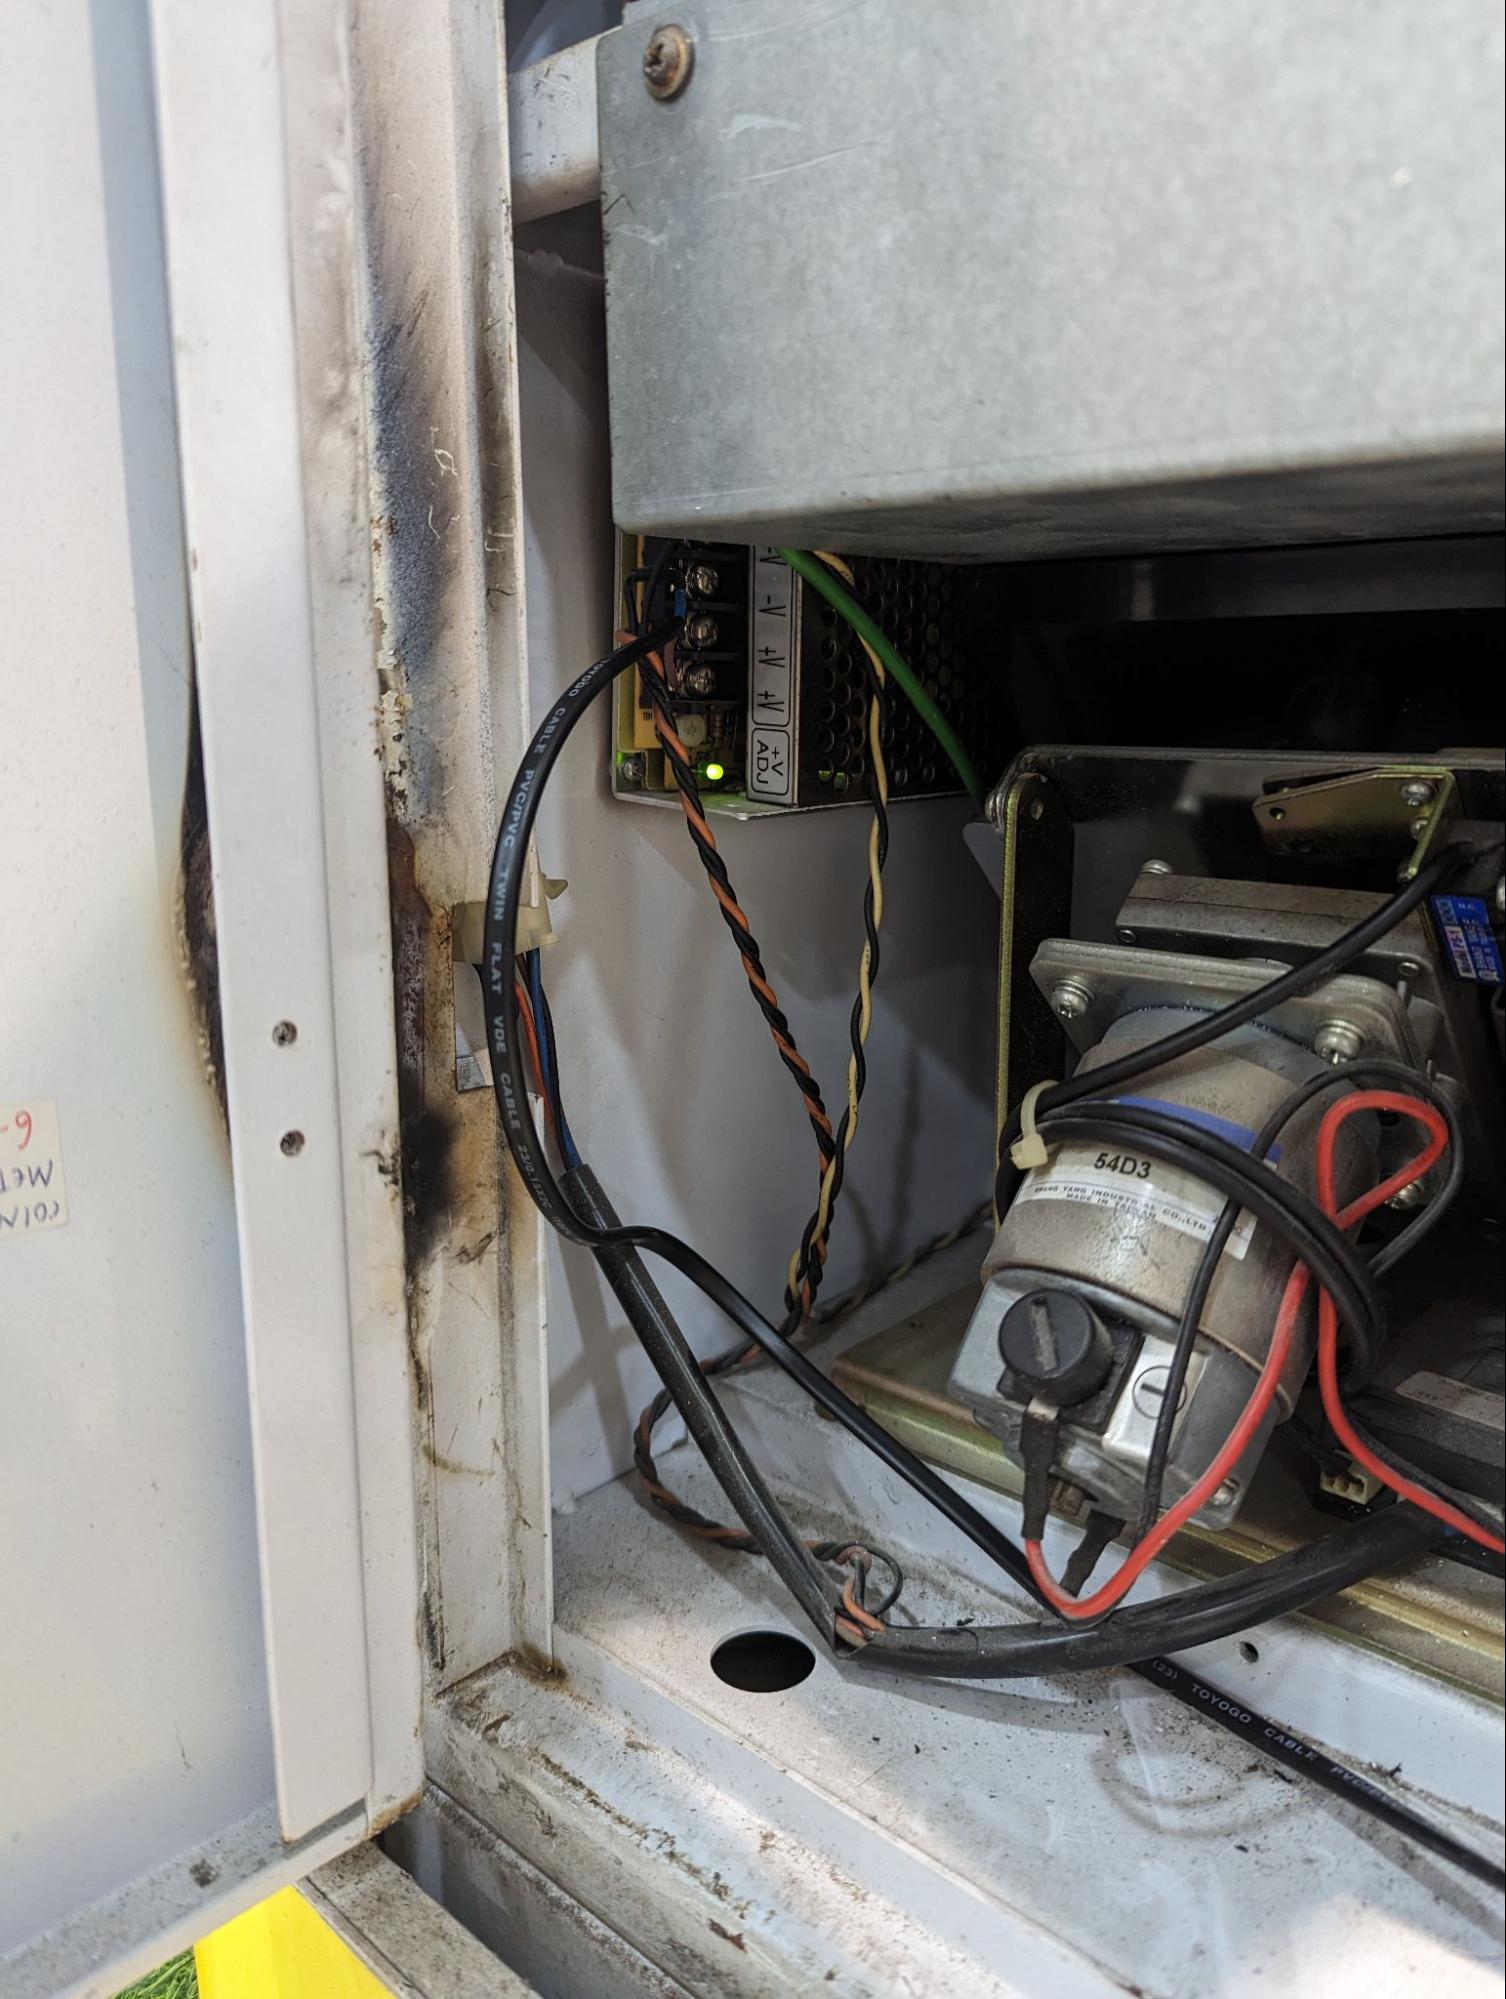
[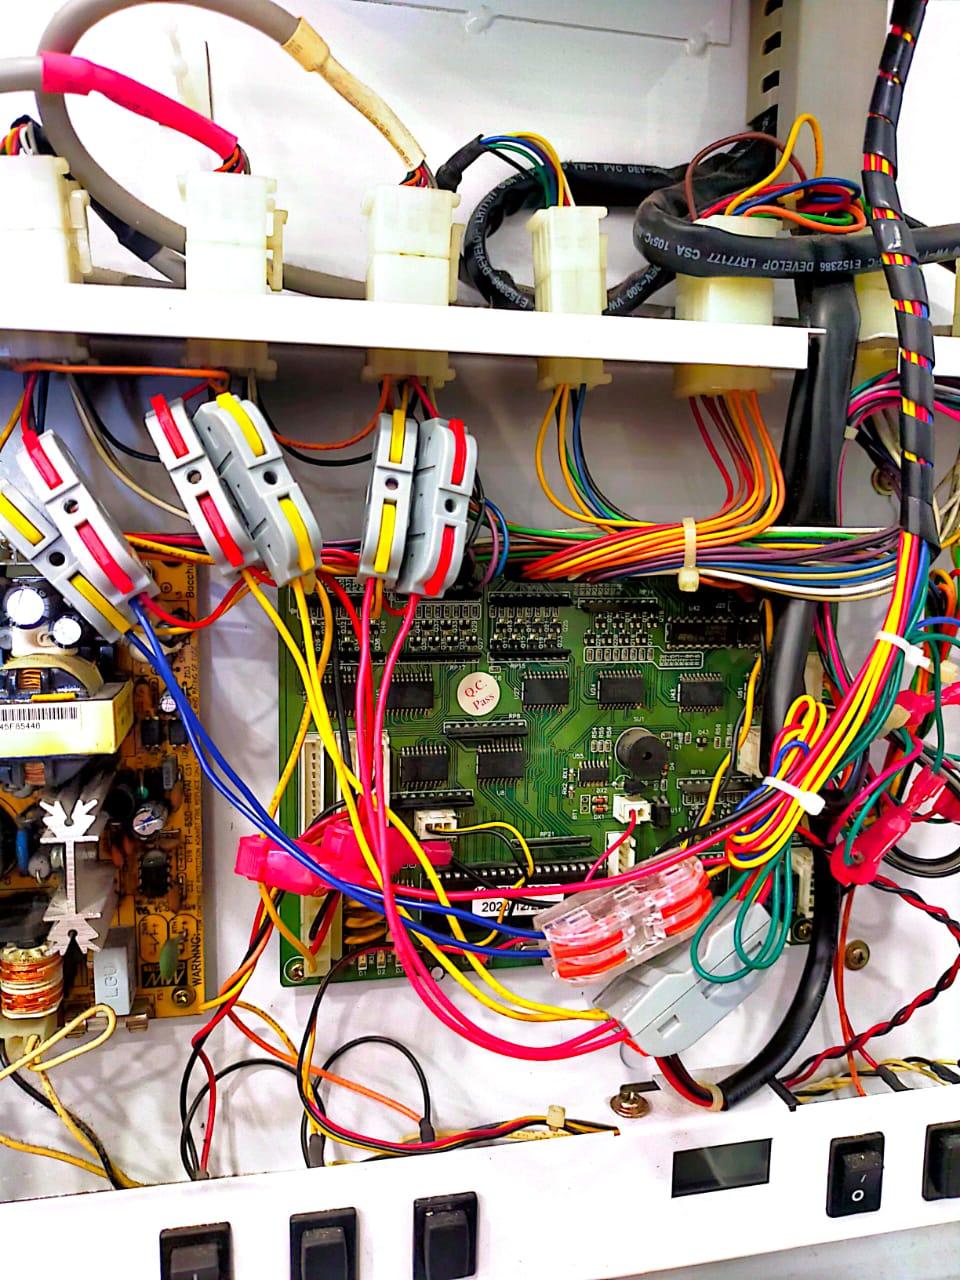 ](https://docs.antlysis.com/uploads/images/gallery/2025-09/09UsxikSe2Rcp8AK-image18.jpg)[Example: Vending A Mother board](https://docs.antlysis.com/uploads/images/gallery/2025-09/09UsxikSe2Rcp8AK-image18.jpg)
2\) You will see the motherboard connections; connect the CA1 and CA2 terminals.
[](https://docs.antlysis.com/uploads/images/gallery/2025-09/44wUlDx7UaNScxwB-image3.png)[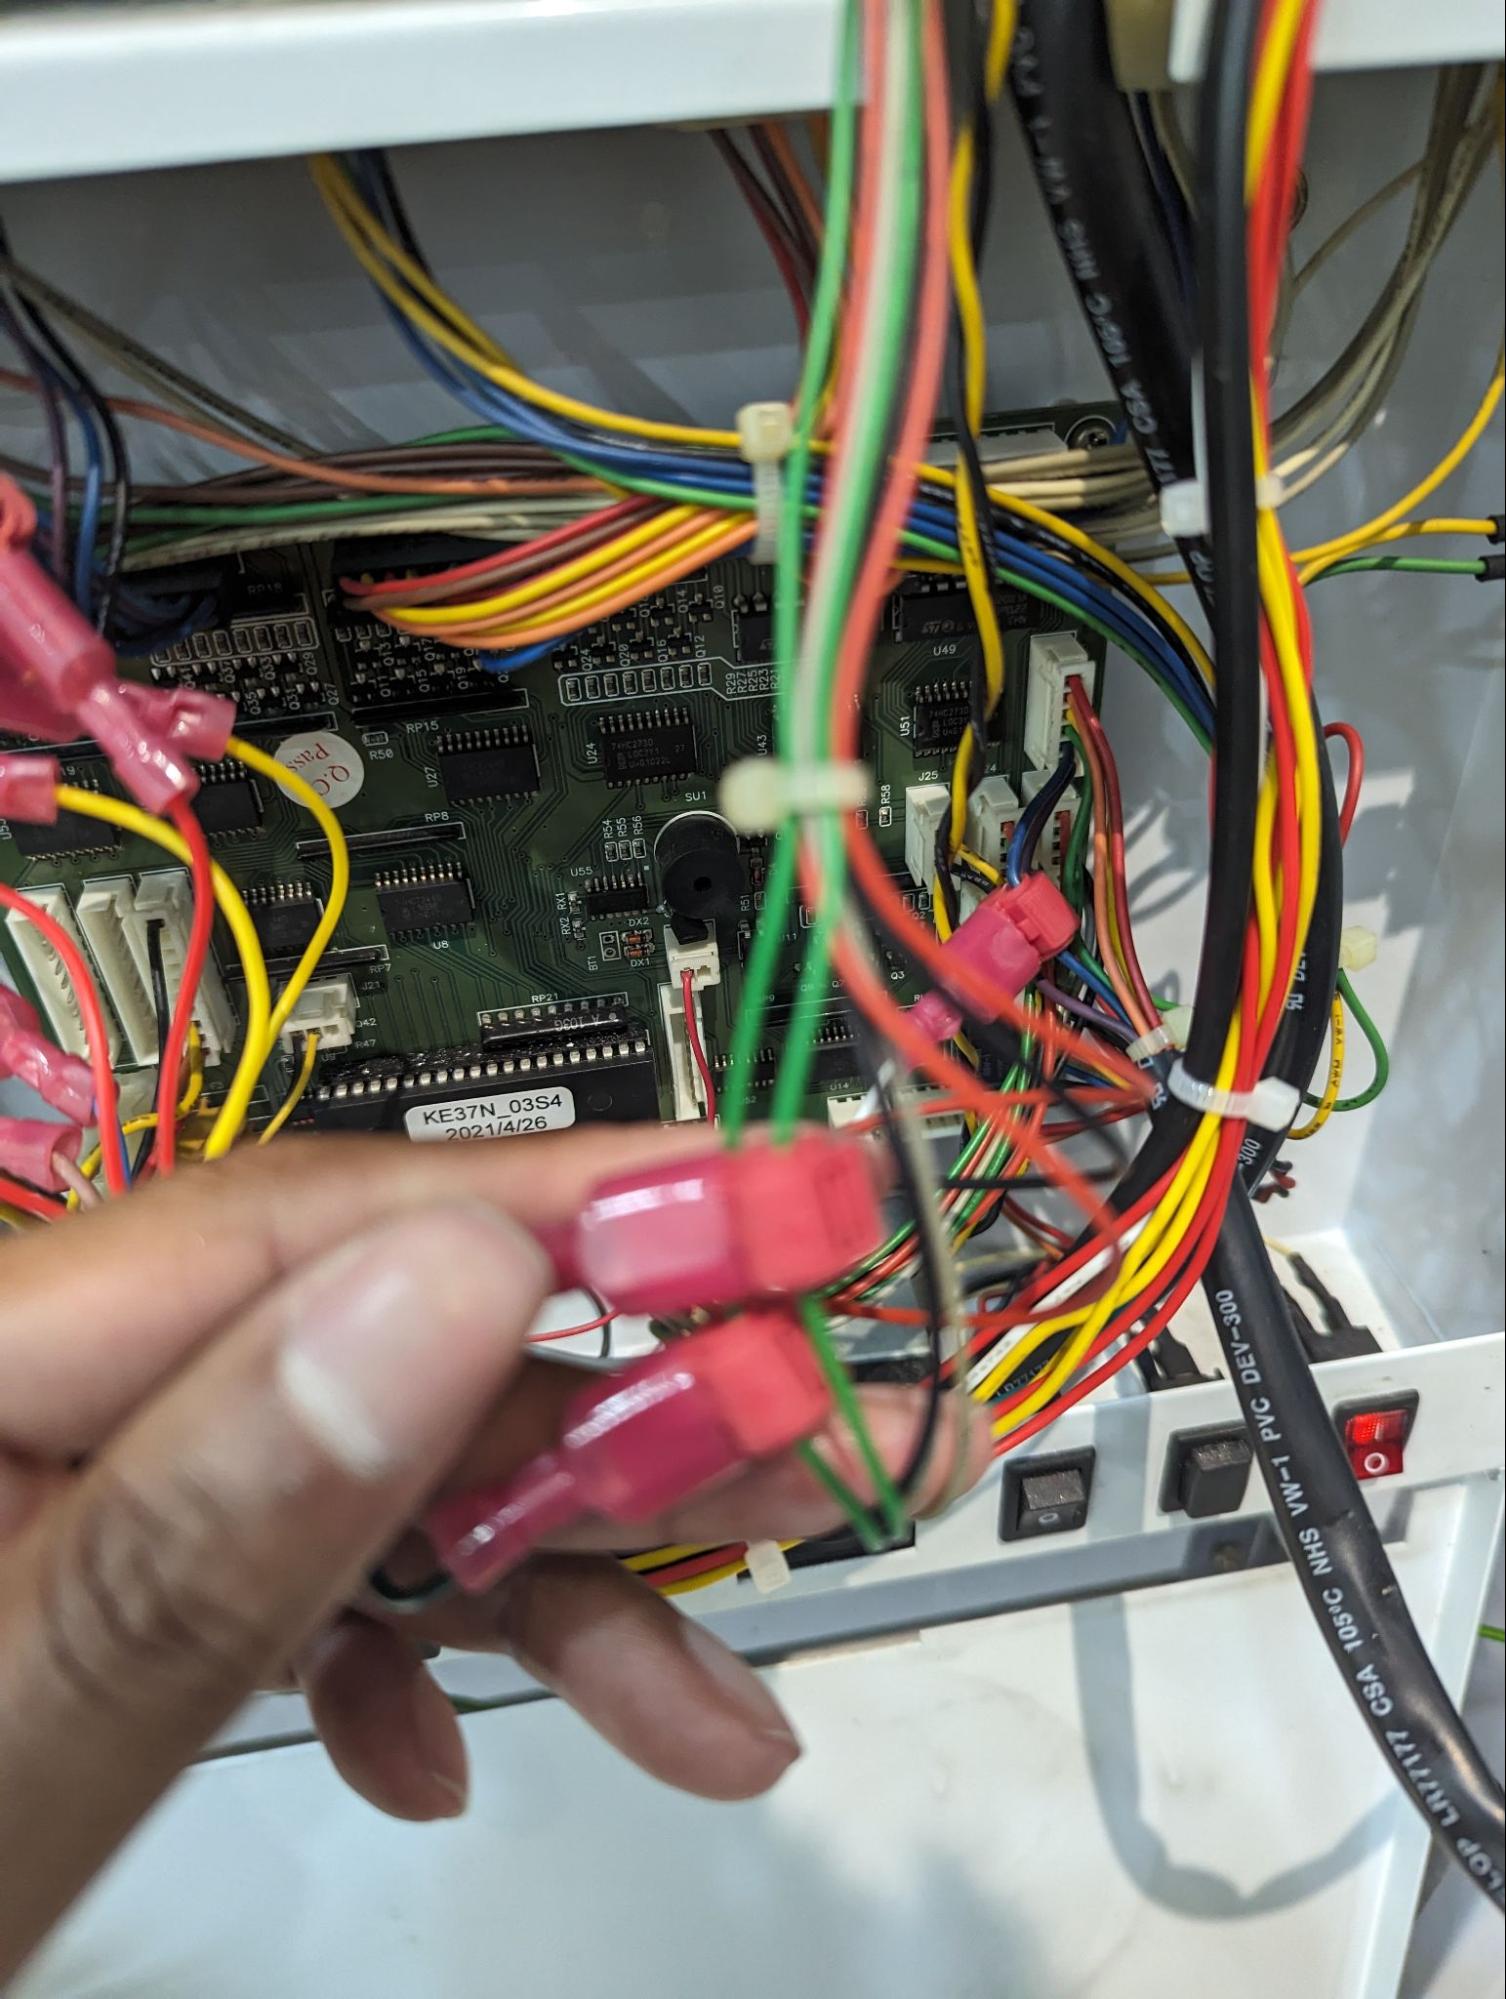](https://docs.antlysis.com/uploads/images/gallery/2025-09/cVWcELbqd2IjTagy-image43.jpg)
[Example CA1 & CA2 connection ](https://docs.antlysis.com/uploads/images/gallery/2025-09/44wUlDx7UaNScxwB-image3.png)
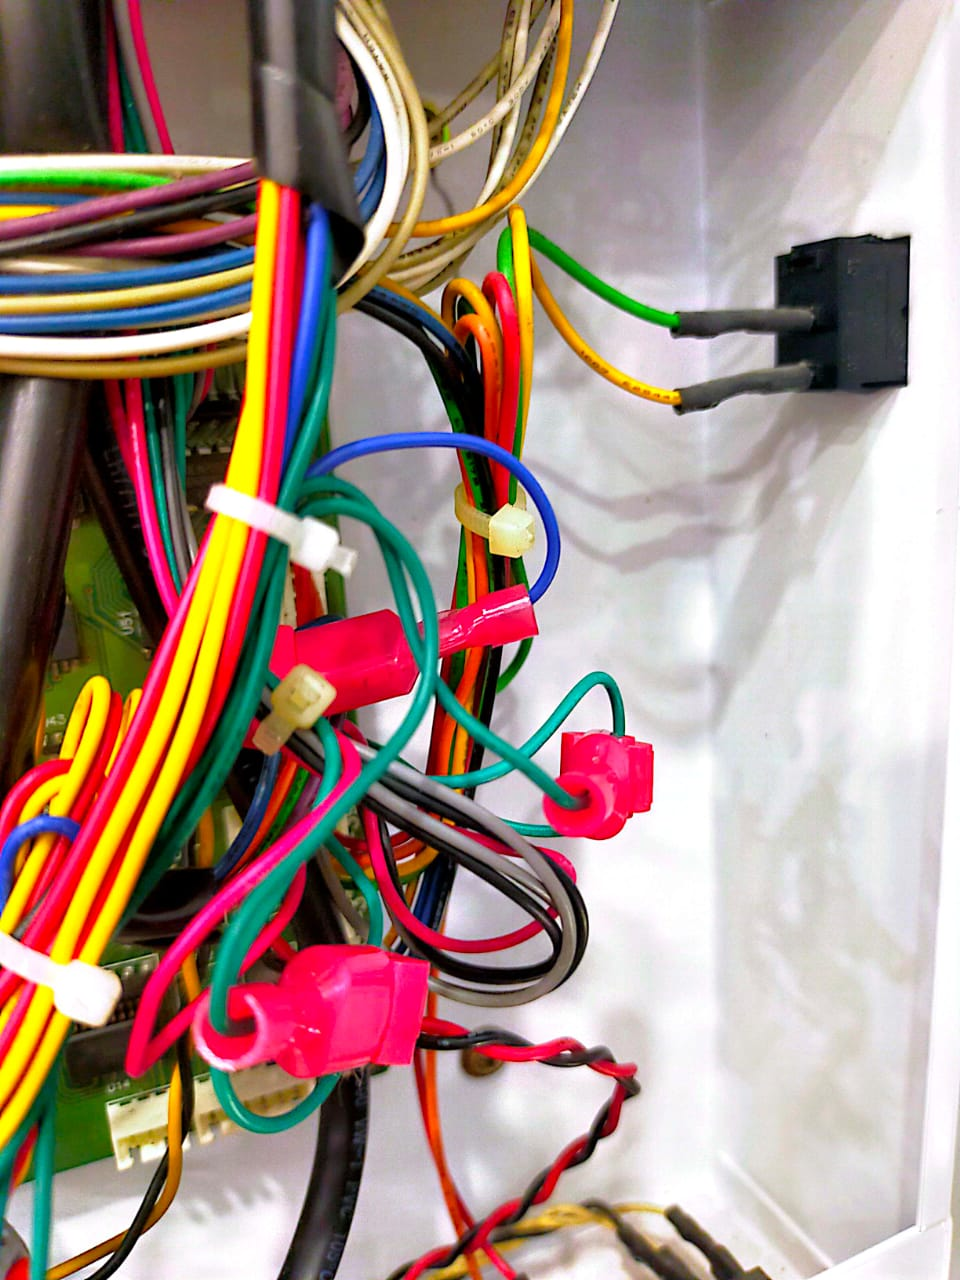
3\) Attach 2 G-splice connectors to the green wires coming from the coin acceptors and connect them to CA1 and CA2 of the Alpha-3 wire harness.
[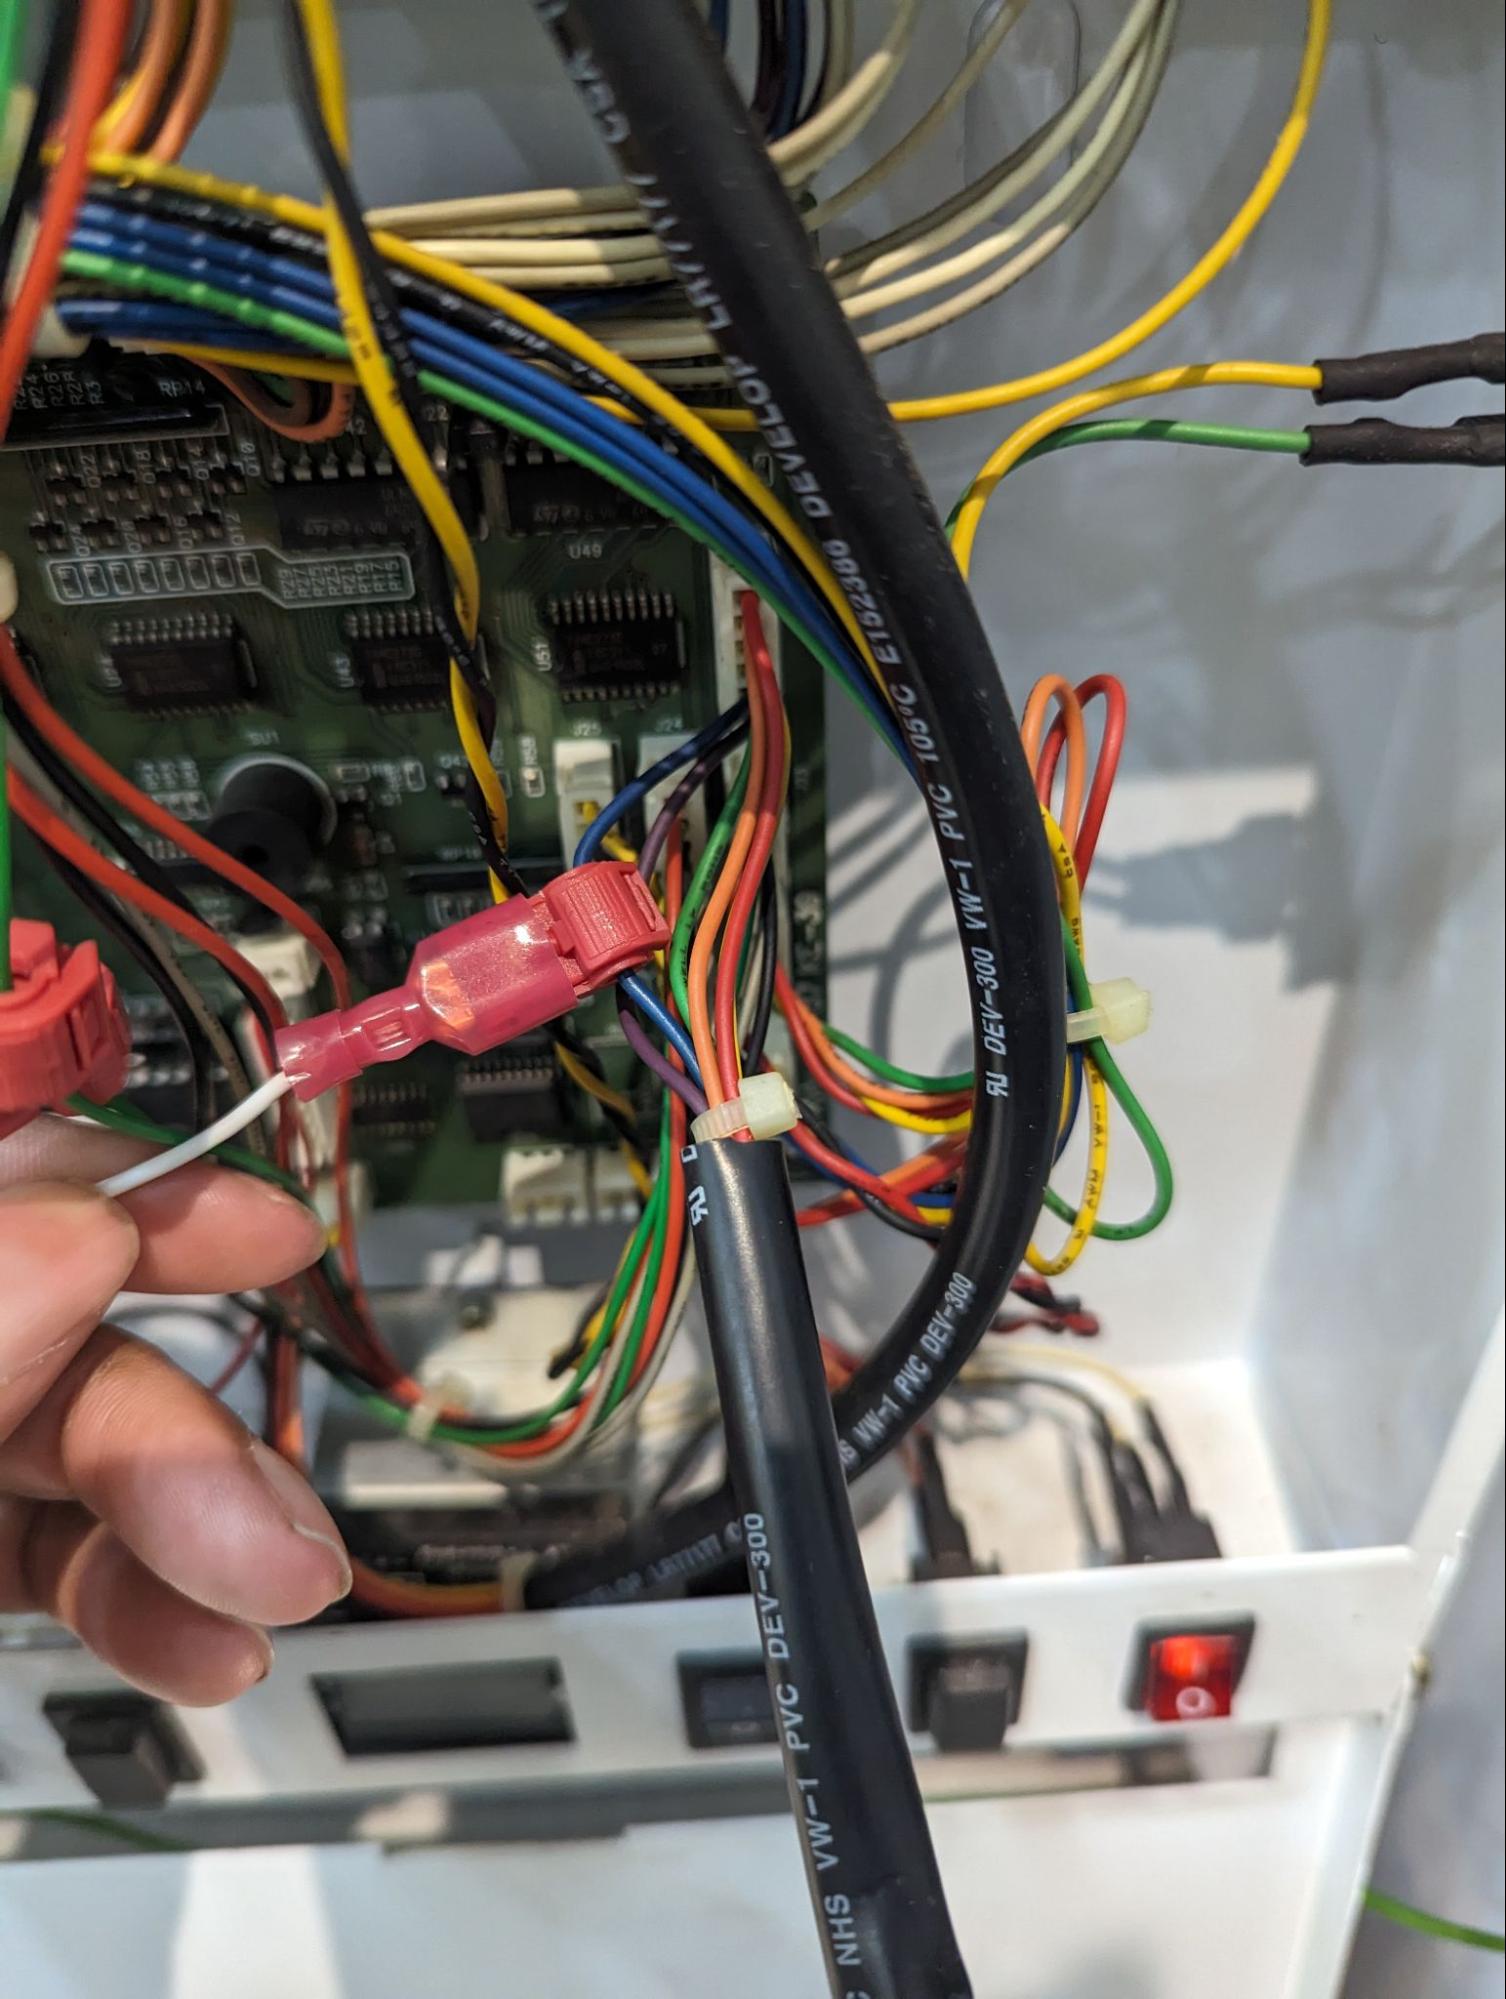](https://docs.antlysis.com/uploads/images/gallery/2025-09/1PwYgFgUj3pVB7ci-image14.jpg)[Example: BA connection](https://docs.antlysis.com/uploads/images/gallery/2025-09/1PwYgFgUj3pVB7ci-image14.jpg)
4\) Attach 1 G-splice connector to the blue wire coming from the bill acceptor and connect them to BA of the Alpha-3 wire harness.
[Example IN.1 to IN.6 (RED/YELLOW) connection ](https://docs.antlysis.com/uploads/images/gallery/2025-09/Eaj3TcJ16CmJK9cy-image17.jpg)
5\) Attach 6 G-splice connectors to the red and yellow wires going to the dispenser motors. (Top 3 connectors on the left)
6\) Starting from the right most, connect the following to the Alpha-3 wire harness
1. 1. IN1 - Red wire of the right most connector.
2. IN2 - Yellow wire of the right most connector.
3. IN3 - Red wire of the next connector on the left.
4. IN4 - Yellow wire of the next connector on the left.
5. IN5 - Red wire of the next connector on the left.
6. IN6 - Yellow wire of the next connector on the left.
[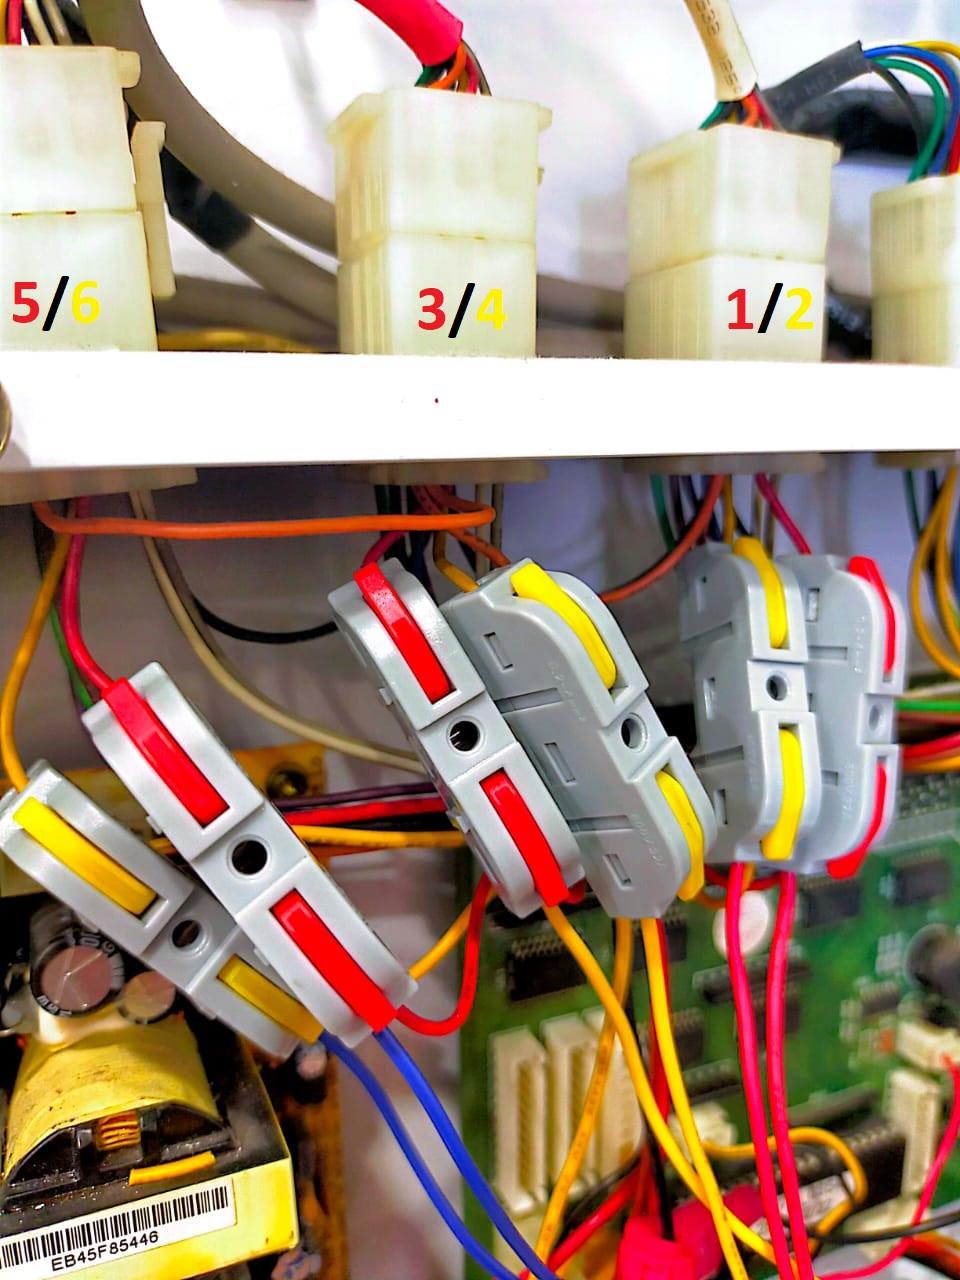⚠️ Attention: Can follow the colour on the in numbers shows ](https://docs.antlysis.com/uploads/images/gallery/2025-09/9LMyRpvdtAwTRT3u-image17.jpg)
7\) Attach 2 G-splice connectors on the yellow and black wire of the power cable for 12V and GND respectively. Connect these wires to the power input of the Alpha-3.
[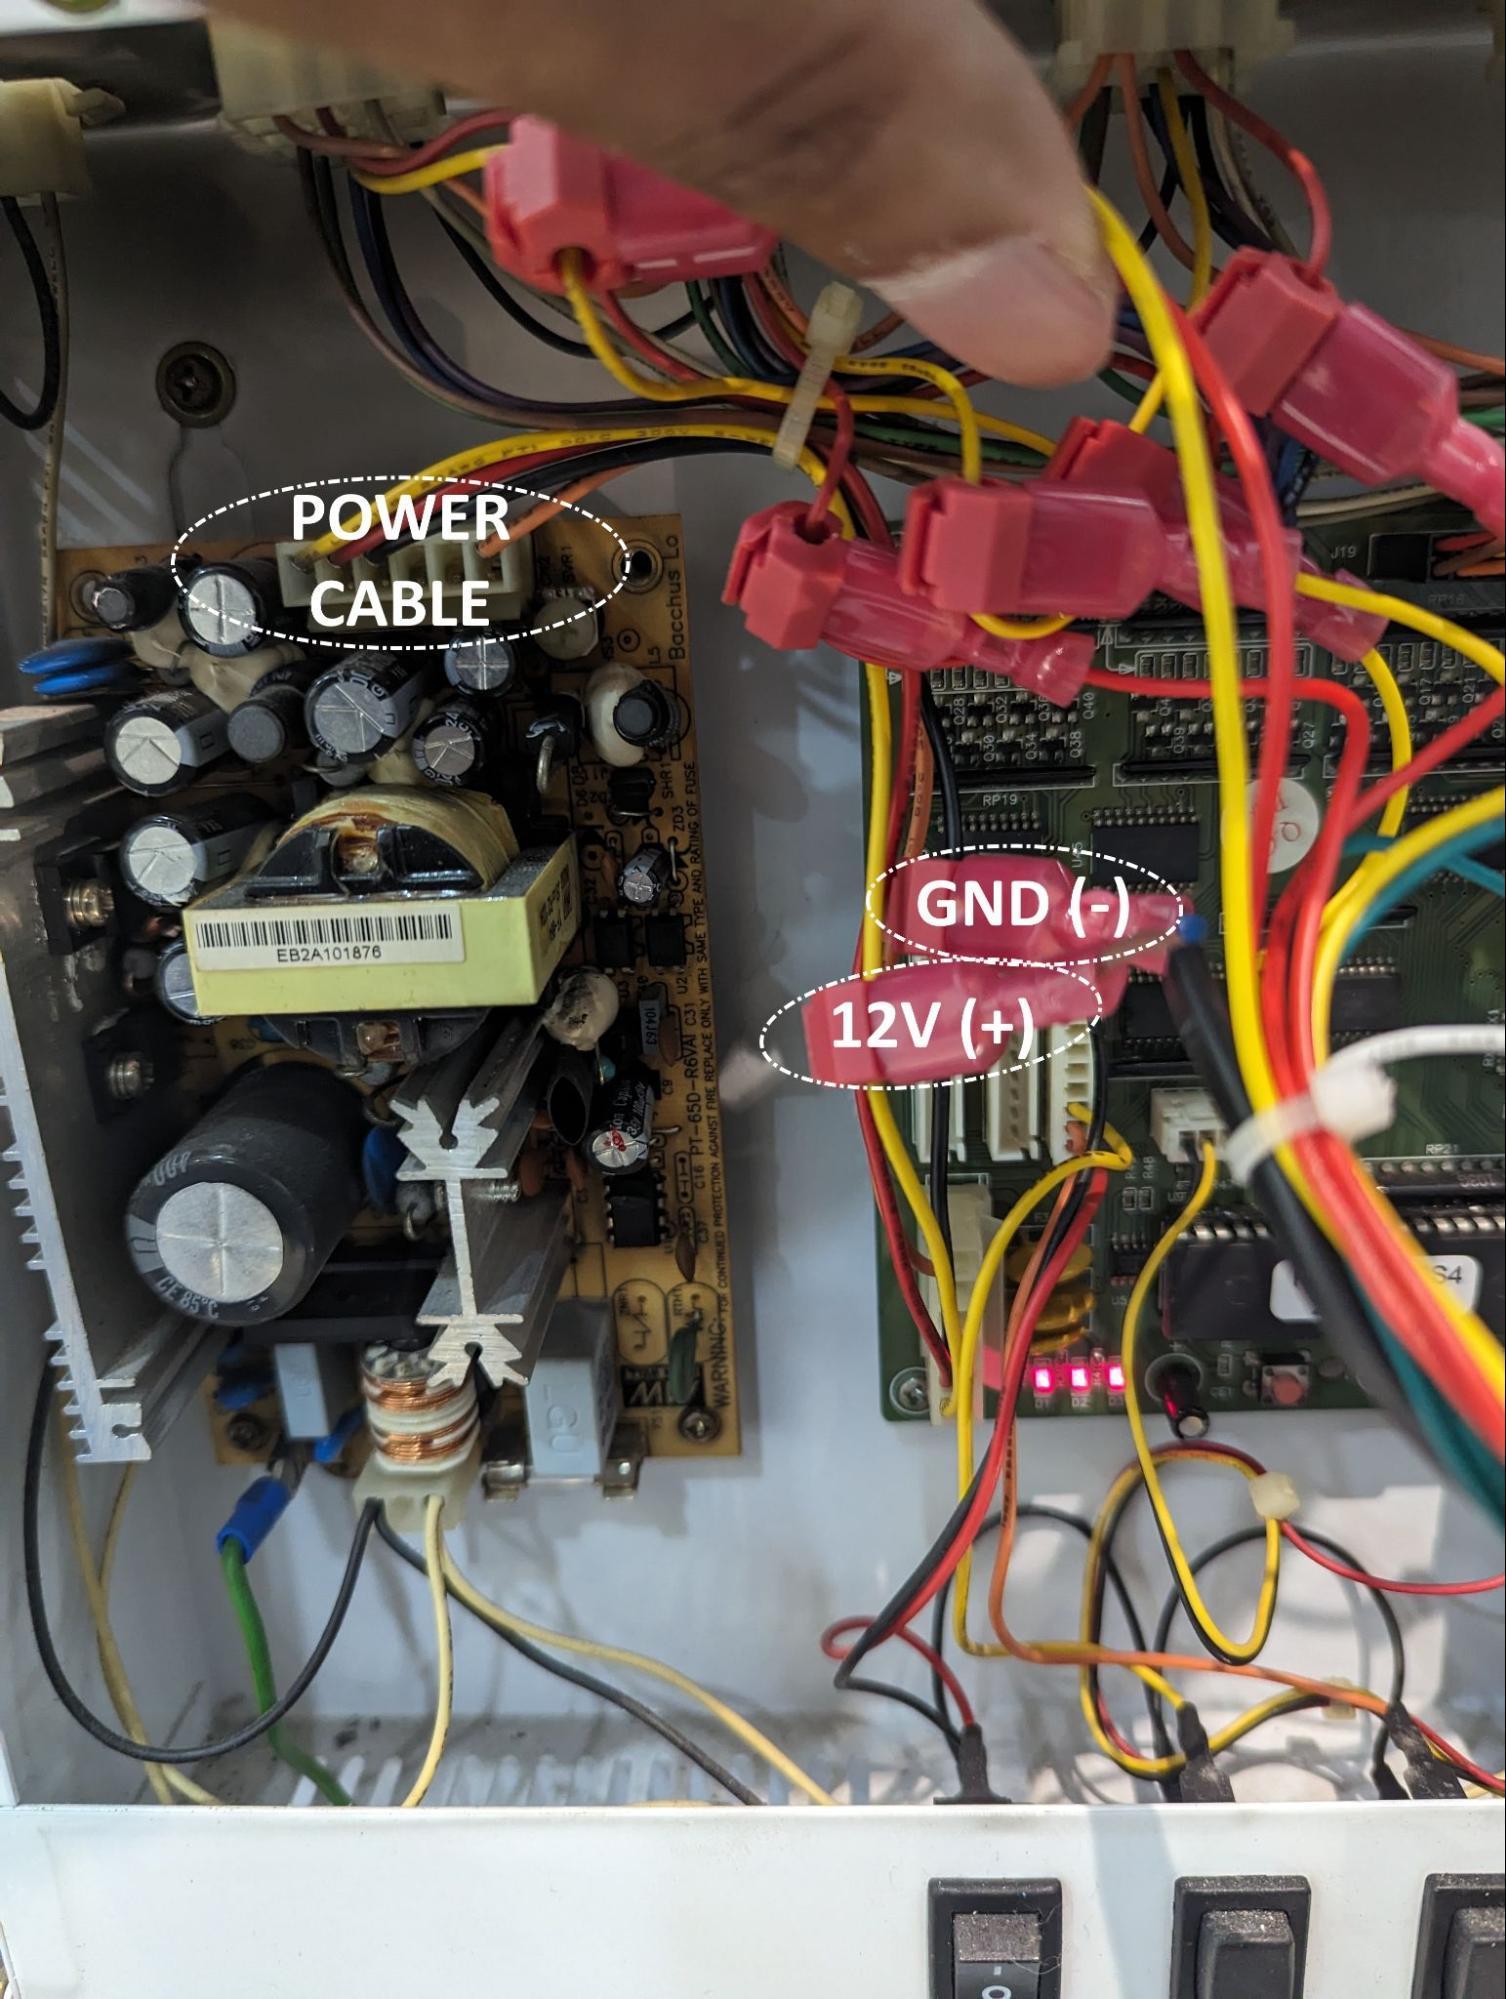Example: Device connection from board](https://docs.antlysis.com/uploads/images/gallery/2025-09/dMSym1BqzB6PGtRS-image26.jpg)
8\) Cable ties the wires neatly, and attach the Alpha-3 device above the controller box.
⚠️ **Attention:** If any of the tests are not detected, check the connections and ensure they are tapped properly. For best results, connect the related connections together for better conductivity.
# Bill Acceptor Type A (Bill Acceptor A)
1\) Bill acceptors that use a single normally open pulse based signal. (e.g ICT Bill Acceptor)
1. You will require the BillAcceptor wire harness that has 1 wire on it.
2. Open up the machine and the bill acceptor.
3. Attach 1 G-splice connector to the blue wire coming from the bill acceptor and connect them to BA of the Alpha-3 wire harness.
[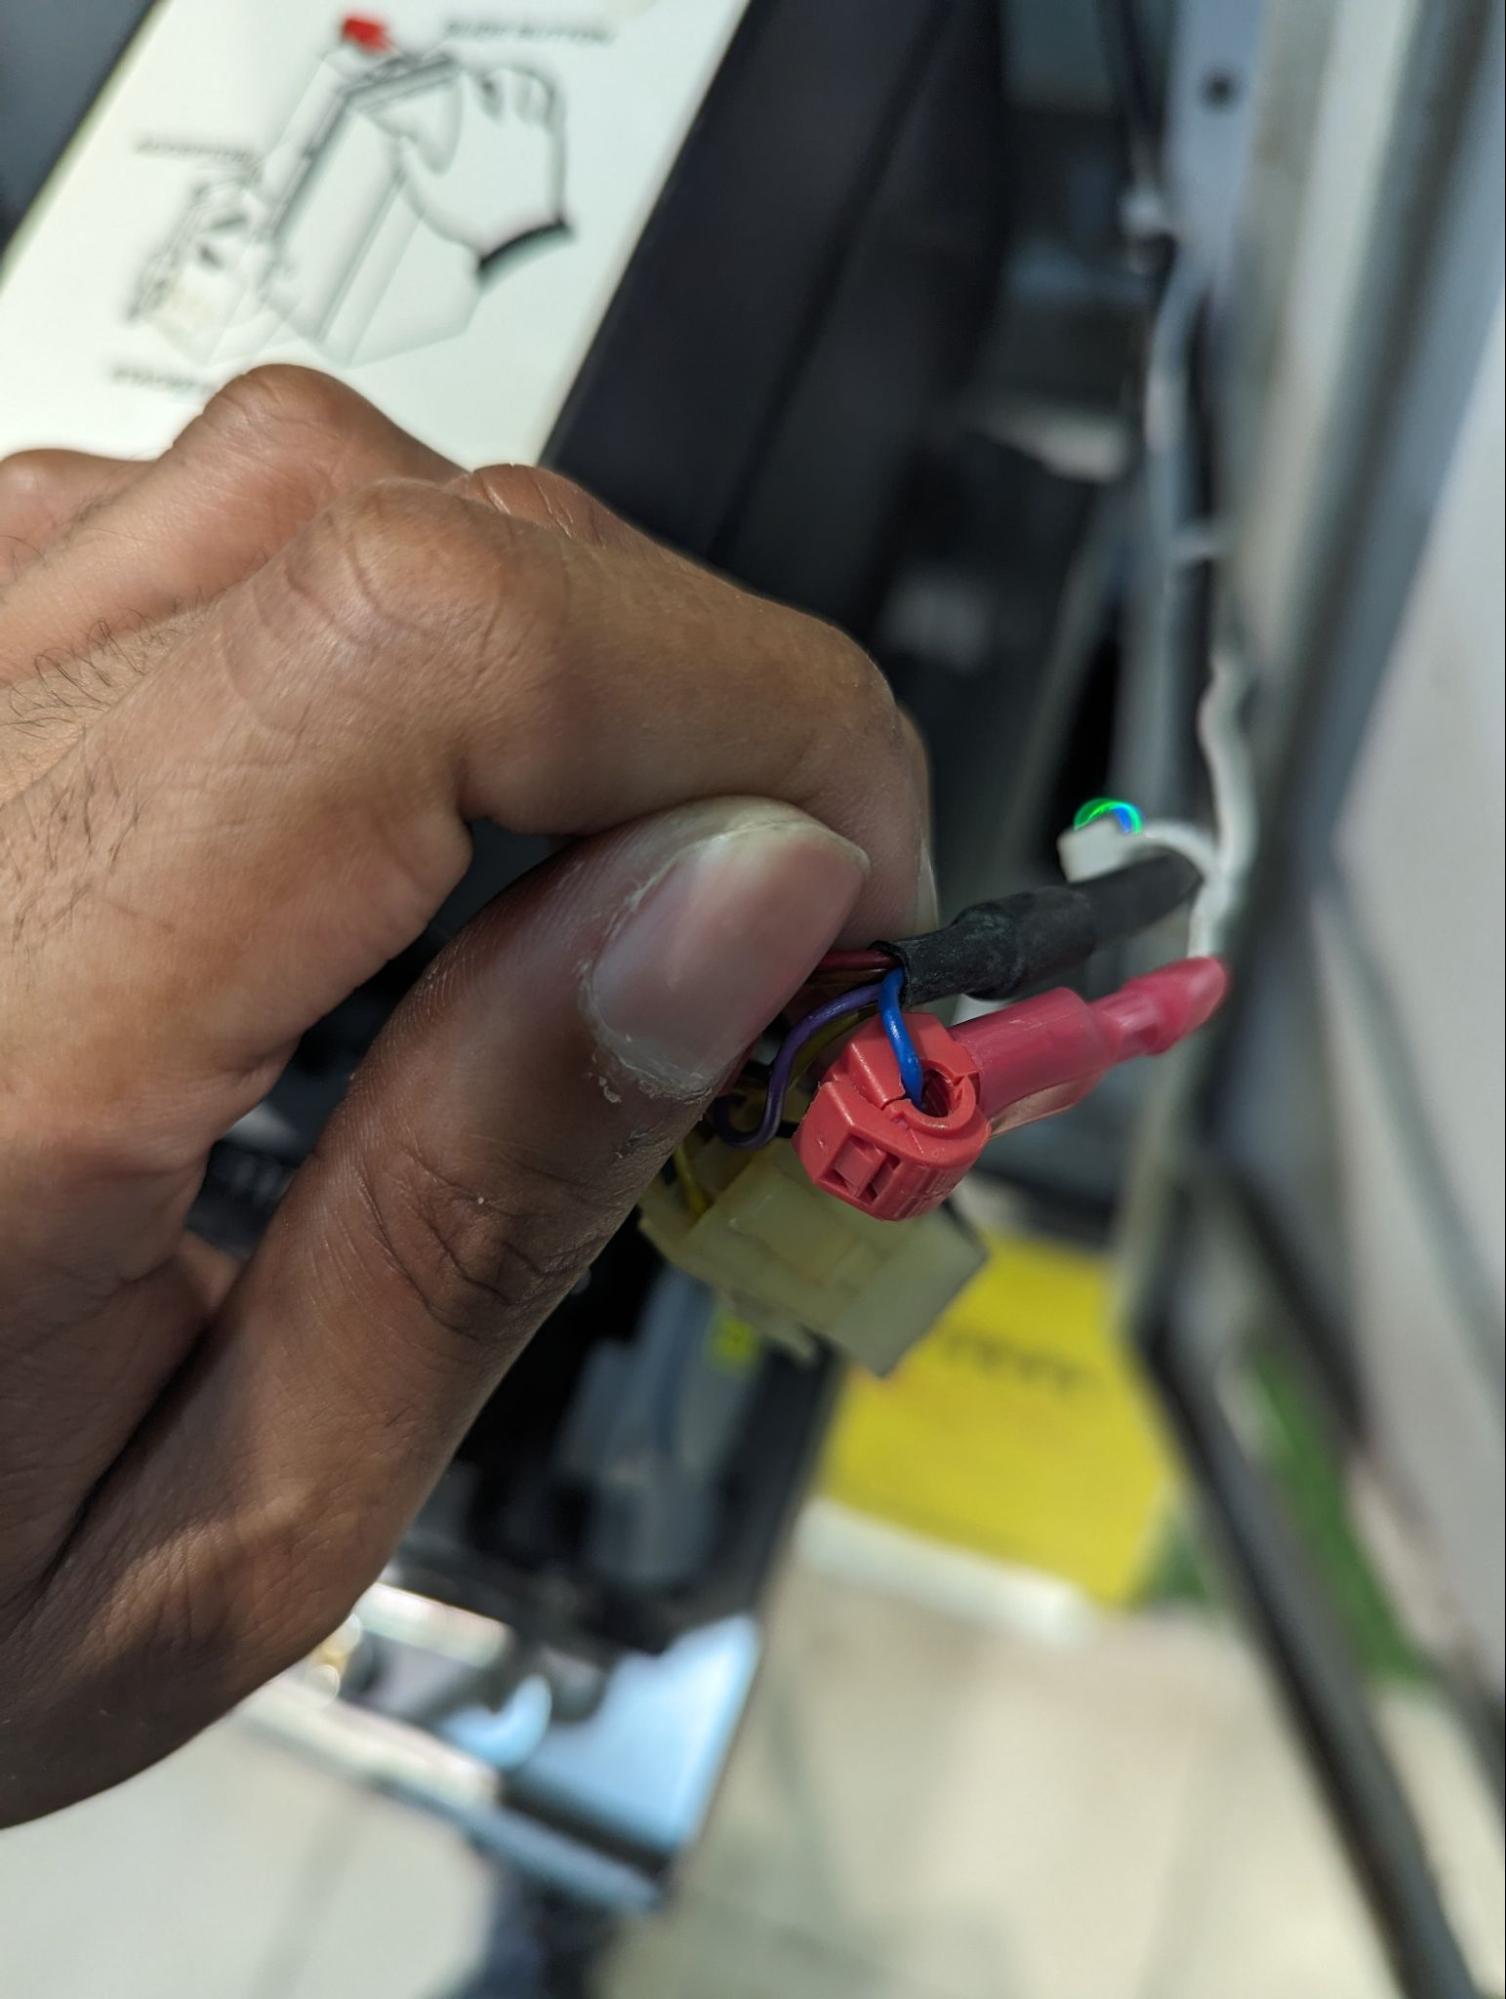Example: BA1 connection from Bill Acceptor](https://docs.antlysis.com/uploads/images/gallery/2025-09/Ue4YMV8HeT7XNofm-image12.jpg)
2\) Take power for the device from the machine’s 12V power supply using a 2-core wire, and run the wire to the device.
[](https://docs.antlysis.com/uploads/images/gallery/2025-09/n1EpDQArA5HIIaFQ-image29.jpg)[Example: Power Supply 12v connection for device](https://docs.antlysis.com/uploads/images/gallery/2025-09/n1EpDQArA5HIIaFQ-image29.jpg)
3\) Cable tie the wires neatly, and attach the Alpha-3 device where it won't interrupt the bill acceptor.
⚠️ **Attention:** If any of the tests are not detected, check the connections and ensure they are tapped properly. For best results, connect the related connections together for better conductivity.
# Firmware Update Procedure for Alpha3
### Steps:
1. Log into your node cloud account
[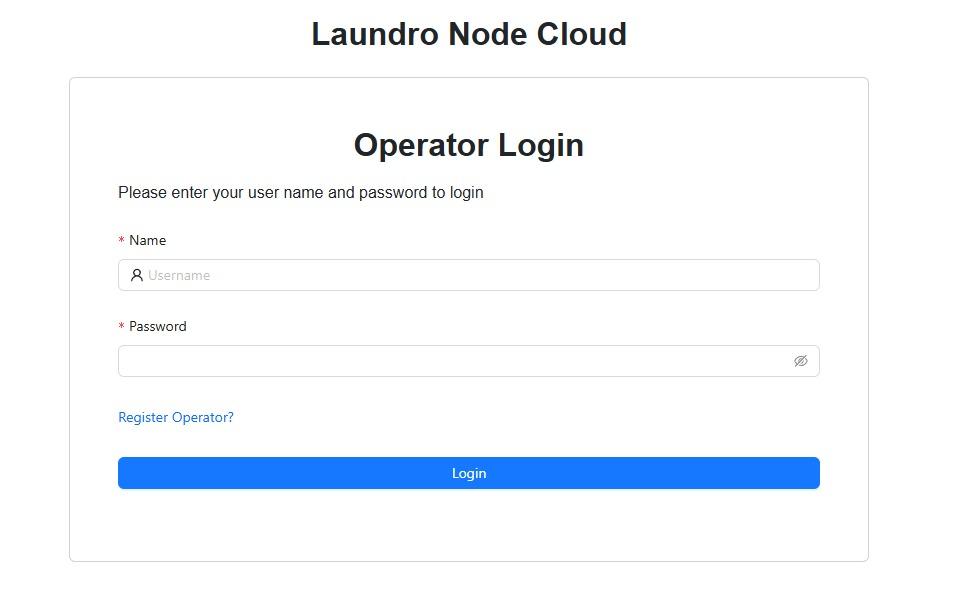](https://docs.antlysis.com/uploads/images/gallery/2026-01/FNKtLTqskwAFuhMm-whatsapp-image-2026-01-06-at-5-34-46-pm.jpeg)
2. Navigate to the device that you intend to update and select **"latest"** in the release dropdown menu
[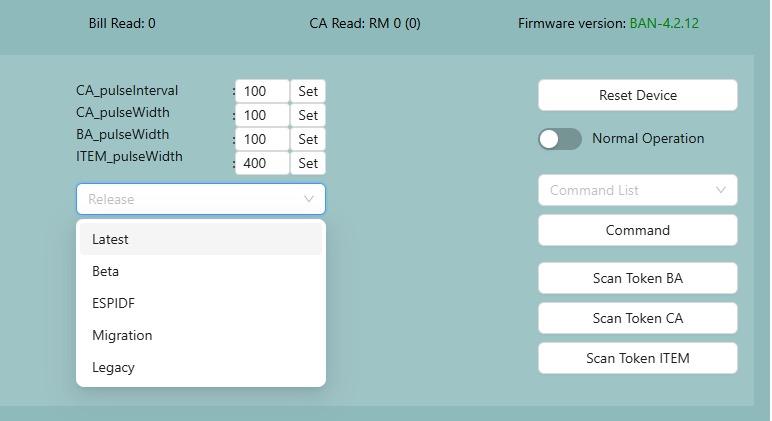](https://docs.antlysis.com/uploads/images/gallery/2026-01/KGsvgLL25oZuXvOX-whatsapp-image-2026-01-06-at-5-37-37-pm.jpeg)
3. Once you have selected "latest", click on **"Check update"** and you will see a message saying update is available beside the firmware version.
4. If update is available, click on **"Update"** and the device will update.
TAKE NOTE: Device will become offline for up to 1-3 minutes during the update process before coming back online
5. If update is successful, you will see a change in **Firmware version** and the device will come back online.
6. If update fails, try again when device comes back online for a few times until it is successful. If update still fails, report the issue.
Sometimes, restarting your router may help to fix update issues