# Speed Queen v1- Installation
### Speed Queen Single Washer & Stack washer / Dryer
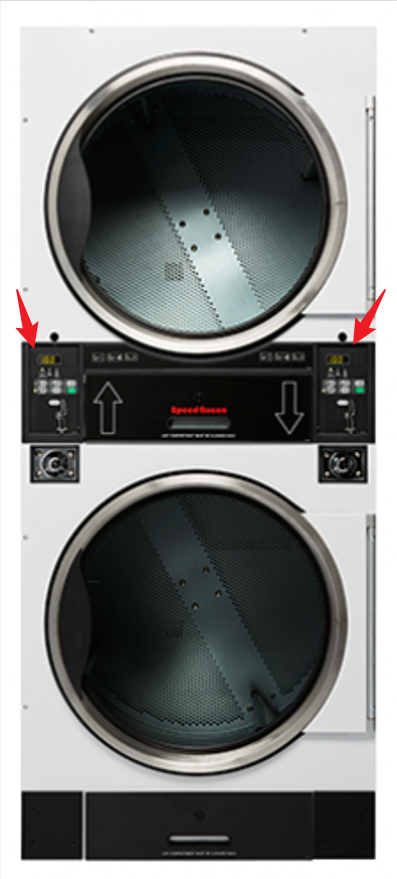
##### Type off Speed Queen Machine
[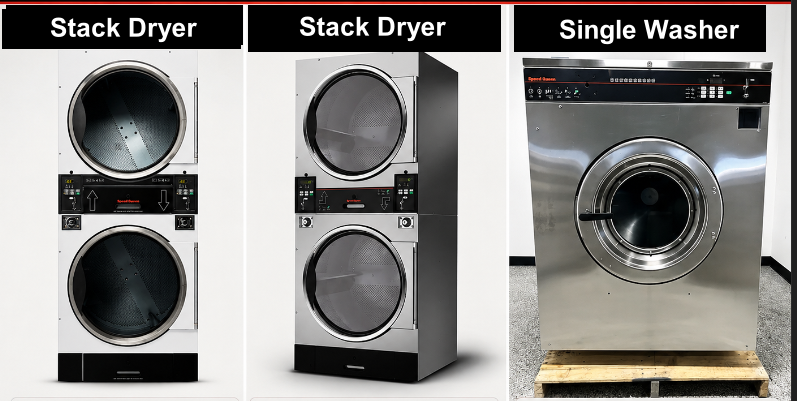](https://docs.antlysis.com/uploads/images/gallery/2026-05/9tCiI3Oxxa5Xuvfj-image.png)[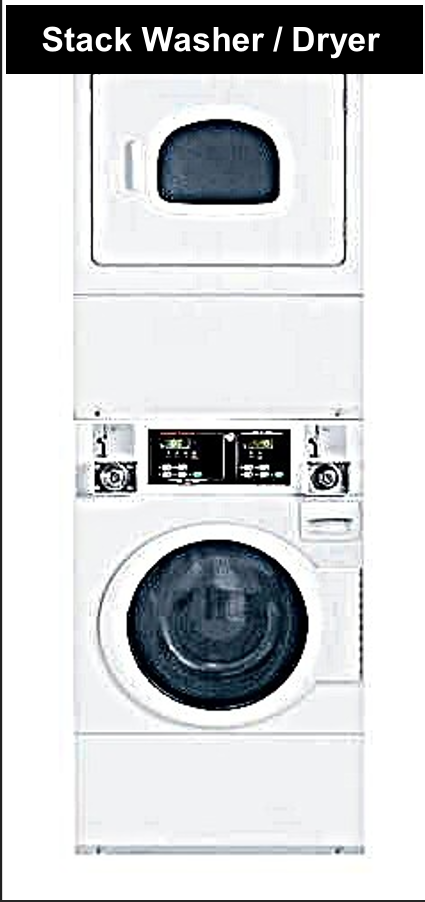](https://docs.antlysis.com/uploads/images/gallery/2026-05/EoIvJvSrwHC68xyP-image.png)
---
####
#### “Types of installation for Speed Queen machines”
#### **Cashless Installation-** Speed Queen Stack Washer/Dryer STGNCASP116TW01
**☞ Cashless connection for E-payment transactions only, suitable for machines without a coin acceptor or machines with a coin acceptor where token capture is not required.**
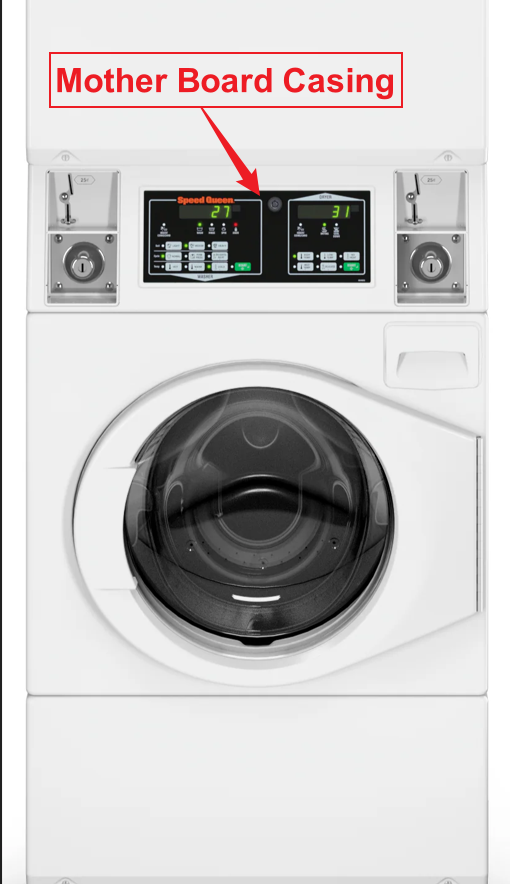
**1)** Open the motherboard casing using the specific machine key provided.
[](https://docs.antlysis.com/uploads/images/gallery/2026-05/GsfqgH55R7YfAB11-image.png)
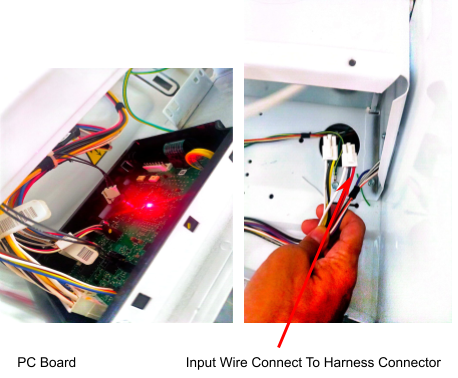
**2)** Pull the wires from the front to the back of the machine, where you will be placing the Alpha-1 device.
👉 **For the Speed Queen machine, it is recommended to use 1.5 mm thick cables for the OUTPUT (-/+) connection.**
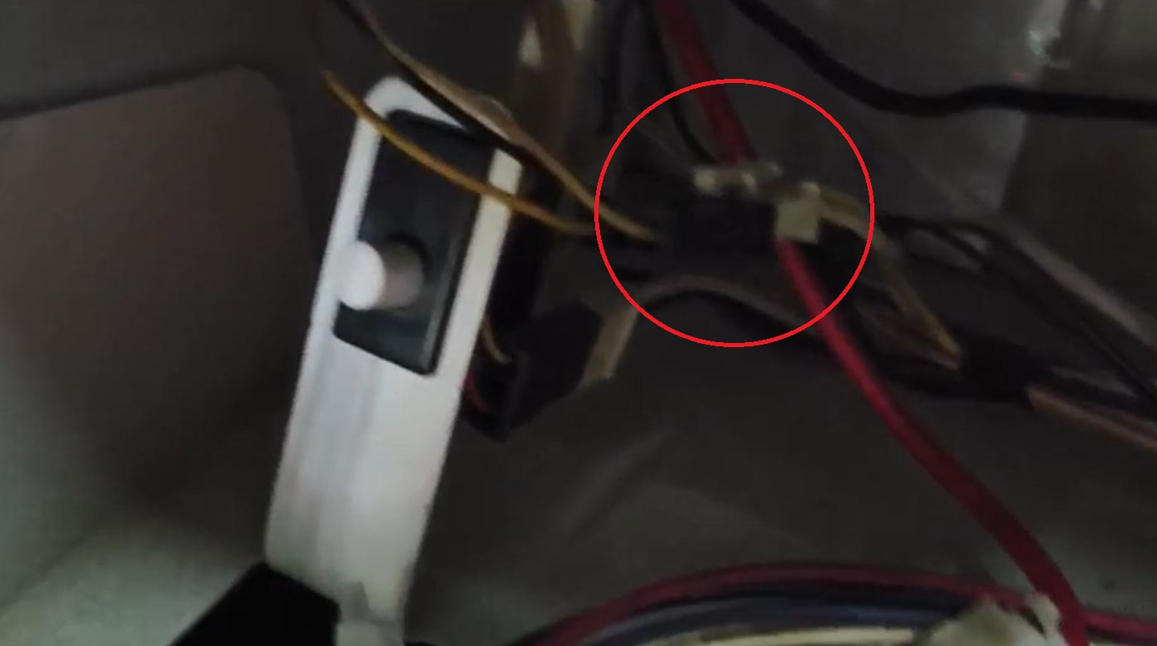
**3)** On the machine, you will see two identical male connectors — one yellow and one red.
👉 **It is recommended to use the red male connector.**
[](https://docs.antlysis.com/uploads/images/gallery/2025-08/SWqPUwyisG5KR2fv-image11.png)
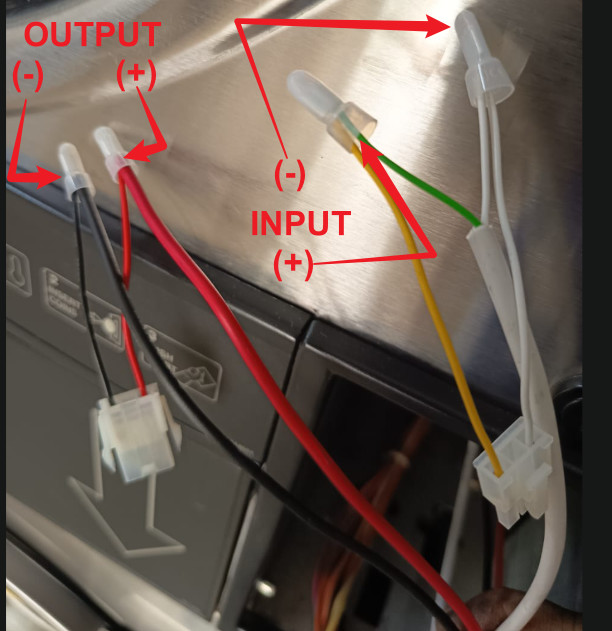
**4)** We provide a specific female harness connector to connect to the machine’s male connector.
**5)** Connect the Output Harness to the cable from the device, ensuring that the output negative (–) and positive (+) are correctly connected.
[](https://docs.antlysis.com/uploads/images/gallery/2025-08/RJY9xzvbNpbEVxBg-image101.png)
---
##### **Coin Acceptor Installation**
**1)** For coin acceptor machines, use the yellow connector as shown in the picture below.
[](https://docs.antlysis.com/uploads/images/gallery/2026-05/wewwK6VXJced7FWc-image.png)
**2)** Connect the wire pulled from the back of the machine to the male and female connectors according to the INPUT and OUTPUT connections.
👉 **For the Speed Queen machine, it is recommended to use 1.5 mm thick cables for the OUTPUT (-/+) connection.**
**3)** Connect it to the machine’s male and female connectors, ensuring the INPUT and OUTPUT connections are correctly matched.
[](https://docs.antlysis.com/uploads/images/gallery/2026-05/v9yQSlonlHePLOOB-image.png)
---
#### **Device Installation -** Speed Queen Stack Washer/Dryer & Single Washer
#### **Cashless Device Installation**
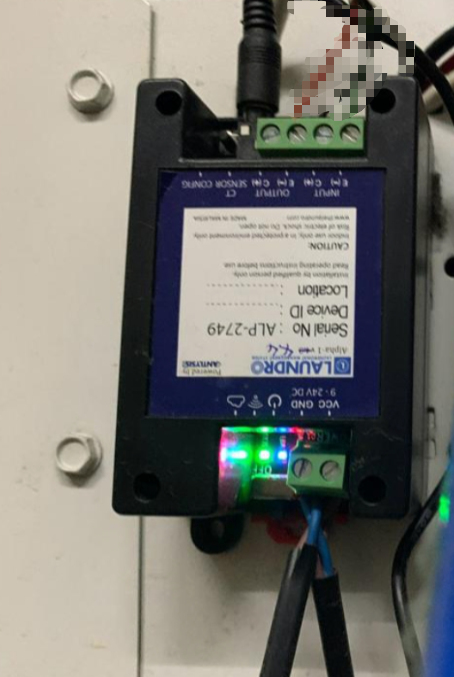
**1)** Place the device at the back of the machine or in a safe location where it will not be damaged.
[](https://docs.antlysis.com/uploads/images/gallery/2026-05/ncqhtQbLjUcxftkS-image.png)
**2)** Connect the wires to the output negative (–) and positive (+) , then loop them back to the input negative (–) and positive (+).
[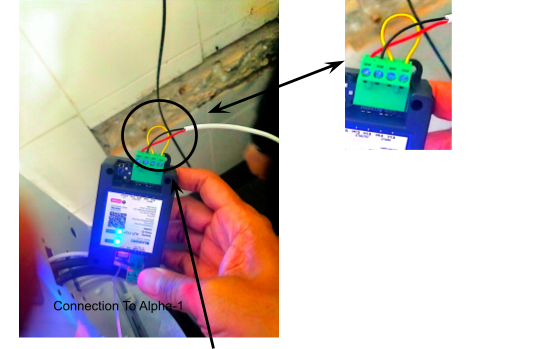](https://docs.antlysis.com/uploads/images/gallery/2025-08/2CzQK00qPMrsqBMq-image99.png)
Quality Note - To Do Looping Input (-) to (+)
---
''Speed Queen Stack Dryer Connection''
**1)** For this machine model, the same harness connector will be used as other Speed Queen models. However, the wire connection from the Alpha-1/Device is slightly different.
👉 **For the Speed Queen machine, it is recommended to use 1.5 mm thick cables for the OUTPUT (-/+) connection.**
**2)** Open both the upper and lower coin acceptor casings.
[](https://docs.antlysis.com/uploads/images/gallery/2026-05/o0MIJCfx2IzTzkG3-image.png)
**3)** After opening the casing, you will see 4 screws at the end. Remove all 4 screws to access the inside of the machine.
[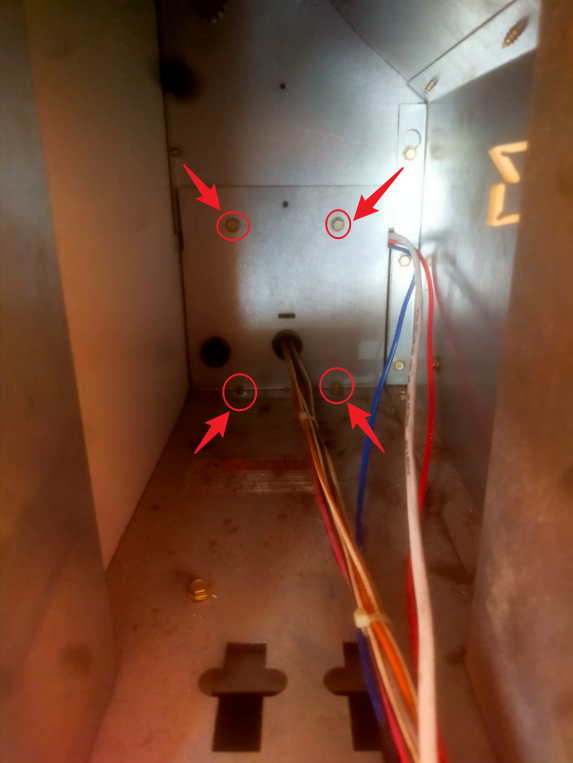](https://docs.antlysis.com/uploads/images/gallery/2026-05/hTWeacIco4wlOgef-image.png)
**4)** To pull the wire, start from the upper side of the casing.
**5)** The diagram below shows how the wire should be pulled in side the machine from the front to the back, where the device will be placed.
[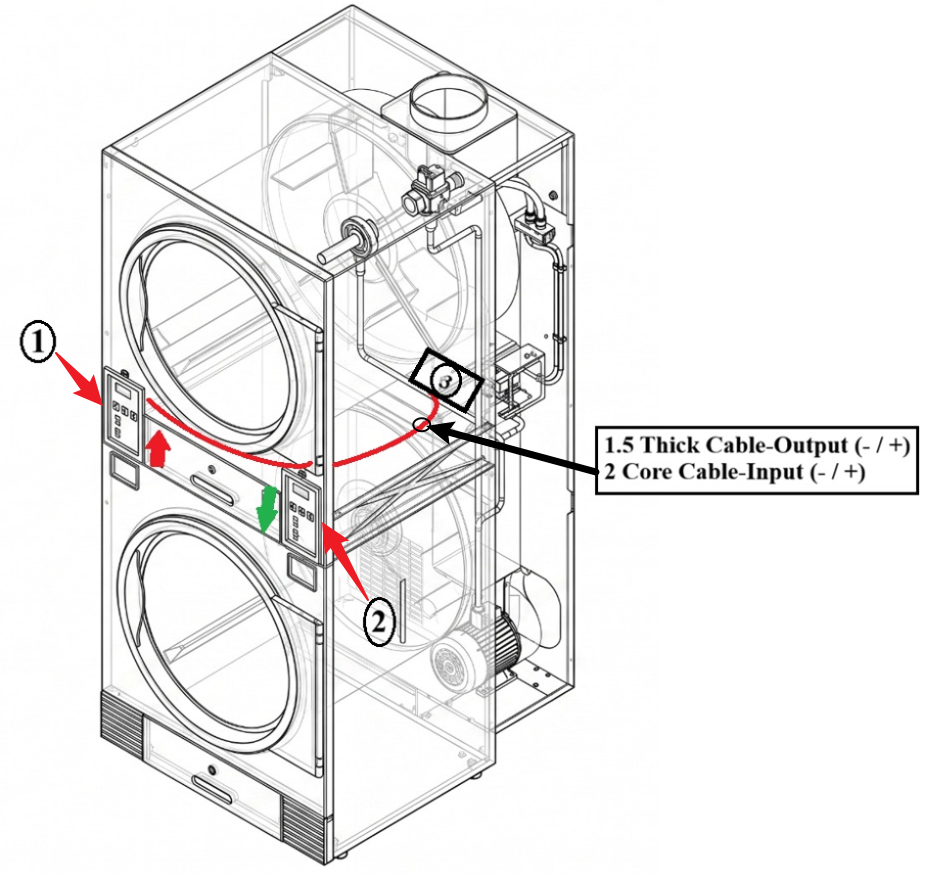](https://docs.antlysis.com/uploads/images/gallery/2026-05/cW9zsVvmdzEYhqa6-image.png)
**6)** Cable Routing Steps for **Left/UP** (1) (Refer to Picture)
**1.** Route the cable from the top side (1) to the bottom side (2).
**2.** Pull the cable to the back of the machine.
**3.** Locate the small hole (3).
[](https://docs.antlysis.com/uploads/images/gallery/2026-05/uXpqxvvnR5jiLuA1-image.png)
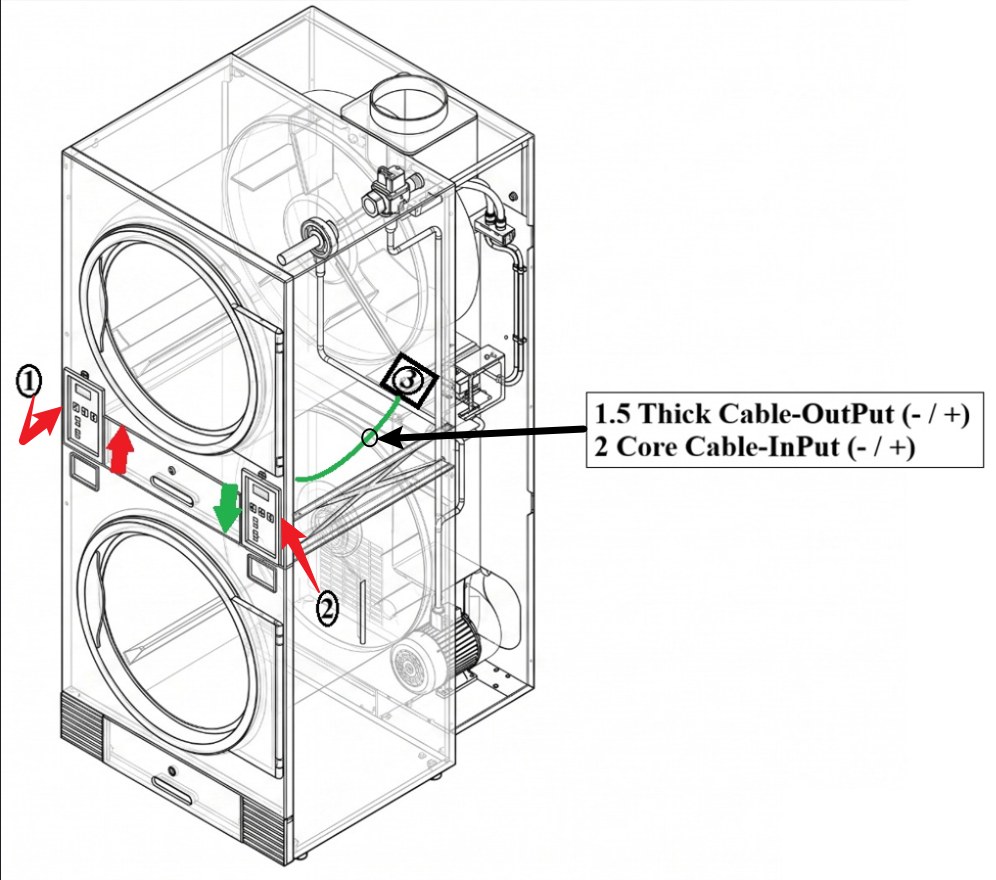
**7)** Cable Routing Steps for **Right/Down** (2) (Refer to Picture)
**1.** From the (2) bottom side, pull the wire straight to the (3) rear section.
**There are other hoses passing near this hole, so pull carefully.**
**7)** Feed/push the cable through the small hole (3) until you can see the cable coming out at the back of the machine.
[](https://docs.antlysis.com/uploads/images/gallery/2026-05/Fx4Za5KW38apAxI2-image.png)
**8)** Pull the cable through hole (3) until it reaches the device installation location.
---
##### Click this link to next step: