Procedure to Flash Alpha device
Prerequisites
Before starting, ensure you have the following:
- Download Flashing tool and latest firmware here -> Flashing Tool.zip
- Windows laptop/pc (recommended)
- microUSB cable
- Cytron USB-UART Converter UC00C (shown below)
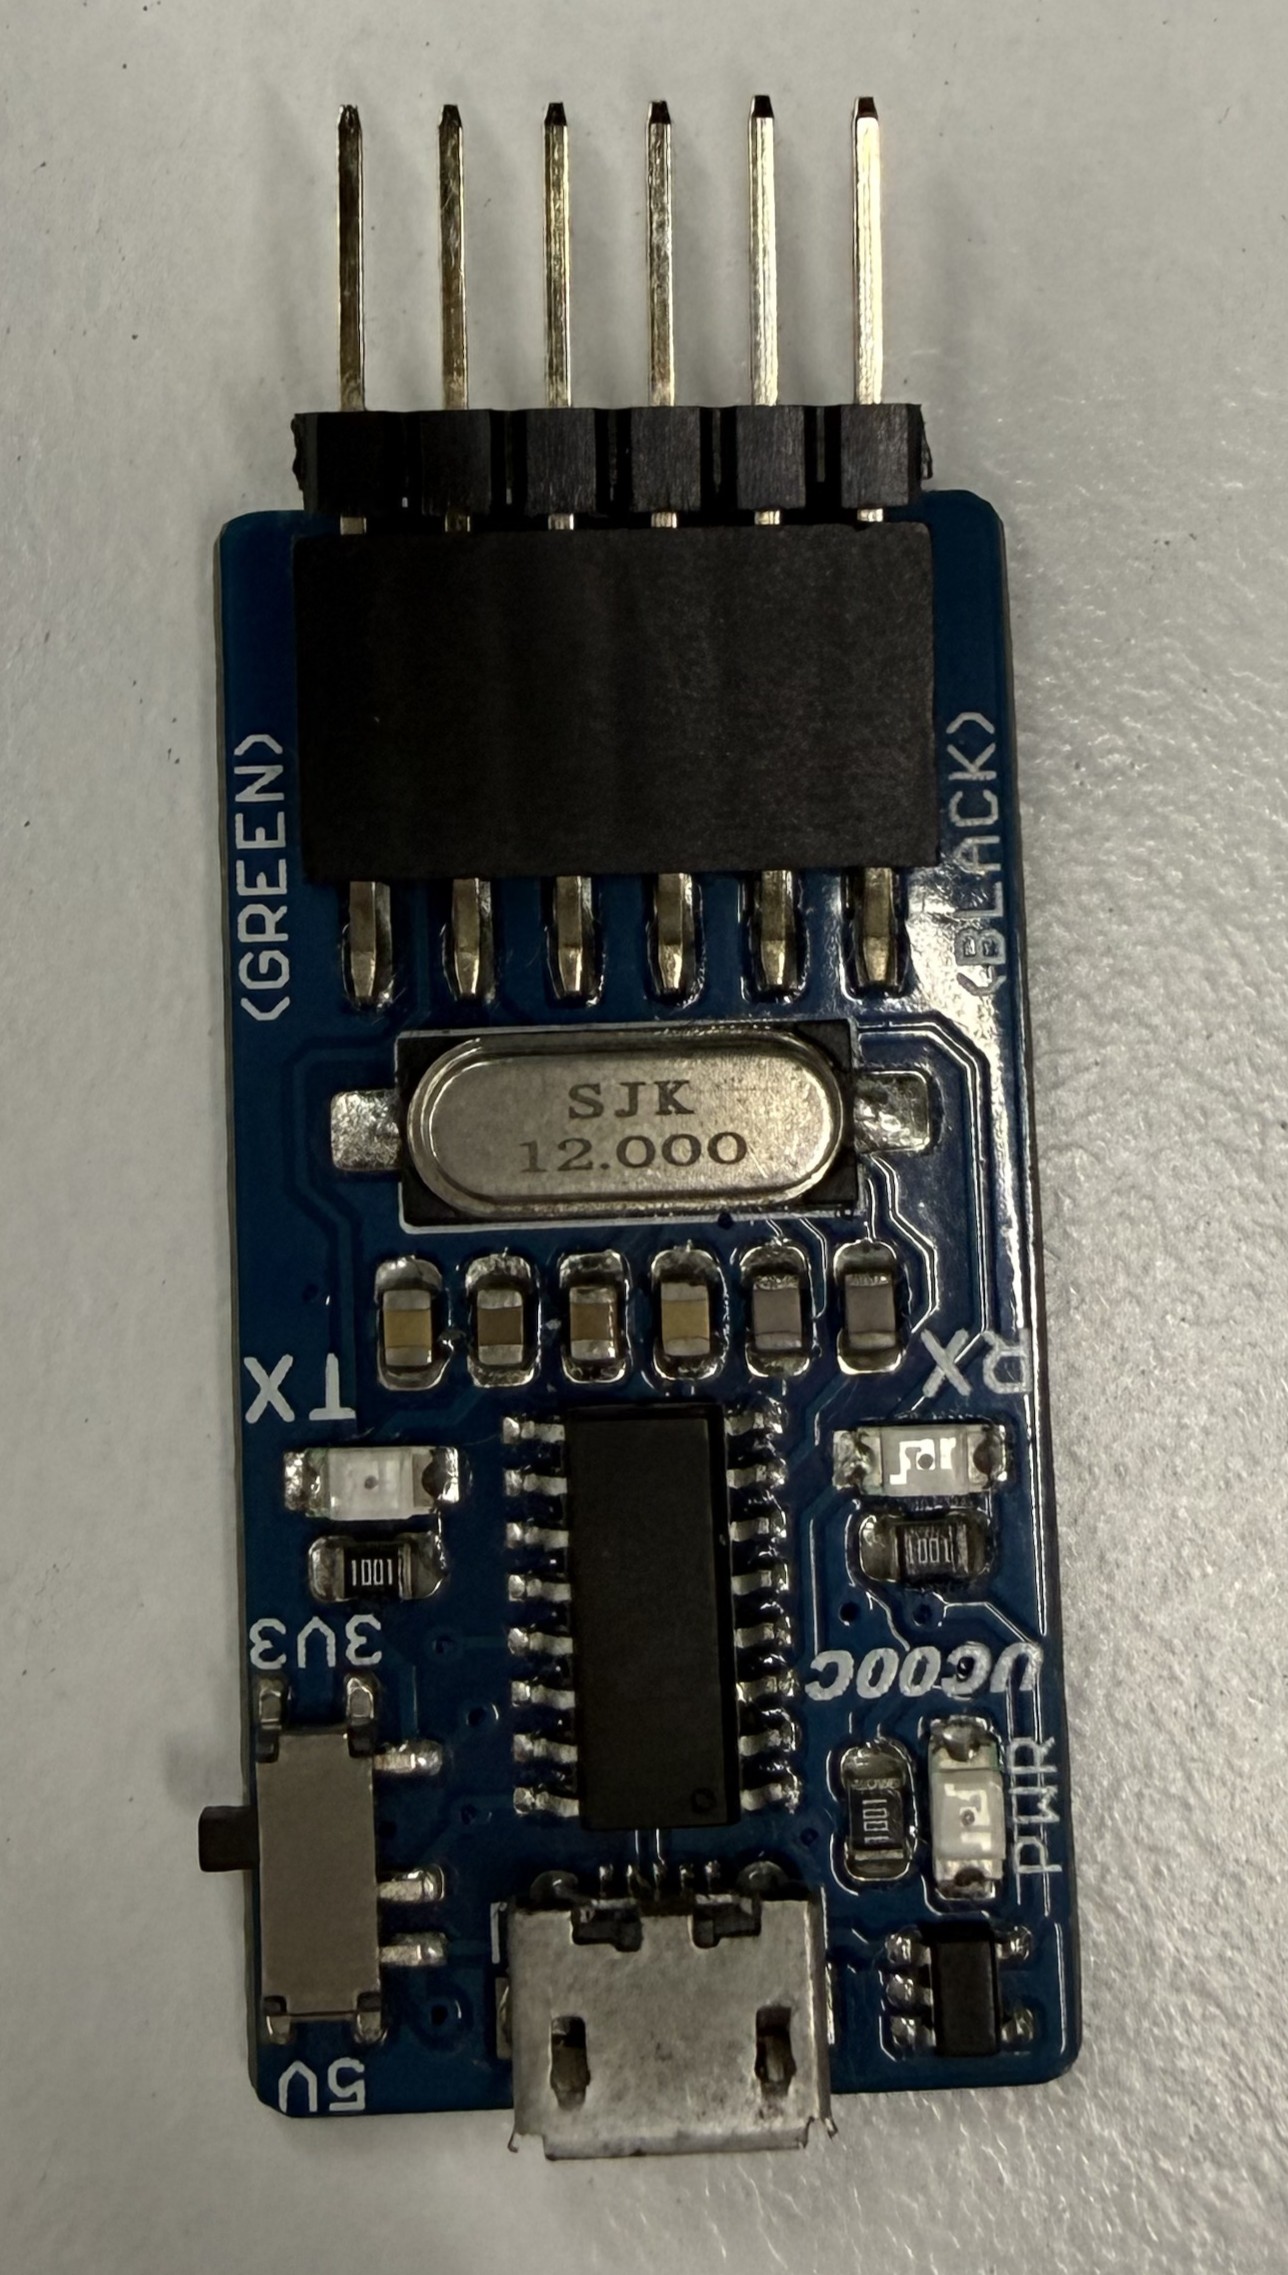
Flashing Procedure
- The programmer pins must be exposed via male headers at a 2.54mm pitch
-
Pin Order: Ensure the pins are arranged in this specific sequence:
-
DTR
-
RX
-
TX
-
3.3V
-
RTS
-
GND
-
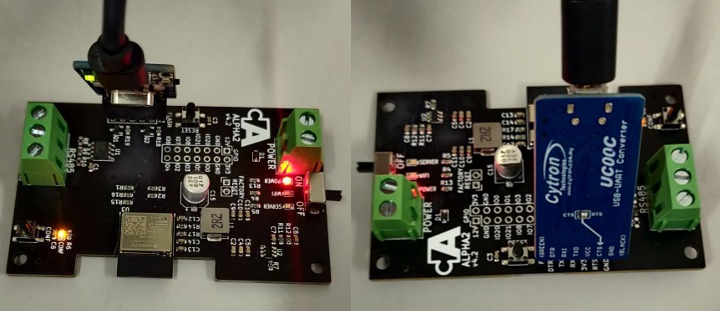
- Insert the programmer into the flashing female port of the board, matching the pin names except for TX and RX, which are typically swapped.
- Tilt the programmer at an angle to ensure a solid electrical connection with the port.

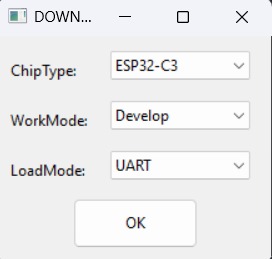
- Open the downloaded Espressif Flash Download Tool (Flashing Tool -> flash_download_tool_3.9.4).
- Upon opening the software, select the following settings:
- Chip Type: ESP32-C3
- WorkMode: Develop (for single board) or Factory (for multiple boards)
- LoadMode: UART

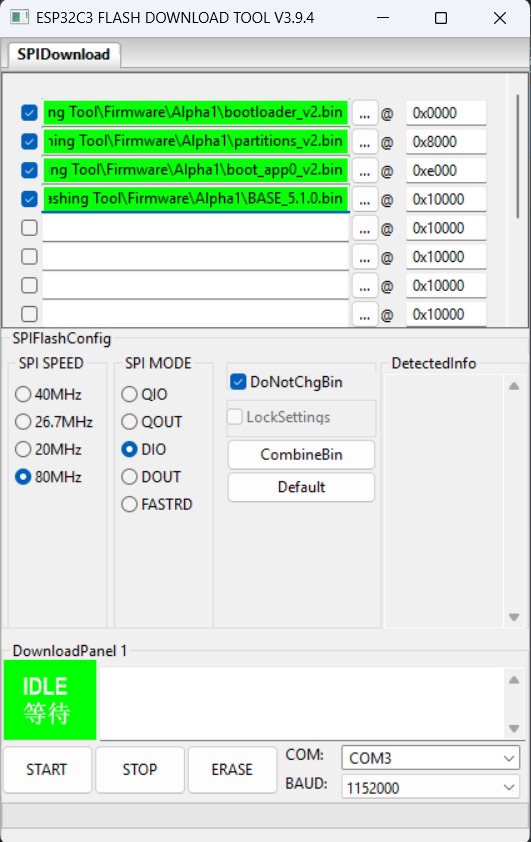
- Set the file paths at the following addresses:
File Name Memory Address (Offset) bootloader_v2.bin0x0000 partitions_v2.bin0x8000 boot_app0_v2.bin0xe000 AlphaX_BASE_x.x.x.bin0x10000 The files can be located at: Flashing Tool -> Firmware -> (select device model eg: Alpha1)
PLEASE USE THE LATEST FILES PROVIDED IN THE ATTACHED FILE ABOVE
- Configure the SPI Flash Config section as follows:
- SPI SPEED: 80MHz
- SPI MODE: DIO
- Baud Rate: 921600
- The flashing process:
- For Single Boards:
- Select the appropriate COM port
- Click "START" to begin.
- Monitor the progress bar as the upload proceeds.
- For Multiple Boards (Factory Mode)
- Uncheck "LockSettings" to modify configurations.
- Assign the correct COM port for each attached programmer.
- Re-check "LockSettings" to secure the configuration.
- Click "START ALL" to flash all boards simultaneously.
NOTE: It is recommended to ERASE the board first before re-flashing it. This can be done by pressing ERASE in the flashing tool before flashing.

- For Single Boards:
Verification
Once the upload is complete, look for the following indicator on the board:
- The blue, green, and yellow LEDs will flash twice to signify a successful firmware upload
- The blue led will start blinking continuously indicating that device is ready to be setup and configured