# LG - Installation
### **Alpha-1 Placement on Machine**
#### **Example: LG Stacked Washer Dryer**
[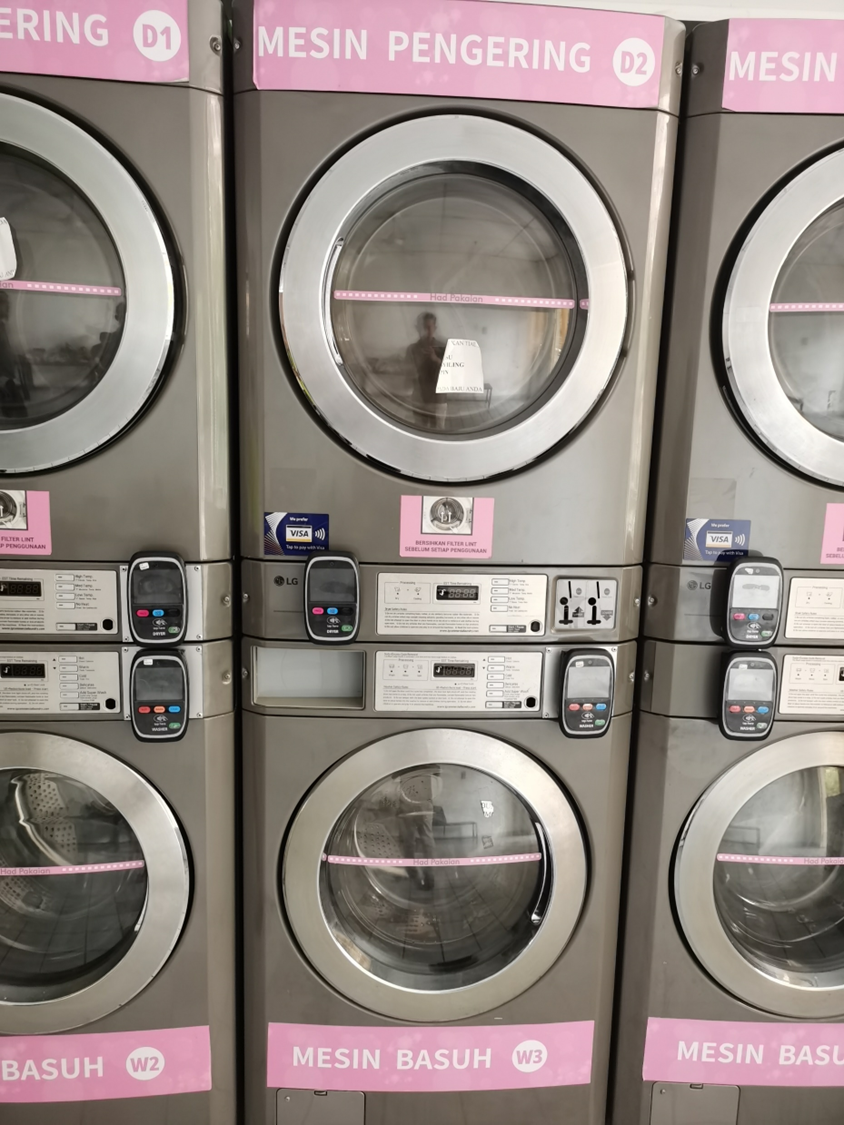STACK DRYER/WASHER](https://docs.antlysis.com/uploads/images/gallery/2025-11/SCYoepSlwyHf5Gzm-image.png)
#### Be cautious before installation ⚠️
1. ##### **No pinch and wire for the main board while installing.**
2. ##### **Turn off the machine electricity while during installation.**
#### **Device Placement**
****
**Washer Placement Dryer Placement**
**\_\_\_\_\_\_\_\_\_\_\_\_\_\_\_\_\_\_\_\_\_\_\_\_\_\_\_\_\_\_\_\_\_\_\_\_\_\_\_\_\_\_\_\_\_\_\_\_\_\_\_\_\_\_\_\_\_\_\_\_\_\_\_\_\_\_\_\_\_\_\_\_\_\_\_\_\_\_\_\_\_\_\_\_\_\_\_\_\_\_\_\_\_\_\_\_\_\_\_\_\_\_\_\_\_\_\_\_\_\_\_\_\_\_\_\_\_\_\_\_\_\_\_\_\_\_\_\_\_\_\_\_\_\_\_\_\_\_\_\_\_\_\_\_**
### Connection from Harness to ALPHA-1
##### (**A**) **Alpha-1 connection ''Input'' ''Output''**
****
1\) device has input and output connections labelled (IN: +, –) and (OUT: +, –). Use a 4-core cable to connect the input (+/–) and output (+/–) terminals.
##### (**B**) **Harness connection on machine ''LG MACHINE''**
[](https://docs.antlysis.com/uploads/images/gallery/2025-11/mFrIJI3hUc0UdaCm-8channel.jpg)
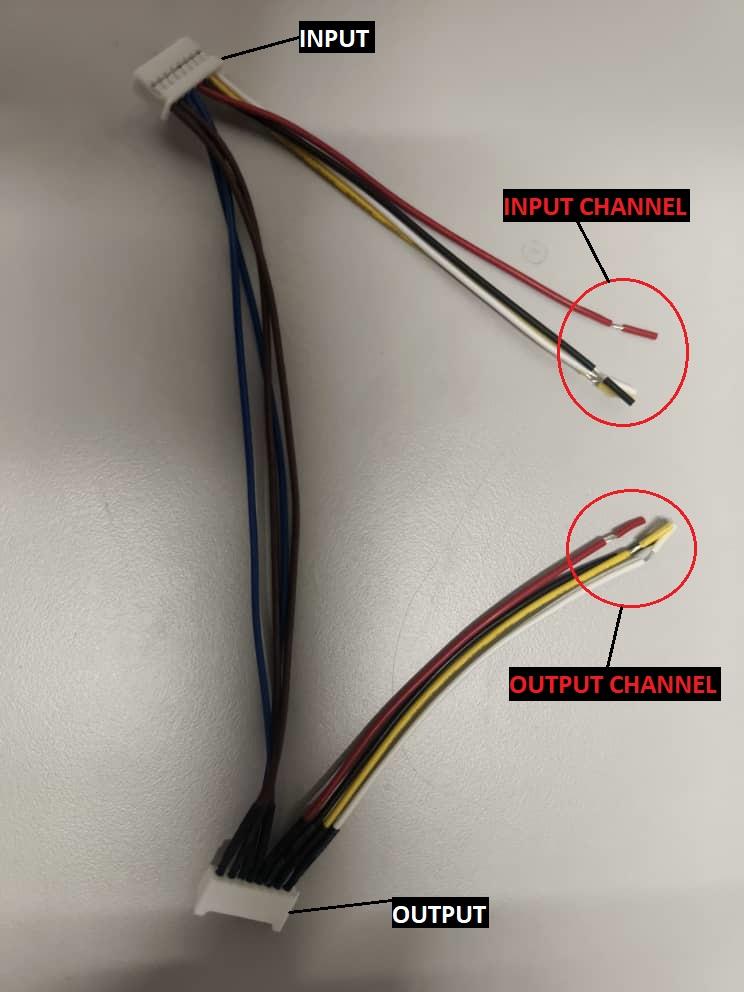
[8 CHANNEL HARNESS CABLE](https://docs.antlysis.com/uploads/images/gallery/2025-11/mFrIJI3hUc0UdaCm-8channel.jpg)
2\) This harness cable is connected to the machine’s coin acceptor. It has two channels: the first channel uses yellow and white wires, and the second channel uses red and black wires.
3\) Try using the first channel **(yellow/white)** to connect the input and output on the harness using a 4-core cable from the device."
4\) Begin testing. If there is no response, check the input and output connections and the device. If all connections are correct but the issue remains, try switch to the second channel.
**\_\_\_\_\_\_\_\_\_\_\_\_\_\_\_\_\_\_\_\_\_\_\_\_\_\_\_\_\_\_\_\_\_\_\_\_\_\_\_\_\_\_\_\_\_\_\_\_\_\_\_\_\_\_\_\_\_\_\_\_\_\_\_\_\_\_\_\_\_\_\_\_\_\_\_\_\_\_\_\_\_\_\_\_\_\_\_\_\_\_\_\_\_\_\_\_\_\_\_\_\_\_\_\_\_\_\_\_\_\_\_\_\_\_\_\_\_\_\_\_\_\_\_\_\_\_\_\_\_\_\_\_\_\_\_\_\_\_\_\_\_\_\_\_**
#### **LG** **Cashless Machine**
**Be cautious before installation**
1. ##### **No pinch and wire for the main board while installing.**
2. ##### **Turn off the machine electricity while during installation.**
1\) Remove the screw at the marked position shown in the picture.
[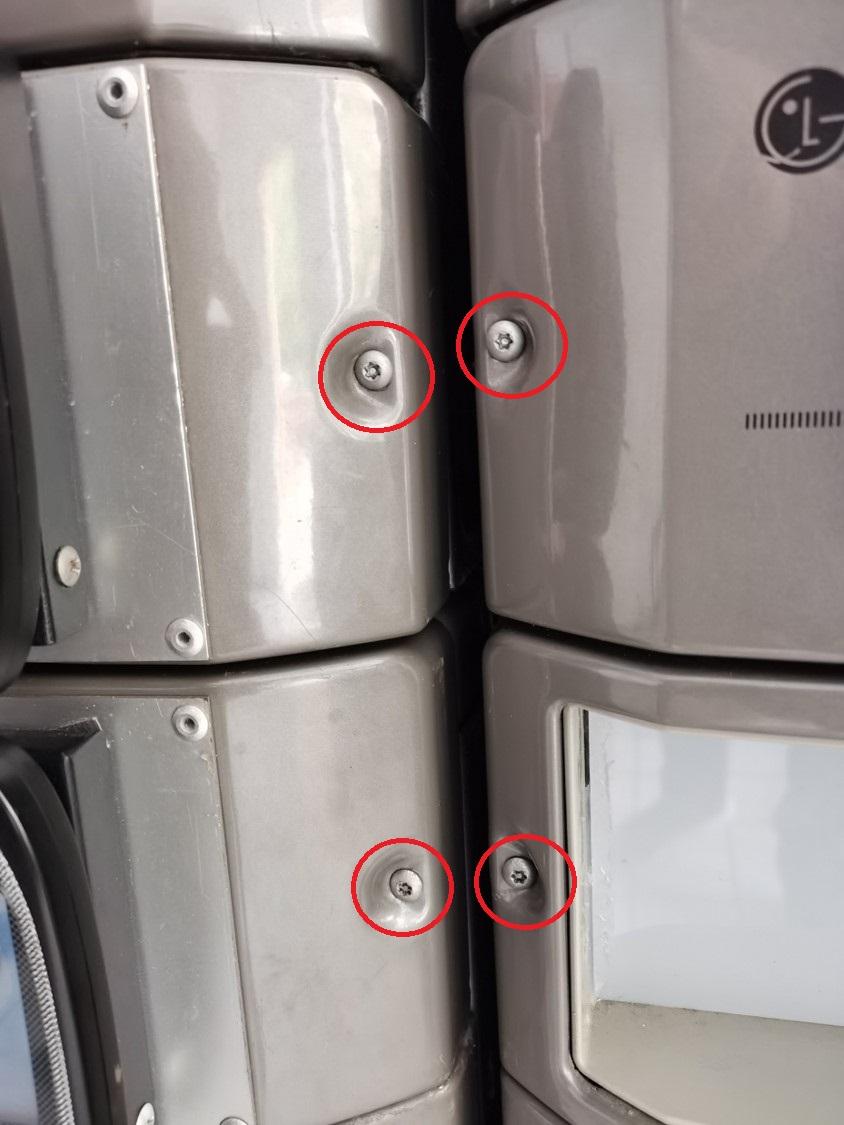T20 SCREW](https://docs.antlysis.com/uploads/images/gallery/2025-11/0LQzl196JYNfxkPn-lg-unscrew.jpg)
2\) After opening the board casing, the board connections will be visible. Remove the connectors and store the board casing safely.
[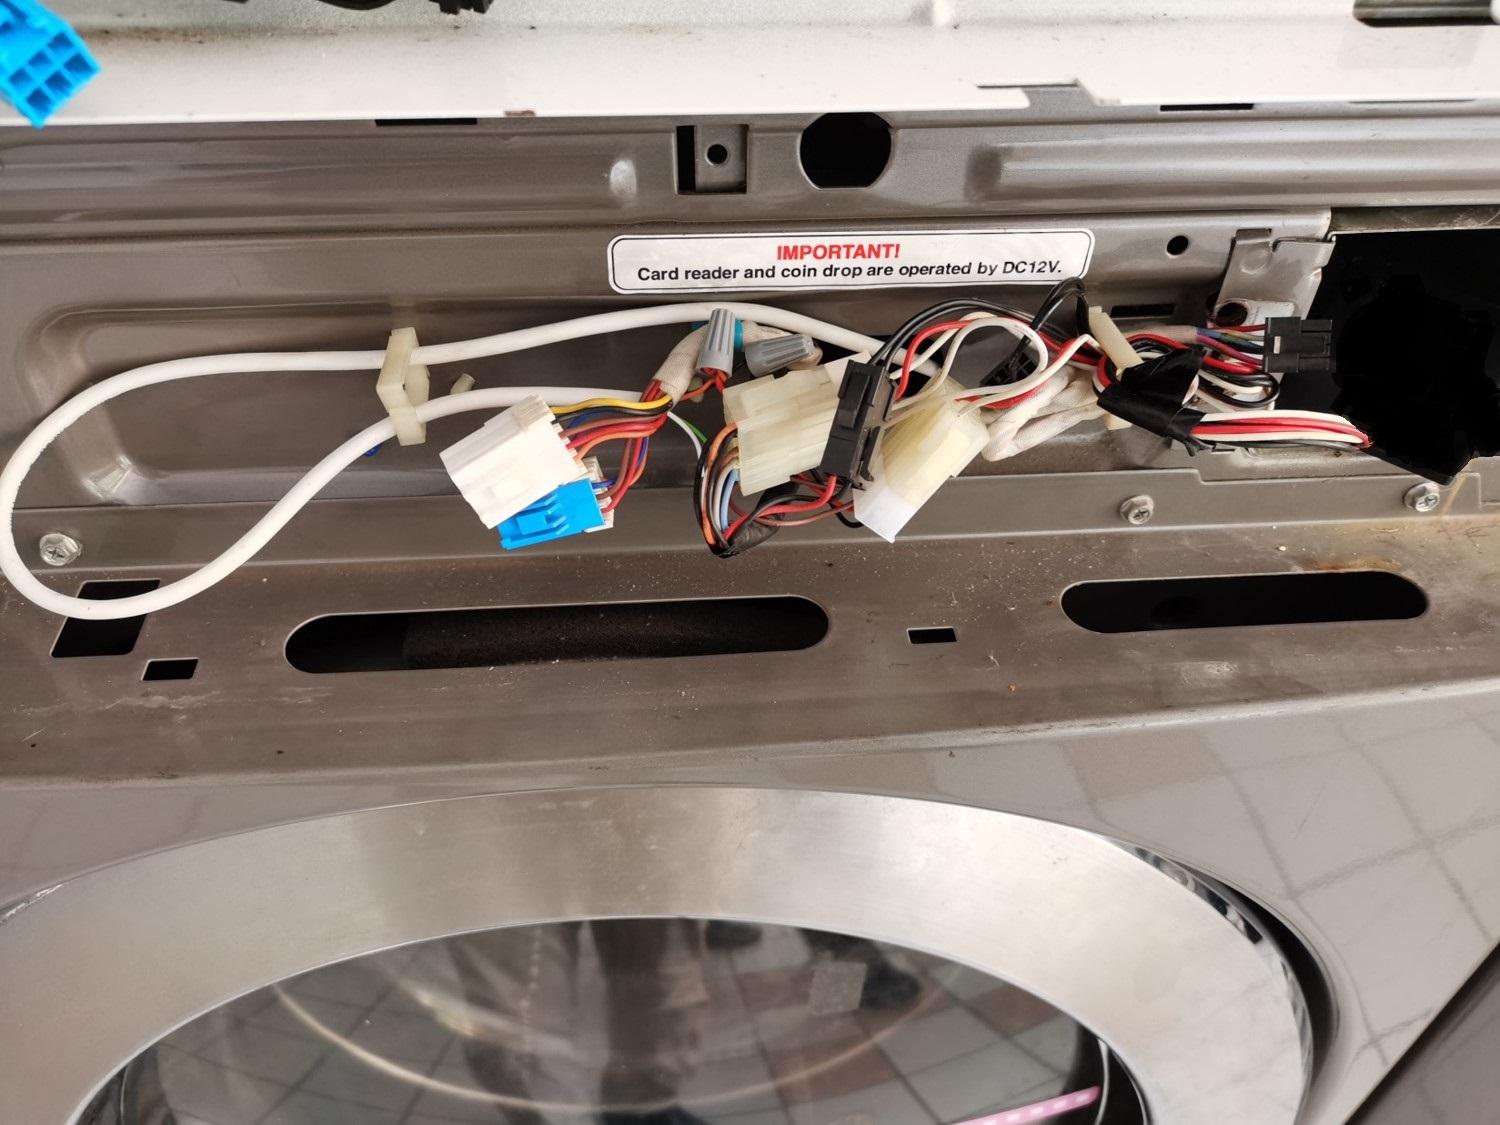ORIGINAL LG CONNECTION](https://docs.antlysis.com/uploads/images/gallery/2025-11/Y6m4pFzsAoXMSJLt-board-con.jpg)
3\) LG Cashless system uses a specific harness cable.
##### **LG CASHLESS HARNESS CABLE**
**[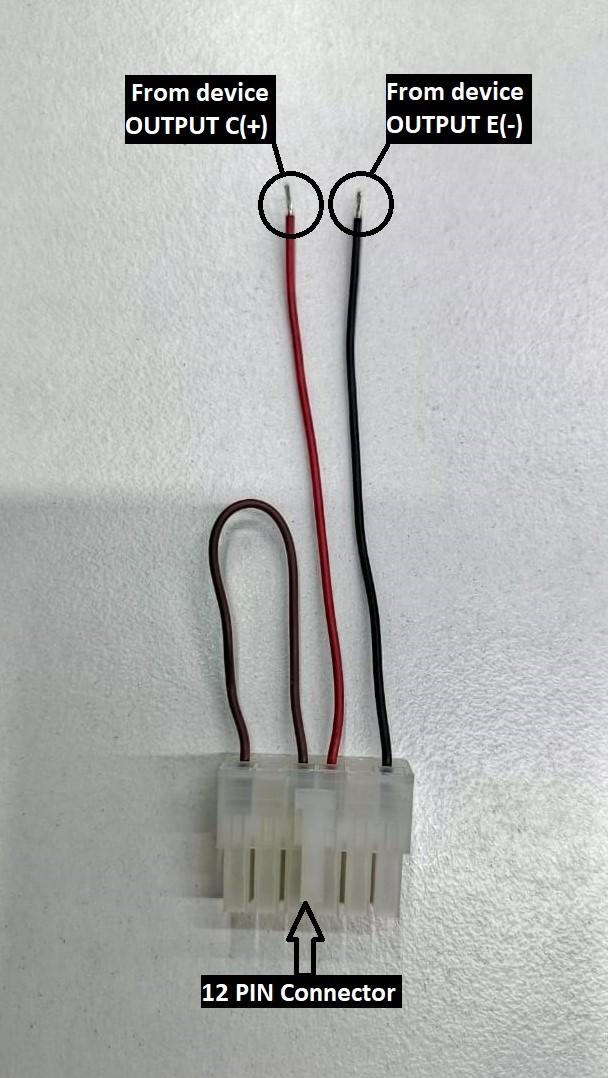](https://docs.antlysis.com/uploads/images/gallery/2025-11/aMAh2FkTIwAgHCHF-lg-harness.jpg)****[LG HARNESS CABLE ](https://docs.antlysis.com/uploads/images/gallery/2025-11/aMAh2FkTIwAgHCHF-lg-harness.jpg)**
4\) The machine connection has a 12-pin connector. Remove it and connect it to the 12-pin harness cable connector.
5\) Use a 4-core alarm cable from device, but only the red and black wires are required. Connect these two wires to the harness cable.
#### **Device Connection**
[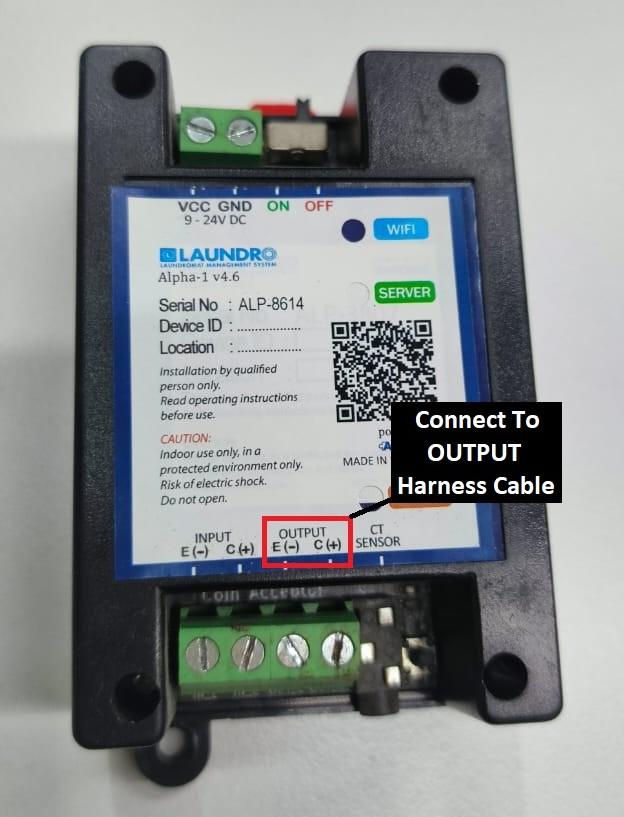](https://docs.antlysis.com/uploads/images/gallery/2025-11/bGgkSkJtVgkU5uDq-device.jpg)
[Device OUTPUT Connection](https://docs.antlysis.com/uploads/images/gallery/2025-11/bGgkSkJtVgkU5uDq-device.jpg)
6\) Using a 4-core cable, connect it to the device OUTPUT terminals **E (–)** and **C (+)**.
##### **Connection from device to harness cable**
- ##### **From device E ( - ) <> Harness cable ''BLACK''**
- ##### **From device C (+) <> Harness cable ''RED''**